Archive

Archive for the ‘RV Factory/Shop’ Category

Merry Christmas to ME!

December 25th, 2013 No comments

Seems my wife is prepping me and the shop for extended work sessions in the near future. I awoke to a surprise this Christmas morning.

Very Nice Addition!

Very Nice Addition!

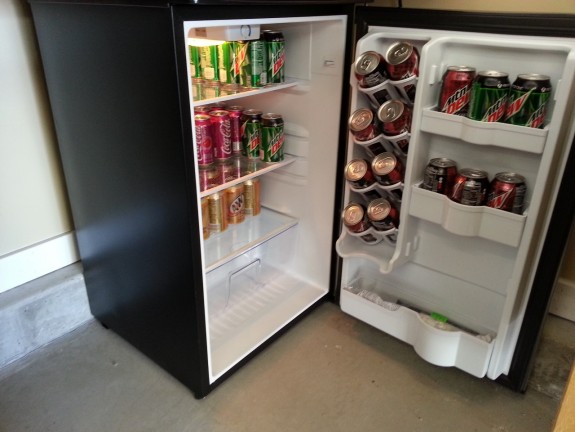
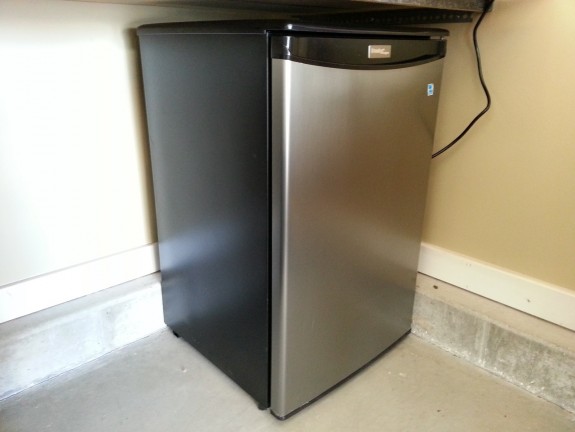
Not only did she get me a SWEET Beverage Box, but she STOCKED it too!!! Room for requests from bucking volunteers as well!

Stocked Up and Ready!

Stocked Up and Ready!

I have cut back on my caffeine consumption considerably, so this should last some time. It also stores Pro-Seal cartridges nicely in the door.

Now that I think of it, I think she must have been tired of dodging those dang Pro-Seal cartridges in the house refrigerator. Now I know the reason for the gift! πŸ˜‰

Either way, Merry Christmas to me! Thanks Sweetie!

Categories: RV Factory/Shop

Shop from Roof

October 6th, 2012 No comments

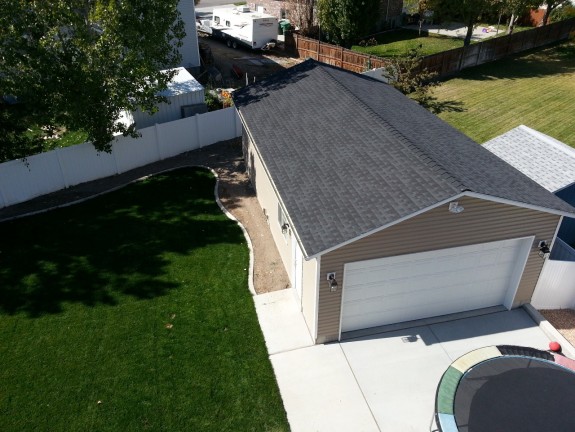
I had to get on the roof of the house to clear some objects the kids had tossed on it. While up there, I took an “aerial shot” of the factory. Enjoy!

Aerial View of Factory with New Yard

Categories: RV Factory/Shop

Shop Flare…Where imagination and computer skills meet neighbors vinyl cutter!

March 18th, 2012 No comments

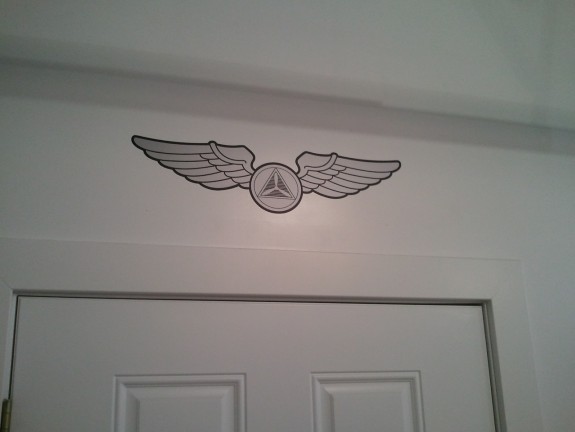
CAP Pilot Wings

I like aviation flare. What pilot doesn’t. Since the shop has a ton of wall space, it is perfect to use for said aviation flare. It is a Pilot Cave after all.

The above is a cooperative effort between a fellow CAP nerd/computer geek to design a set of CAP wings that could be easily cut on a vinyl cutter. I think we finally got the center emblem where it works just perfect. I added a black outline for contrast. Once I earn my Star and eventual Wreath, these will get added on.

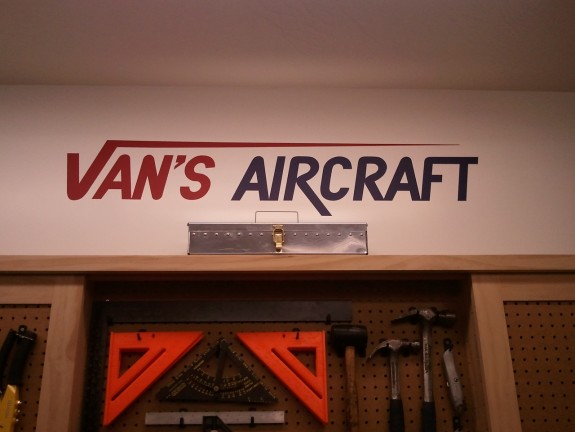
So who's kit is it now?

I found an .eps version of the Van’s logo and had it cut in two colors to match those of the colors of my stripes on the walls. This one is big, nearly 48″ across. Any question where my kit is from now?

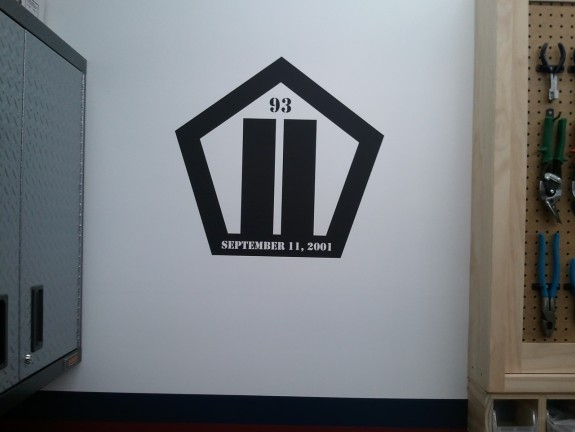
Never Forget!

I designed this after making a trip to Ground Zero shortly after 9/11. I once stood on the top of Tower #2. I have also been to the Pentagon with my Dad. The design speaks for itself. Let us NEVER FORGET!

I have more ideas floating in my head…so who knows. The nice thing is, I have all the files saved, so when it comes to accessorizing the eventual hangar, it is a simple matter of cutting some more.

Categories: RV Factory/Shop

Needed Upgrade Complete

February 7th, 2012 No comments

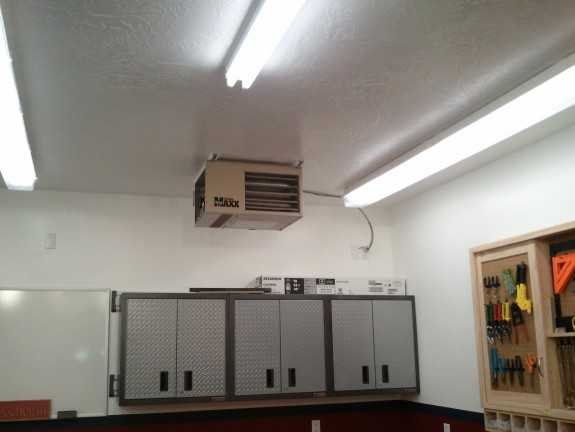
Heater Mounted to UniStrut

When I built the shop, I always intended to heat it some how. I insulated it really well, installed an insulated man and garage door, wired an outlet up in a corner, and wired a thermostat wire in the wall that went to the middle of the shop. I had a good idea of what type of heater I was eventually going to run and have been watching the local suppliers for good deals and something that would work. Since the shop was completed in April of 2011, there was no real pressing need to get a heater in at that point so I just put it on the back burner. πŸ™‚

As winter began to approach this year, I began to think heavily about it again. When the temperature started dropping, so did my motivation to be in the shop working. As you can see, my build progress has been much slower since. The Holidays did not help either. I called a local RV’er that also does HVAC and we chatted about options, ideas, and costs. He gave me really good information, but shortly after, my money ran out as December 25th got closer.

As December 25th passed, we were blessed with some generous gifts from my parents and Grandmother. Combine that with a nice gal at Lowe’s giving me a good one time discount, I was able to get a 45000 BTU shop heater for a really decent deal. I also got the conversion kit to make it run on Propane for REALLY cheap as they were closing the kit out. I also bought the flue kit made by the manufacturer. All in all, I was out the door for no more than $400.00.

The 45000 BTU is rated to heat a 700 sq/ft garage. My shop is 720 sq/ft but really well insulated. I figured, it would be great fit as most garages are not insulated that well.

The heater is set up with mounting brackets that will natively mount to a 24″ on center truss situation. Here was challenge #1. I wanted the heat to be blown into the major area of the shop, not against a wall 16 feet away. I was sitting in my desk at work, contemplating how I could rotate the heater 90 degrees and still make it look good. Above me are cable racks suspended from threaded rods that hold pieces of UniStrut which the cable trays set on top. Solution found. I will get some UniStrut and mount it across the shop trusses and then hang the heater from them. Worked great. I painted the UniStrut so it would look good against the ceiling.
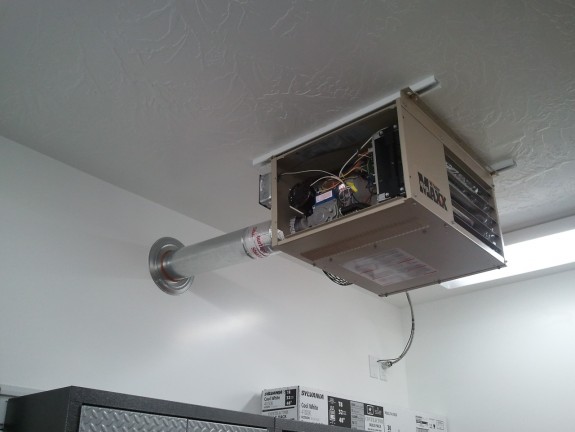
Double Wall Vent Done

I ran the wiring and installed a switch. Probably not required, but not a big deal in case it needs to be worked on. I can also just unplug it from the wall.

Next up was the vent flue. You can vent these in 2 ways. On is a traditional vertical flue and the other is a horizontal. I thought long and hard about both. I have a low pitch roof (4/12) and I filled the attic with R60 worth of insulation. It would have made a real mess and some real work to get to the spot where this vent would penetrate the ceiling and the roof. The horizontal required at 7″ hole to be cut in my fairly new wall and exterior. As you can see I chose to do the horizontal.

I began to use the flue kit that the manufacture designed for the heater and quickly realized I paid too much for too many parts for a simple run through the wall. So I boxed it up and returned it. I then ran to a local HVAC parts supplier and bought only what I needed. Saved nearly half over the manufacturer kit and got only what I needed. If you are going through the roof, the kit is nice and you will use most of the parts, but horizontally, it is not worth it.
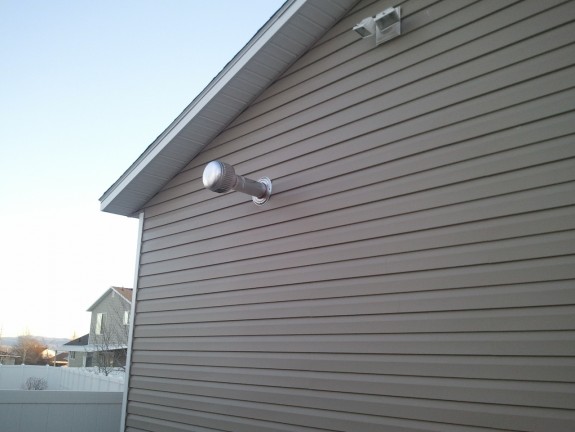
The Exterior of the Vent Flue

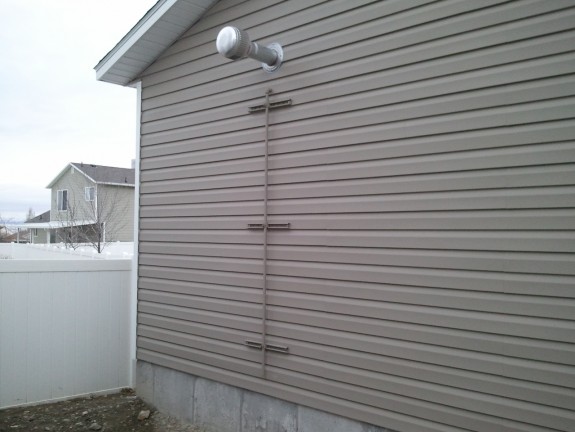
Here is the view from the outside of the shop. The vent is required to be at least 12″ beyond the exterior. This is 12.25″ and looks just fine. It must also be 4 feet from any vented soffit. Since my eve is not vented here, not an issue. This is on the back of the shop…so I will never see it. My Dad suggested I put a smiley face on the cap for my neighbors to dress it up. πŸ™‚ Nah.

Gas Line Anchored to Shop Wall

Next up was installing the hard line from near the foundation, through the wall, and to the heater. I simply used more of the same UniStrut I hung the heater from inside. Since my exterior is vinyl siding, and lagging the UniStrut right to the wall would squish it, I had my machinist friend make me some 1″ dia 5/8″ thick standoffs. This way the siding still floats around the standoffs, but the UniStrut is SOLID to the wall. I then drilled a 7/8″ hole in the wall for the 1/2″ black pipe to penetrate through. I then used the standard clips to hold the pipe to the UniStrut. Needless to say, you can hang off this pipe. I also found an off the shelf can of paint that matched the color of the siding and painted all the exterior parts for both corrosion resistance and so it would blend in to the building better. I think it looks great. Again, all this is on the back of the shop. Out of site out of mind.

At this point I can either run a Natural Gas line to this drop or I can drop a large Propane tank. This pipe will work for either and meets code.
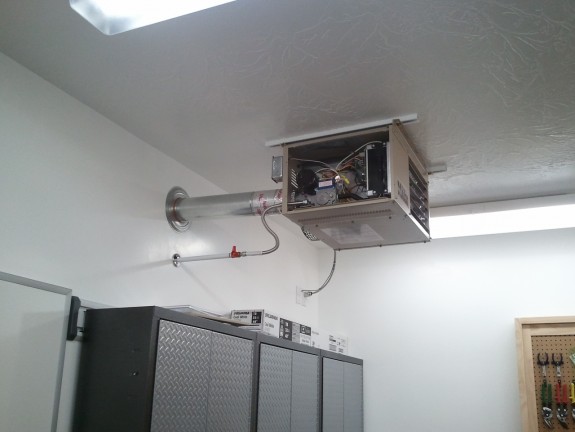
Gas Line Plumbed

Next was the interior hookup. I asked about a dirt leg in the line and was told that they are not required here. This was especially true given the rise in the line to the heater. I can always add one later, but none of the appliances in my house have them and they have been good for many years. I painted the interior portion of the pipe white to blend in. I also put a cheap trim ring near the wall. Overkill to some, but a cheap way to dress it up a bit.

Now was the time to decide which gas. To get Natural gas to the shop is a BIG deal (and would have during original construction as well). I have to trench 18″ deep about 100 feet from the other side of the house without chopping through my sprinkler, telephone lines, pay to have the line installed/inspected, all while the ground is frozen solid. Not sounding like a fun winter prospect. I did buy the Propane conversion kit. I can have a local LP company lease me a 125 gallon tank for $48.00 a year and then I pay for the fuel at a reduced bulk price and no delivery fee on a schedule. The local HVAC/RV’r did a cost compare and that did not help me decide one way or another as some have convenience over $$ perks that come out nearly at a wash.

I have decided in the short term to convert the heater to LP and get the tank. As the winter thaws, I may then decide on the NG line and work and then convert it back to NG. If the consumption of the LP is low enough, I may simply keep the big tank and then have a backup in the event of a NG shortage. πŸ˜‰

Heat, Glorious Heat!

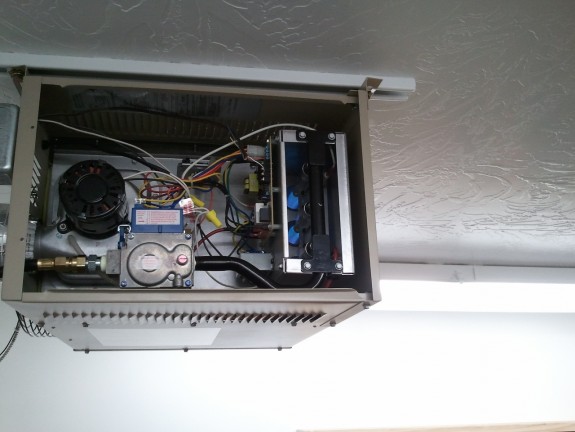
I converted the control valve to LP. Changed the pressure spring and the burner orifices, and then hooked up a standard 20 lb Propane cylinder to test it and set the proper manifold pressure. With a flip of a switch on the thermostat, I had glorious blue flames. Within 10 minutes of running it, I had increased the shop 10 degrees! This thing is surprisingly quiet. I had to turn it off after a bit because I was tempted to run the whole cylinder. I think this will be a VERY nice addition to the shop. The bonus is that I can run only the fan in the summer and it will circulate the air and help with cooling.
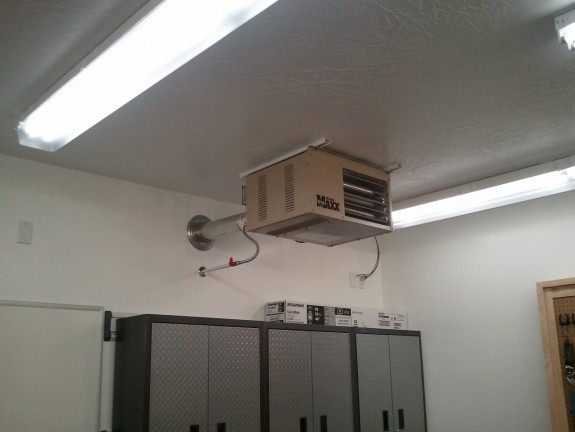
Heater Ready to Run

So here it is all buttoned up. I still need to schedule with the LP company and get the tank dropped and filled. I adapted the exterior pipe to run off a smaller cylinder until then. It looks a little silly to have a small tank attached to the shop…but, it will do in a pinch until the big tank arrives.

Again, as it warms up, I can always trench, get a NG line installed, and convert it back to NG. But for now…I am loving this little heater. Now, it is time to get back to building the plane.

Categories: RV Factory/Shop

New Gate Installed

June 21st, 2011 No comments
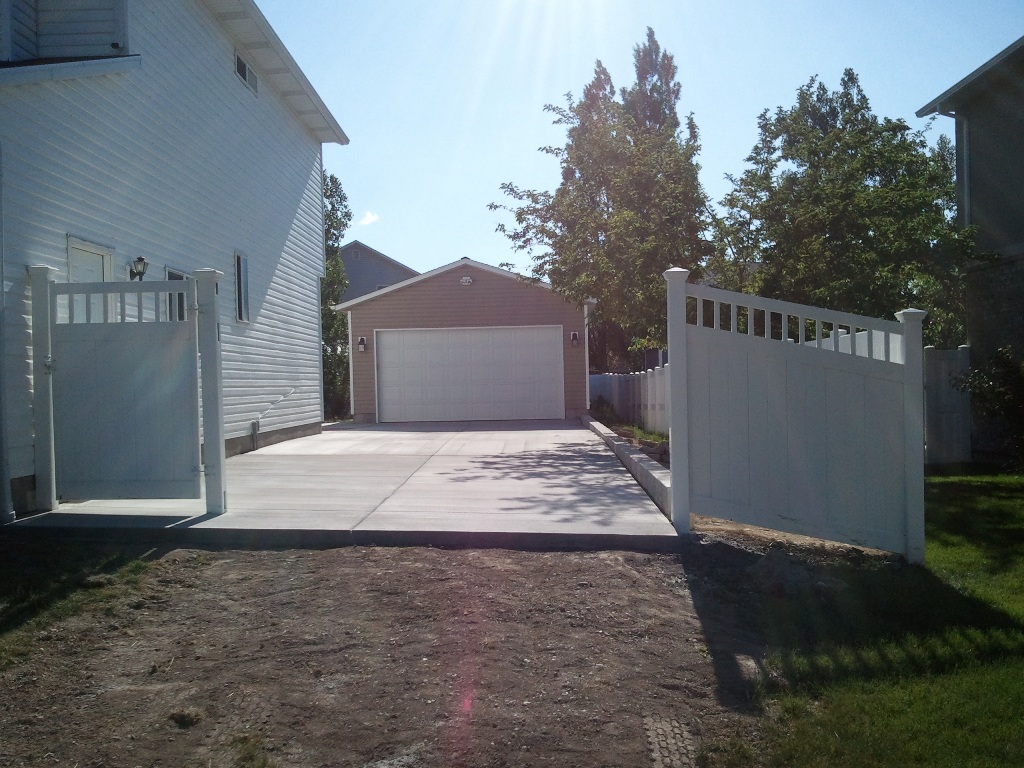
From Shop

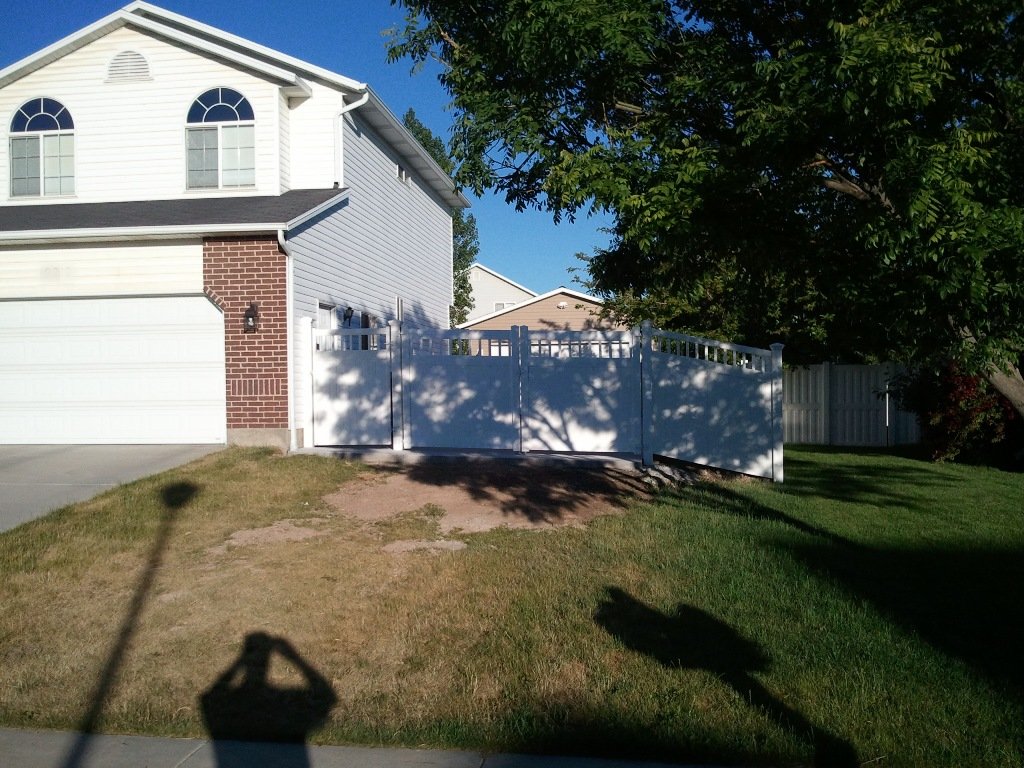
Now that the ramp area to the shop has been poured, we needed to fill the gaping hole in our fence so that the poor dog that was chained up could have her domain back. I had a local fence shop make me up a gate that I installed after work. It turned out OK. I also had to re-rig the man gate that was part of the old fence so that it would operate smoother. In the process, I lowered it a bit and it looks and works great now.

From the Street

Now when the time comes, we can get the plane out of the shop and to the airport with little trouble. Once we recover from the expense of getting this complete, we will eventually get a driveway to the street put in. The other advantage of the new drive is that when my kids start driving, they can park their inevitable eyesore of cars off the street and behind a gate. I can’t stand cars parked on the street. It does not look good and invites vandalism and theft. Overall, the gate operates very smoothly and looks good. It was painful to drill the hole in the slab for the drop bar…but it had to be done.

All Lined Up

Kiowa was thrilled this morning to be let out and run free again. She has not been able to explore the new drive and watched all the excitement from a chained up position. She was back to her happy self now that she has free roam of the land.

Categories: RV Factory/Shop

No Plane, All House/Shop Work

June 17th, 2011 No comments
Runway Done πŸ™‚

Was not able to get any work done on the plane this last 2 weeks. I had the concrete guys finishing the approach to the shop to the front corner of the house. I also had to fix the fence, set a new post, and get the area ready for a gate that is coming soon (I hope). I also had some CAP work to do in preparation for an all day training exercise. Cannot say I’d not rather be bucking rivets over the options, but you have to do what you have to do sometimes. The final pour was completed Monday this week. I got the fence put back together on Tuesday and called in to the city for my final inspection for Wednesday. Apparently “early morning” means something different to a city agency than to someone who works a corporate job. He finally arrived Wednesday near lunch time and quickly handed me the paper below. The inspection time is NOT accurate…I think that is when he left to come over and stopped off for a BIG GULP and a pastry and read the whole morning paper. πŸ˜‰

Passed with No Squawks

What a relief to have that done. Now to get the gate in and fix the yard. I hope to get some plane assembly done in there too. Have to keep Mom happy! πŸ™‚

Categories: RV Factory/Shop

Another Big Day for the Shop

June 7th, 2011 No comments
Looking good there Travis!

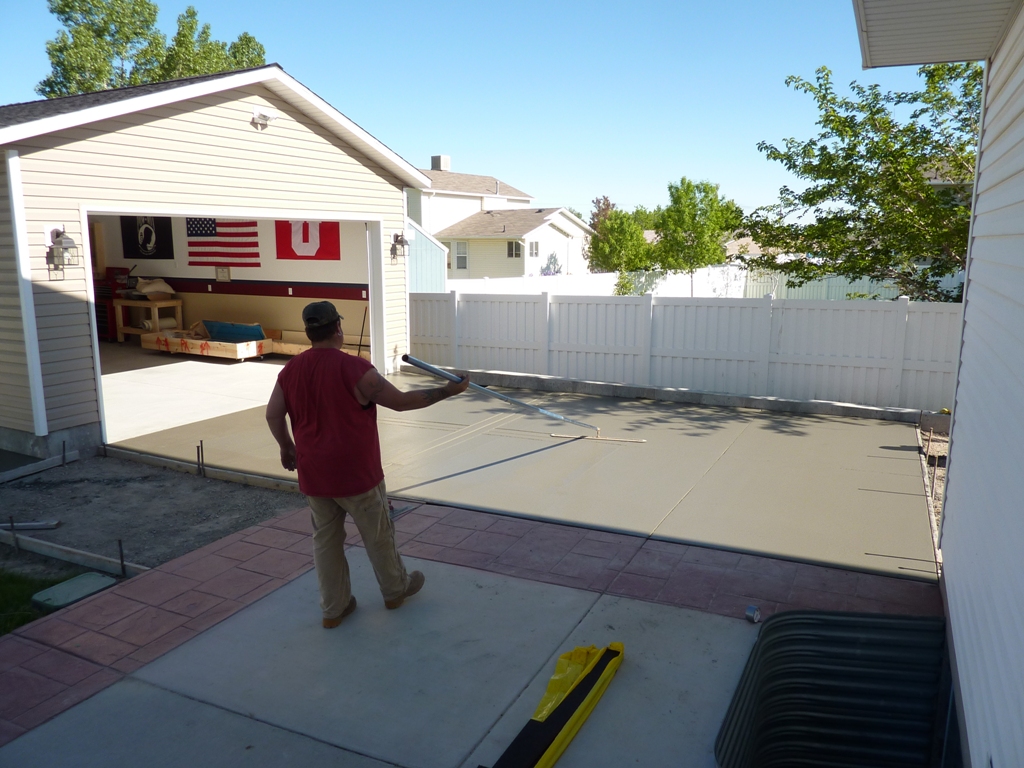
The last thing the shop needs before I can get the final inspection is at minimum a 3′ x 3′ pad at the man entry door. I knew I wanted to have a nice transition from the patio to the shop and eventually I would need a driveway from the street to the shop…so I decided to to at least from the back corner of the house to the shop with a sidewalk to the man door. I had planned to have this complete a long time ago, but the weather made other plans. With the weather finally cooperating, my concrete guy showed up last Saturday and formed up the sidewalk and set my drain box and pipe. They showed up this morning to pour the pad to the back corner. When they were doing the work Saturday, I asked for a bid to get from the back corner of the house to the front corner. He came in much lower than I had expected, so I said….”let’s do it!” So after the pour today, they are going to form up and get ready for the rest of the drive to the front of the house on Friday.

That will leave from the front corner of the house to the street. I can also get my gate done and in. We will be waiting a little to do to the street to figure out exactly what we want to do, and save up some money as well.

The other bonus is that we can now set up the basket ball hoop that my parents gave the kids for Christmas. They cannot wait, and neither can my wife. Next we can get the sprinklers redone and get the backyard as good as new.

If you need a crete guy in the SLC area…these guys to GREAT work.

Categories: RV Factory/Shop

DRDT-2…Great Tool

May 18th, 2011 No comments
The Amazing DRDT-2

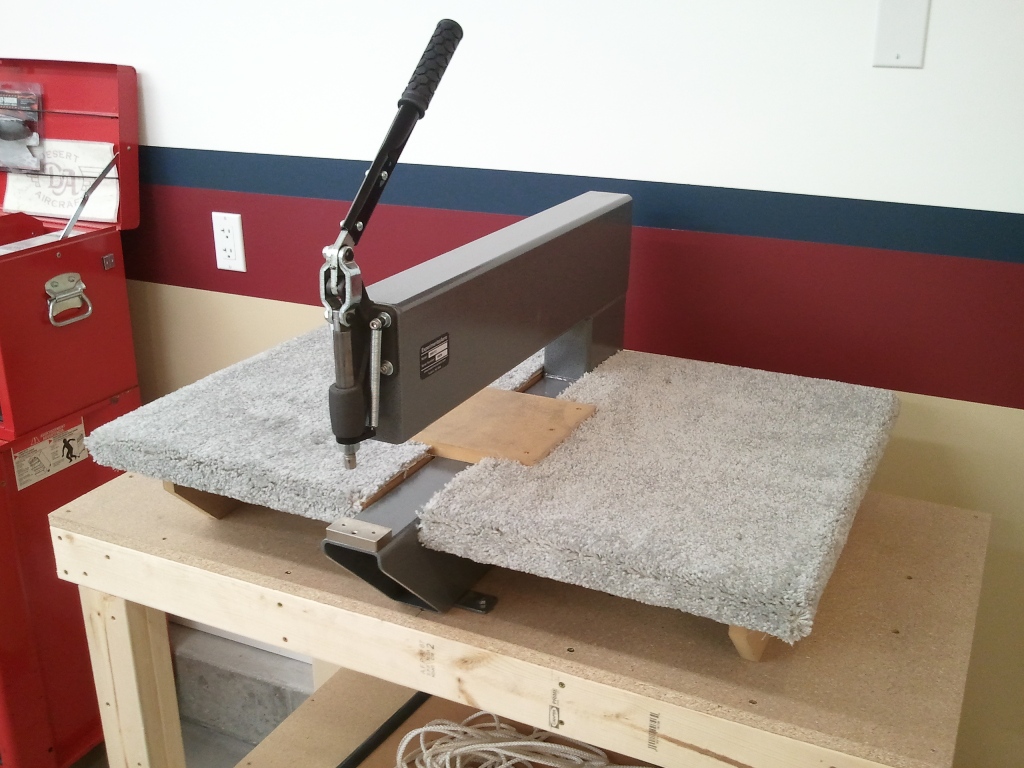
One of the needed tools to complete an aluminum airplane that uses flush rivets is a “C-Frame” dimpler. There are several types. Once uses a mallet to smack the dimple dies together and then there is the DRDT-2. Instead of using a mallet, it uses a lever and a fulcrum to produce the pressure between the dies.

Since I have smashed enough fingers in my time with a hammer, I was VERY leery in taking a mallet to hit anything around my new airplane parts. Particularly around the skins that are typically dimpled in a “C-Frame.” There are plenty of guys that have good success, but I did not want to take the chance. Another problem with the mallet type is that if you slip while getting your swing ready, and move theΒ  skins when you hit the plunger head, you can create the proverbial “Figure 8” hole in your skin. Basically, the force is great enough that you drill another hole with the dies right next to the hole you are actually trying to dimple. The DRDT-2 helps eliminate this as you can precisely place the pilot of the male dimple die in the hole and then just pull the lever down to actuate the plunger.

Before I got into any real heavy dimpling, I needed to mount it to something. When I bought the tool many months ago in preparation to build, I constructed a platform/table per the instructions provided by the tool manufacturer. However, the tool itself was never mounted to a bench. Some builders do, some don’t. Having three young children around, I don’t take chances with expensive and heavy tools that can be anchored. It is better to protect the kids and the tools.

When I constructed my benches, I modified the EAA1000 tables to essentially make a single 4’X6′ table. This left a 2’x4′ piece of ply left over. I figured I would simply make a smaller bench to hold my band saw and drill press. That idea lasted a short time when I wanted to place my bench vise and 12″ disk sander on the same bench. Needless to say, real estate was dwindling fast. So I built another 4’X4′ bench to make a 4 tool bench and mount all those tools to it. That left me with this 2’x4′ bench again. In shuffling around stuff when the Tail and Wing crates arrived, I set the DRDT-2 on this extra bench, and it became clear, the DRDT-2 has a home.

So I bolted it down today to the bench with some 5/16″ x 1.5″ bolts and then used some left over carpet from the house that was in storage and covered the support platform. Took me about 20 minutes and shortly after I got busy dimpling the Horizontal Stabilizer skins. The little bench that wasn’t enough earlier was perfect now. Worked like a charm.

So if you are trying to decide between a standard “C-Frame” mallet type dimple frame and a DRDT-2, I cannot comment beyond what I have read on the standard, but I can tell you, the DRDT-2 is great and works as designed. I hope to get my lovely wife on it for the Vertical Stabilizer skins. I am not sure I would say the same if she was using a mallet. πŸ˜‰

Categories: RV Factory/Shop

Air System Complete

May 6th, 2011 No comments
Hose Reel Mounted

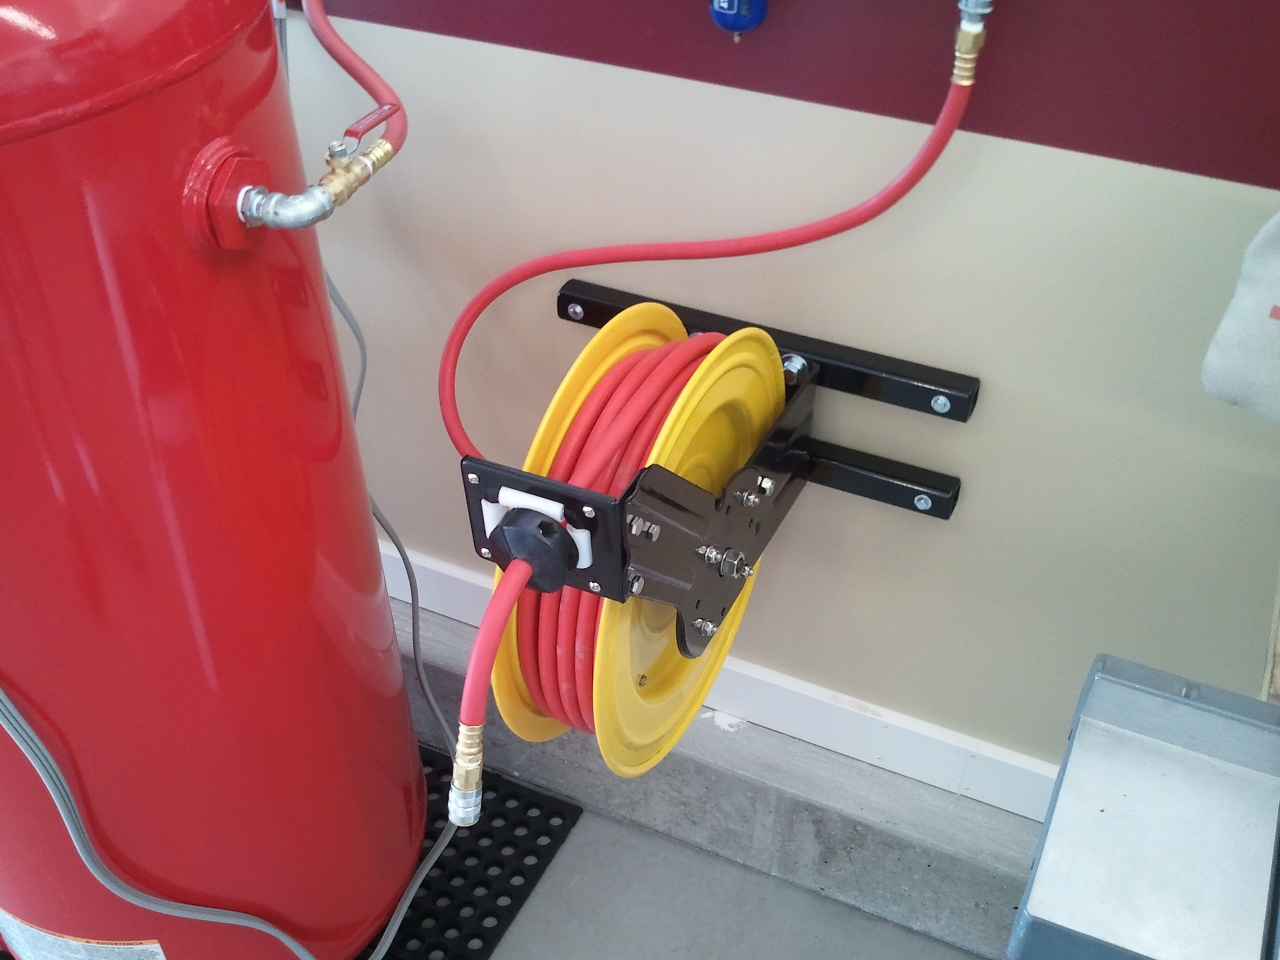
The hose reel with the 50′ of rubber air hose had a mounting plate that did not exactly work on a stud wall. I thought through all the solutions and ultimately came up with the above.

One of my partners on my Spam Can has a machinist father-in-law with a great set of machinists tools. He had some 1.5″ tubular steel scraps laying around so he cut 2 lengths 18″ long and then drilled the ends with 1/4″ holes to accept 4″ lag screws at 16″ on center for the studs.

For the reel mounting plate, we tapped the 3/16″ thick walls for to accept the requisite 1/2″ bolts the reel needed. I then prepped, primed, and sprayed them to match the reel brackets. Turned out great.

Now I have a hose that can reach any area of the shop and then some.

Categories: RV Factory/Shop

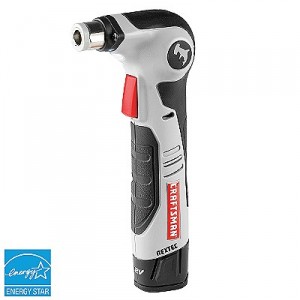
Craftsman Auto Hammer Modification

May 5th, 2011 No comments

Craftsman Auto Hammer

While browsing the ever vast treasure trove of knowledge over at VAF, I came across a discussion about how good the $100 Craftsman Auto Hammer would be as a rivet gun. It hits hard and is a very good size for getting into tighter places than the traditional pneumatic rivet guns used in RV projects. The conclusion was that with a minor tweaking, and the fabrication of a rivet set holder, it would be great.

One of the other owners of my Spam Can Beech has a father-in-law who is a brilliant and very skilled machinist. We have become friends over the years and have been unofficially adopted by his wife into the family.

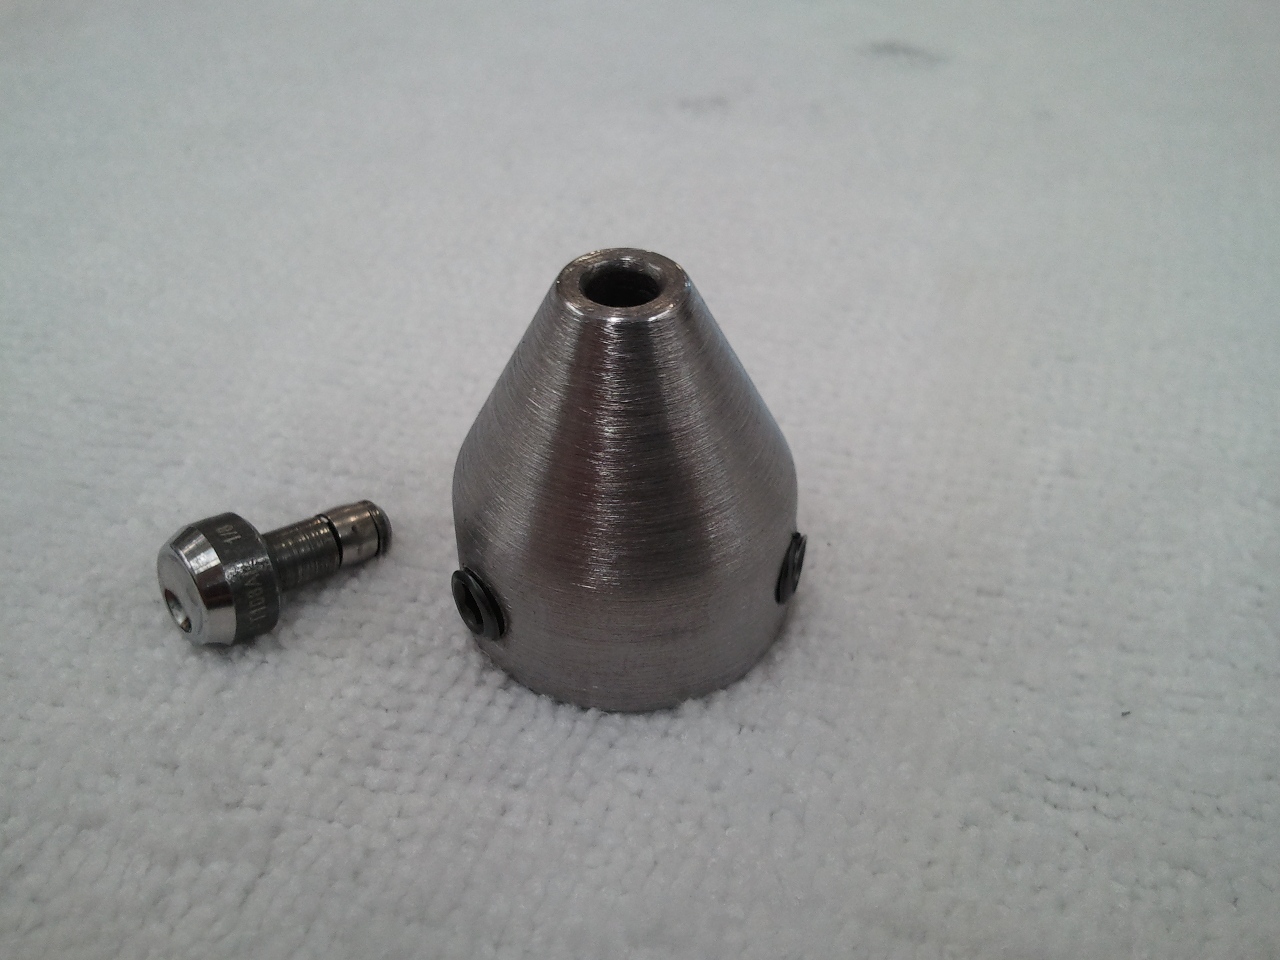
As the thread evolved over at VAF, some particulars of the modification needed were shared and dimensions listed. So I took the information over to my machinist friend and in 10 minutes, he took a hardened bolt and made me this;

Modification with AD4 Rivet Set installed

Basically, the modification attaches to the hammer head (nose) of the auto hammer tool with the set screws and the set inserts into the nose of the modification. Now you can bang at the head of the rivets with very good control and you can also switch out to different sets for different rivet sizes.

Here is the modification without the set installed

I geeked out some as he was turning this bolt into my modification with such skill, speed, and precision. Needless to say, I am glad I have a machinist “in the family!”

Categories: RV Factory/Shop

Air Supply Part Duex

May 3rd, 2011 No comments

A minor part swap.

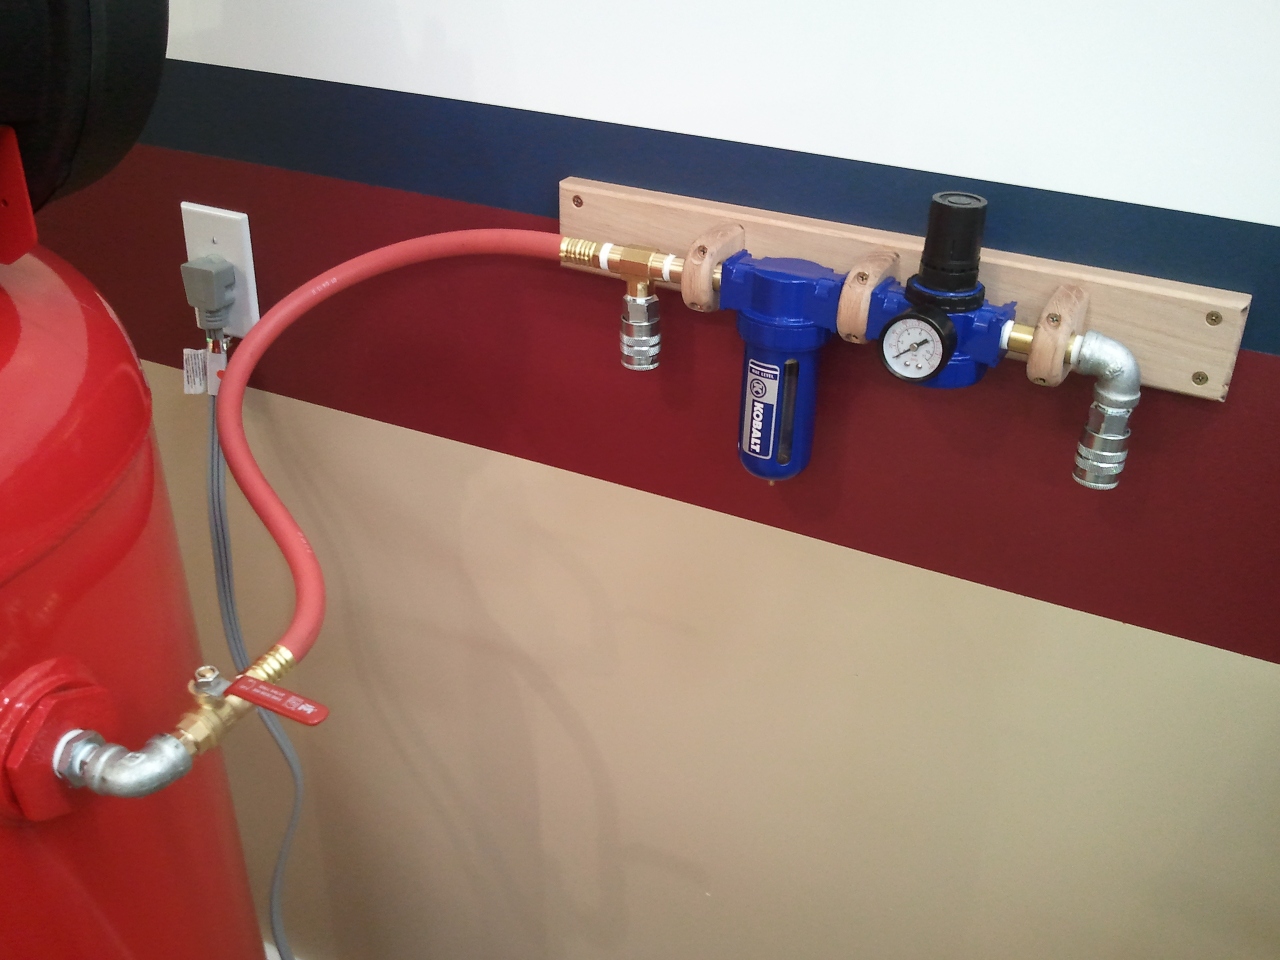
Based on some suggestions from fellow (aka more experienced) builders, I moved the shutoff valve to the tank rather than the wall. This takes the pressure off the lead-in hose when closed. Additionally, I added a tank pressure outlet for general use with air nozzles and other high pressure needs.

Easier moisture removal valve

Another suggestion from a builder with arachnophobia was to make the valve on the bottom for moisture removal easier to use. I added an elbow, 4″ nipple, and a ball valve. Much easier to get to, and certainly easier to use.

The rubber mat is temporary to keep the compressor from walking across the floor. I will be bolting it down very soon for many reasons.

Categories: RV Factory/Shop

Shop Air Setup

May 2nd, 2011 No comments

Custom Standoff

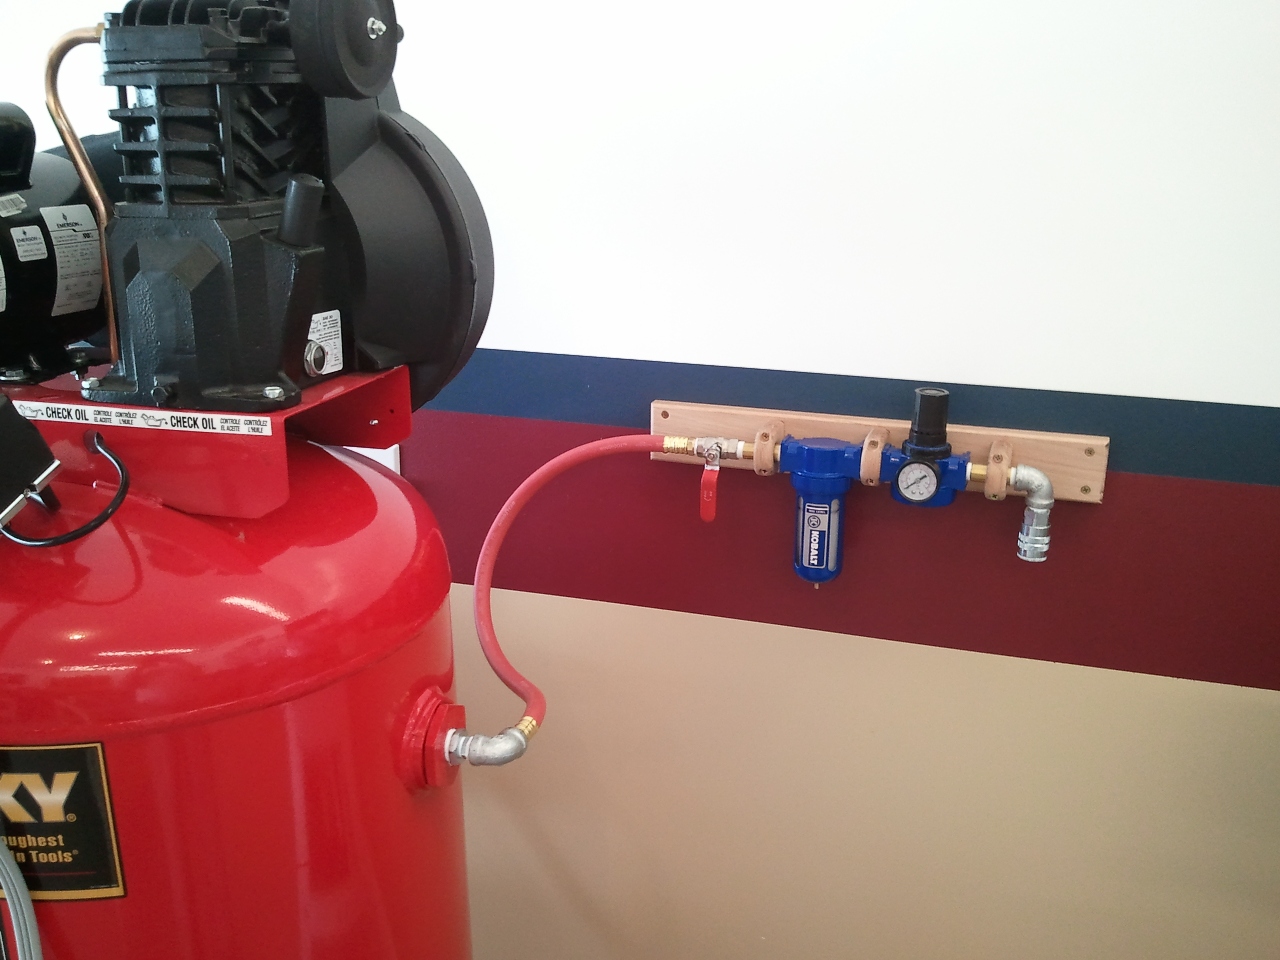
I have been planning on buying a larger compressor for the build for some time. I saved up and the time arrived. I got the Husky 60 Oil lubricated upright 240V.I wired a 240V 20A circuit in the shop just for this purpose and it runs it great.

One of the things that needed to happen before I could use the new compressor was the installation and mounting of the filter and regulators.

I chose the Kobalt versions over the Husky versions because the Kobalt has an auto drain in the filter. Does not hurt that it is patriotic looking next to the compressor πŸ™‚

Unfortunately, neither the filter or the regulator came with provisions for wall mounting. So, I sat there and conjured in my head a design I was sure would work. Turns out, I was right. I basically took a 1″x3″X5′ piece of Red Oak from Home Depot aviation supply, and made 3 standoffs. I drilled each undersized to the pie holding all the components together, then rounded them, routered the edges with a 1/4″ round-over bit. and then sanded the holes to a snug slip fit. Once they were fit, I drilled and countersunk holes for screws on either side of the hole for the pipe. Then I simply cut the part right down the middle of the mounting hole. The width of the band saw blade being removed made a perfect clamp when the parts are screwed back together. Works and looks great.

I also have a 50′ hose reel that will be mounted below this assembly that will keep the hose tidy.

A few other builders suggested a couple of enhancements to this setup that I will implement tonight and update.

Categories: RV Factory/Shop

RV Factory Construction/Setup

April 20th, 2011 No comments

Slideshow of the RV Factory being built and setup.

Google Photos of Shop Construction


Categories: RV Factory/Shop