Needed Upgrade Complete
When I built the shop, I always intended to heat it some how. I insulated it really well, installed an insulated man and garage door, wired an outlet up in a corner, and wired a thermostat wire in the wall that went to the middle of the shop. I had a good idea of what type of heater I was eventually going to run and have been watching the local suppliers for good deals and something that would work. Since the shop was completed in April of 2011, there was no real pressing need to get a heater in at that point so I just put it on the back burner. 🙂
As winter began to approach this year, I began to think heavily about it again. When the temperature started dropping, so did my motivation to be in the shop working. As you can see, my build progress has been much slower since. The Holidays did not help either. I called a local RV’er that also does HVAC and we chatted about options, ideas, and costs. He gave me really good information, but shortly after, my money ran out as December 25th got closer.
As December 25th passed, we were blessed with some generous gifts from my parents and Grandmother. Combine that with a nice gal at Lowe’s giving me a good one time discount, I was able to get a 45000 BTU shop heater for a really decent deal. I also got the conversion kit to make it run on Propane for REALLY cheap as they were closing the kit out. I also bought the flue kit made by the manufacturer. All in all, I was out the door for no more than $400.00.
The 45000 BTU is rated to heat a 700 sq/ft garage. My shop is 720 sq/ft but really well insulated. I figured, it would be great fit as most garages are not insulated that well.
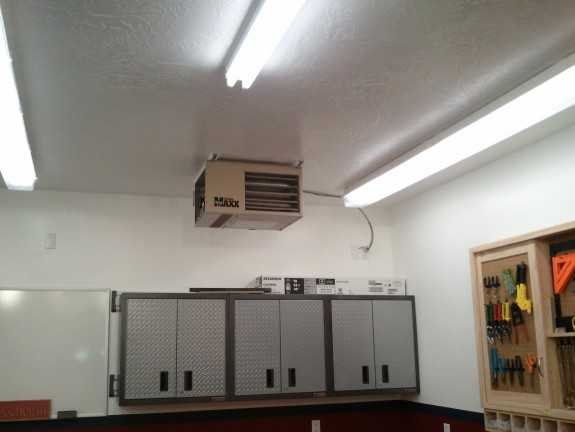
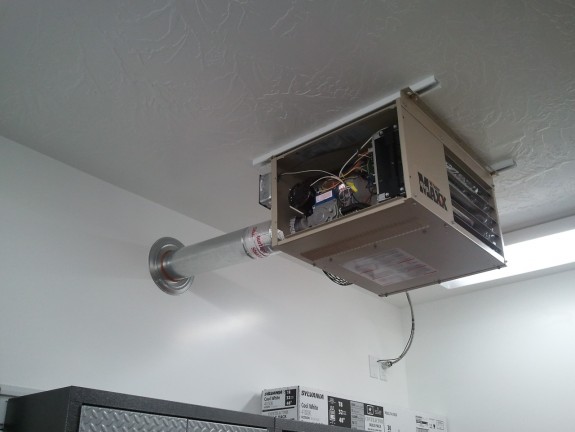
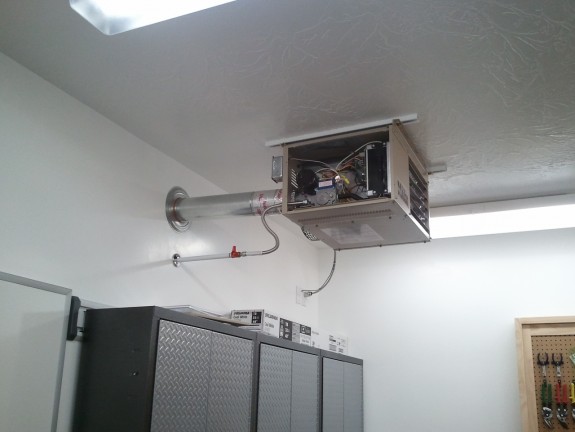
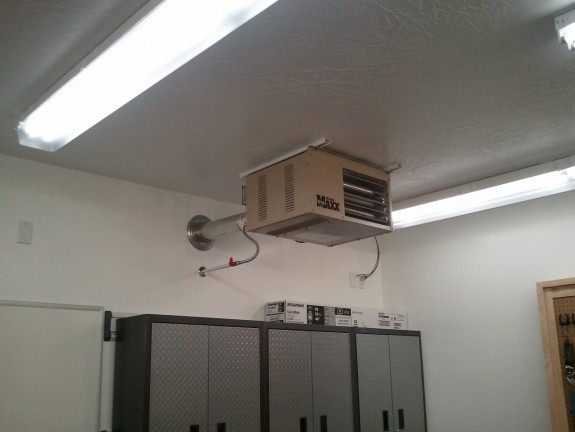
The heater is set up with mounting brackets that will natively mount to a 24″ on center truss situation. Here was challenge #1. I wanted the heat to be blown into the major area of the shop, not against a wall 16 feet away. I was sitting in my desk at work, contemplating how I could rotate the heater 90 degrees and still make it look good. Above me are cable racks suspended from threaded rods that hold pieces of UniStrut which the cable trays set on top. Solution found. I will get some UniStrut and mount it across the shop trusses and then hang the heater from them. Worked great. I painted the UniStrut so it would look good against the ceiling.
I ran the wiring and installed a switch. Probably not required, but not a big deal in case it needs to be worked on. I can also just unplug it from the wall.
Next up was the vent flue. You can vent these in 2 ways. On is a traditional vertical flue and the other is a horizontal. I thought long and hard about both. I have a low pitch roof (4/12) and I filled the attic with R60 worth of insulation. It would have made a real mess and some real work to get to the spot where this vent would penetrate the ceiling and the roof. The horizontal required at 7″ hole to be cut in my fairly new wall and exterior. As you can see I chose to do the horizontal.
I began to use the flue kit that the manufacture designed for the heater and quickly realized I paid too much for too many parts for a simple run through the wall. So I boxed it up and returned it. I then ran to a local HVAC parts supplier and bought only what I needed. Saved nearly half over the manufacturer kit and got only what I needed. If you are going through the roof, the kit is nice and you will use most of the parts, but horizontally, it is not worth it.
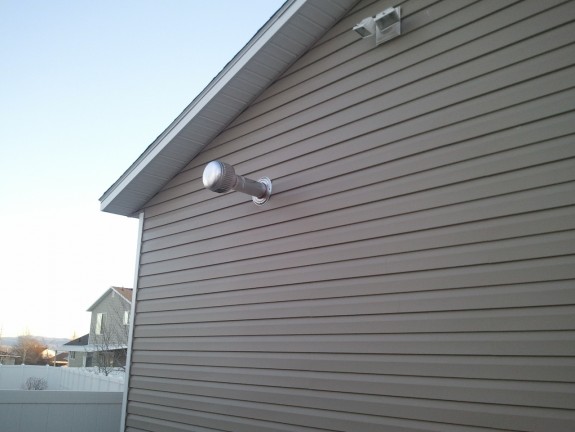
Here is the view from the outside of the shop. The vent is required to be at least 12″ beyond the exterior. This is 12.25″ and looks just fine. It must also be 4 feet from any vented soffit. Since my eve is not vented here, not an issue. This is on the back of the shop…so I will never see it. My Dad suggested I put a smiley face on the cap for my neighbors to dress it up. 🙂 Nah.
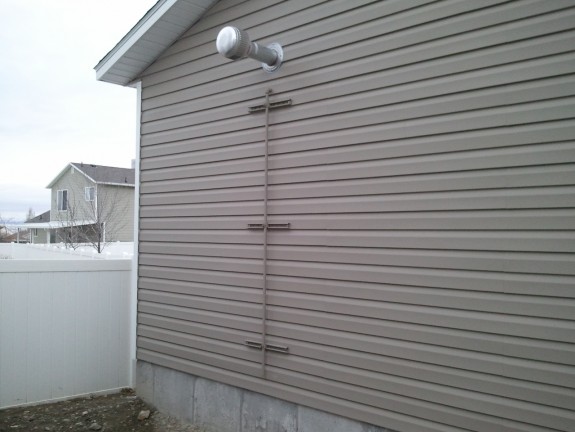
Next up was installing the hard line from near the foundation, through the wall, and to the heater. I simply used more of the same UniStrut I hung the heater from inside. Since my exterior is vinyl siding, and lagging the UniStrut right to the wall would squish it, I had my machinist friend make me some 1″ dia 5/8″ thick standoffs. This way the siding still floats around the standoffs, but the UniStrut is SOLID to the wall. I then drilled a 7/8″ hole in the wall for the 1/2″ black pipe to penetrate through. I then used the standard clips to hold the pipe to the UniStrut. Needless to say, you can hang off this pipe. I also found an off the shelf can of paint that matched the color of the siding and painted all the exterior parts for both corrosion resistance and so it would blend in to the building better. I think it looks great. Again, all this is on the back of the shop. Out of site out of mind.
At this point I can either run a Natural Gas line to this drop or I can drop a large Propane tank. This pipe will work for either and meets code.
Next was the interior hookup. I asked about a dirt leg in the line and was told that they are not required here. This was especially true given the rise in the line to the heater. I can always add one later, but none of the appliances in my house have them and they have been good for many years. I painted the interior portion of the pipe white to blend in. I also put a cheap trim ring near the wall. Overkill to some, but a cheap way to dress it up a bit.
Now was the time to decide which gas. To get Natural gas to the shop is a BIG deal (and would have during original construction as well). I have to trench 18″ deep about 100 feet from the other side of the house without chopping through my sprinkler, telephone lines, pay to have the line installed/inspected, all while the ground is frozen solid. Not sounding like a fun winter prospect. I did buy the Propane conversion kit. I can have a local LP company lease me a 125 gallon tank for $48.00 a year and then I pay for the fuel at a reduced bulk price and no delivery fee on a schedule. The local HVAC/RV’r did a cost compare and that did not help me decide one way or another as some have convenience over $$ perks that come out nearly at a wash.
I have decided in the short term to convert the heater to LP and get the tank. As the winter thaws, I may then decide on the NG line and work and then convert it back to NG. If the consumption of the LP is low enough, I may simply keep the big tank and then have a backup in the event of a NG shortage. 😉
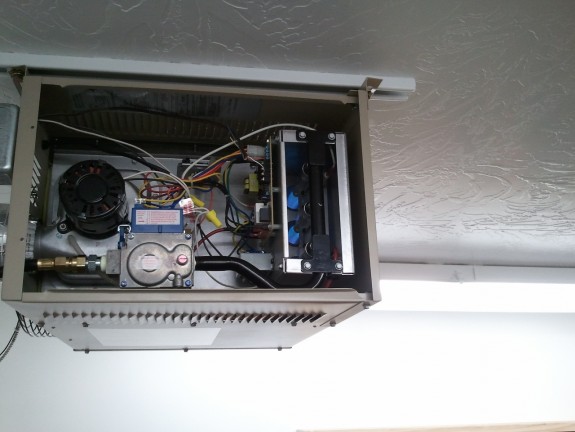
I converted the control valve to LP. Changed the pressure spring and the burner orifices, and then hooked up a standard 20 lb Propane cylinder to test it and set the proper manifold pressure. With a flip of a switch on the thermostat, I had glorious blue flames. Within 10 minutes of running it, I had increased the shop 10 degrees! This thing is surprisingly quiet. I had to turn it off after a bit because I was tempted to run the whole cylinder. I think this will be a VERY nice addition to the shop. The bonus is that I can run only the fan in the summer and it will circulate the air and help with cooling.
So here it is all buttoned up. I still need to schedule with the LP company and get the tank dropped and filled. I adapted the exterior pipe to run off a smaller cylinder until then. It looks a little silly to have a small tank attached to the shop…but, it will do in a pinch until the big tank arrives.
Again, as it warms up, I can always trench, get a NG line installed, and convert it back to NG. But for now…I am loving this little heater. Now, it is time to get back to building the plane.

