Archive

Archive for the ‘Horizontal Stabilizer’ Category

Bummer news for the build…Service Bulletin

February 3rd, 2014 No comments

Well, my hopes of all the issues and bugs being worked out and buying a kit that was the product of all the revisions being incorporated have been dashed.

Van’s released a Service Bulletin (SM 14-1-31) that requires me to do some more work on the HS.

It appears that some cracks are forming in the forward spar interface with the ribs and skins and doublers are being called for now. Granted, I am glad I can comply now rather than later, but still a bummer as this SB requires some tear down of completed parts.

Fortunately, it is much easier to complete on the bench than on the plane.

SB 14-1-31 DWG Snip

SB 14-1-31 DWG Snip

If you look in the upper right corner of this drawing snippet, the relief notches are being found with cracks. This is likely due to the relief notch not being smooth and the stresses put here in flight.

While they are voluntary according to the FAA, I don’t want to chance anything in the future, so I am going to comply now, or as soon as the parts arrive.

Better safe than sorry.


Categories: Horizontal Stabilizer

Milestone…HS is Complete

May 30th, 2011 No comments
Thing of Beauty

Memorial Day 2011 will be memorable for sure. I was able to get all the assembly of the HS done. I had bucked all the rivets in the field of the skins earlier and only had the perimeter to do. So I started with the HS-404 and HS-405 ribs and grabbed my pneumatic squeezer and knocked them out. I did remember to leave the open holes for the fairing between the Horizontal and Vertical stabs alone. Some have reported that they got so into it, they just riveted those and then had to drill out.

Next was final attaching the HS-706 ribs to the skin. Worked from front to back on each end and each side. Went fast with the squeezer.

Once the ribs were done, I moved on to riveting the aft spar on to the skin. Basically, I pulled out every other cleco from the skin and placed a rivet in. Then I squeezed them. Once complete, I removed the remaining clecos and squeezed the rest.

Vans Said Not a Problem

Next, I squeezed the HS-603PP to HS-706 AD4’s, then the HS-603PP to HS-609PP to HS-405 holes. These were a little awkward to get to with the squeezer and the aft flange of the HS-405 lifted/distorted some from the aft spar, though the rivet locations were tight together. Shot an email to Vans which they replied…build on, it will happen.

Ooops Overcome

Once these were nailed down, I was left with the HS-708 aft rib holes that are blind riveted to the spar assembly. I failed to mention earlier that apparently I had a fit of dyslexia when I first started the Aft HS Spar. I accidentally drilled the holes that tie the aft of HS-708 to the spar with a #12 bit rather than the called out #21. I felt really stupid and was really discouraged on day one of my build that I had royally messed up. I called Vans then and asked if it was OK to use CR3213-6-4’s instead of the BSPQ-5-4’s called for due to the oversized hole I now had and if it posed a problem to the strength of the HS-609PP spar doubler. They assured me, you could not measure the loss of strength without visiting NASA. They agreed that using the much stronger (aka overkill) Cherry Max rivets was perfectly acceptable. I sent them another email as I finished up with this picture, and they replied again, all is well and build on. They mentioned several times my work looks really good. Whew! One note of caution, make sure that when you insert the blind rivet into the spar that it really is in the rib. You can check by looking through the HS-405 lightening hole. I thought several times that the rivet was pushing the flange away from the spar and was glad I checked before I set these tough little rivets.

Within Spec…Build On

The last area of concern I had when I got all done was the HS-710 stiffener to HS-702 to HS-405 rib interface. I mentioned it earlier, but I sent it on to Vans to just be double safe. I mentioned I was a couple of thousandths of an inch short of the 0.250″ ED and they replied…you are well within MilSpec, build on. Again they complimented me on my work. Perhaps they know something about new builders. We worry tooo much. It was still welcomed assurance.

HS Complete!!!

And we arrive here. A completed Horizontal Stabilizer. It is not 100% perfect, but it will fly, and fly well. Thankfully paint will make up the difference. I need to shoot some primer back on some spots that got a little scuffed when assembling, but all in all, it is time to move on to the next stage of the build…the Vertical Stabilizer! If my mistakes really bug me, once I have more of the bird built, I can then decide if I want to do another HS, but we’ll cross that bridge much later. After all, it is not the space shuttle. 🙂

Categories: Horizontal Stabilizer

HS Nearly Done

May 25th, 2011 No comments
Oh Sooo Close

Not to many pictures tonight but a ton of work. I was first able to get the Left HS Skin riveted on with no real trouble. It became clear that I really should but some tape on my Flush Rivet Gun Set. The first flush rivets and surrounding skins have some scuffing that will go away once prepped for paint. After a while my eye again calibrated to the proper setting of the flush rivets. I spot checked them with the gauge and all seemed good to go. The other lesson learned was you really need to keep a good grip on a tungsten bucking bar. If it is just slightly tilted when bucking, it won’t take long to make a mess. It does make bucking go fast however.

I ate some dinner, returned and started on the right skin. I shot the rivets on the HS-707 rib and had to replace the top nose rivet a couple of times. I thought I was satisfied until I was done for the night and looked at it again…I may need to put a cherry max in there because it is now closed up. I will check with my local expert first, but in the end…it will be OK.

As I moved further aft on the HS-707 rib, the rivet flush set in my gun slipped off the rivet and left a minor indentation in the skin…grr. Why did it have to be on the top of the skin. It is not terrible and a little prep when painting may make it disappear 😉 . Either way…it will still fly just fine. I then joined the other half of the HS and installed the HS-708 Rib with blind rivets in the tight space. Then I attacked all the field rivets on the right skin. I then clecoed the rear spar in. And here is where it ended and the picture was taken.

All that remains are all the rivets around the perimeter of the skins. So close, but it was time to stop before I got too tired. All in all, it looks great…I have a plane part near completion. I may get it done tomorrow or over the weekend.

Categories: Horizontal Stabilizer

Horizontal Stabilizer Final Assembly Begins

May 23rd, 2011 No comments

Getting Ready to Really Rivet

After a weekend of traveling south for CAP, it was time to take the primed parts and start doing some assembly. Here you can see the first 4 rivets in the HS Aft Spar in their locations. I was worried that the AN470AD4-6’s called for in the plans were too short. My length gauge from my tool kit said they were, but all the reading I did said that this was normal and would be OK. Here goes nothing.

First 4 Smashed and Looking Good

Here is a backside shot of the same after taking my pneumatic squeezer to set them. That tool is worth every cent. Made for clean, consistent, well set rivets over the whole spar. The call outs are correct on the plans after all. I started to feel like I could calibrate my eye after checking the shop heads with my go/no go gauge. I was correct! After a short while, I could tell by simply looking at them. (I still checked them though 😉 )

First Slipped Rivet

I was happily setting rivets and thought I was complete with the HS Aft spar and was going over them one at a time and noticed this gem. Apparently I let the squeezer slip and it mangled both the shop and the manufactured head. It just looked bad. Many builders tell you to resist the urge to drill out a rivet just because it looks bad, but this one was not acceptable. I center punched the divot in the manufactured head with a #40 drill and then followed it up with a #30 just until I knew I was just below the rivet shoulder and was able to pop the head out with a punch. I then drove the rest out. The nice thing was, no hole elongation or mangling.  I then reset a new one and you cannot even tell. Whew…however, I know there will be plenty more I will have to remove on other parts.

Spar Complete

And here we have a complete HS Rear Spar. The gold rivets look great against that green of the primer. Now on to the Forward Spar. I assembled it per the instructions. Had to break out the rivet gun for some tighter spots the squeezer could not reach. My dies did scratch up the primer on the reinforcement bars a little. Once both skins are on…I will shoot another dusting of primer on the center section and the stiffeners. Other than that, it went together OK. Then next step was to start working on riveting the skins of the HS on. I started with the center nose rib. I clecoed it to the top of the left skin. My 3/32″ clecos did not seem to hold well under the spring tension of the skin. They kept popping off as I bent the skin around the rib. To solve the problem, I simply drilled a bunch of #40 holes into some scrap stock and then on my band saw cut squares out around the holes to make little washers. Then when I clecoed the parts together, I simply put the little washers on last and they held strong. Kind of a pain, but an easy solution. I got the first 10 or so flush rivets set in the top and bottom of the skin and pressed on. They are not perfect…but final paint will do fine to make up the difference. 😀

No Question why Rosie was the Right Person for the Job

After the center nose rib is riveted, you have to install the forward spar assembly into the skin and then the aft center and outboard ribs. Once in, you blind rivet (pop) the two center ribs and spar together. This is not easy to do when your hands are XL in size. The Army Air Corps knew what they were doing when they hired all the Rosie Riveters in WWII. I needed one in the shop for these. I got them in though. I may shoot some primer to cover the scuffed areas my blind riveter hit when the mandrels broke. Otherwise…it is looking good in there.

Ready for All the Rest of the Rivets

It was time to call it a day. I was able to rivet the end rib to the spar, cleco in the aft center rib, and cleco on the skin to all the parts. Next step is to set all the rest of the flush rivets. Once complete, you do the same for the other skin and then rivet on the aft spar completed earlier. Then…you have a completed Horizontal Stabilizer!!! Hope to have this complete over the Holiday weekend. I am beat, but it really looks like I am building a plane now!

Categories: Horizontal Stabilizer

HS Parts Primed and Ready

May 19th, 2011 No comments
Ready to Get Riveting

Those around the RV world know the primer debate is a hot one. There are MANY general aviation aircraft in service that have been around a long time with no primer…but they were not hand crafted by the owner either.

I have chosen at this point to prime all the parts internal to the airframe. I know that currently I do not live near a salty coast or a highly wet climate…but that may change in the coarse of life. Of course at this point it feels like I do considering the very wet spring we have had lately. I do live near the Great Salt Lake, but again, it seems to evaporate and disappear rather than linger in the air. So the next decision is which primer to use.

I decided on the Dupli-Color Self Etching variety. I have had great success with it on other projects. It takes care of the etching and is very durable. The other bonus is that it comes in cheap spray cans. The other point is…I do like the color. Kind of a throw back to the old bombers of WWII. It also seems to get good reviews on VAF. The other rattle can variety that gets good reviews is the NAPA 7220 Self Etching. It is grey in color, but has the same durability.

Once all the edges/holes were deburred, I scuffed the parts with a maroon scotch bright pad. Good thing I have a local source as I am sure I am going to burn through these fast. I then cleaned all the parts with Denatured Alcohol and let dry. From that point on, I wore nitrile gloves so to keep any oils from the parts. Then I hung them from my overhead shelving racks in my garage and sprayed.

I did find one item of interest as I was spraying. It was my method of the hanging the parts. It seems that hanging them vertically is not very effective and results in a lot more over-spray. I think I may have sprayed more on the floor than on the parts. I think for the next round of parts, I will rig up a spray tray out of chicken wire or some other method of being able to set them horizontal so that I can better place the parts for maximum coverage and minimal waste.

Otherwise, they look great and are now ready for assembly. I will let them rest for a few days to simply make sure the paint is good and cured and then get to it. Those gold plated rivets will look really good against the green. 😀

Categories: Horizontal Stabilizer

HS Ready for Primer

May 18th, 2011 No comments
Parts Prepped and Ready

After work, I was able to get started on deburring the HS skin rivet holes.  First I removed the vinyl coating completely from the inside of the skins and then only over the rivet lines on the outside. Lots of debate on the right thing to do, but I chose to retain it as we are in a dry climate and I want to protect it as much as possible until paint. As for the holes, basically I took a 3/16″ bit and spun it in my fingers in each hole. It knocked the burrs right off and it does not take to much material with it. There has been a large amount of discussion as to what is and is not too much deburring. I was pleased with the outcome and feel it is just right.

After getting the left skin done, it was time for my two boys pack meeting. They are progressing well in Cub Scouts and Webelos. Their shirts look like hard working cubs…completely covered in patches.

Once pack meeting was over, and the three kids were tucked in bed, it was time to see what else I could get done. I got the right skin deburred, then deburred the edges of both skins to a non finger slicing smoothness. I had not completed the setup of my DRDT-2 Dimpler to date. I needed to bolt it down and wrap the support table with some scrap carpet. No time like now, so I knocked it out. Check out the RV Factory/Shop topic for more.

Once that was complete, I got to dimpling my skins. The DRDT-2 make single pilot dimpling a breeze. I did have to take a couple of breaks in between each half to let the arm recover from the plunger lever. All in all, this thing makes great, consistent dimples.

I did read a bunch on preload on the DRDT-2. I simply set the plunger to 0″ clearance on the dies, then made one more turn on the plunger and then tested on some scrap .032″ Vans pleasantly supplies in the kits. Simply perfect dimples.

Once all the dimples were complete, I scuffed the inside of the skins and made sure all the parts were ready for primer. I hope to prime tomorrow and then let it sit over the weekend while we do some family/CAP business.

Categories: Horizontal Stabilizer

Sub Structure/Skeleton All Dimpled

May 16th, 2011 No comments
Right Tools for the Right Job

Was able to get all the skeleton dimpled tonight. The last holes at the nose of rib HS406 needed my pop rivet dimple dies. Sure glad I had a set.  I then dressed all the edges, and then double checked all the scuffing.

I need to get my DRDT-2 table rigged up so I can dimple the skins to match the sub structure. Hopefully sometime this week I will get to it. Once that is complete I will prime all the parts and then start final assembly of the HS sub assembly.

Categories: Horizontal Stabilizer

Full Day of Horizontal Stabilizer Work

May 14th, 2011 No comments

The Tricky Drilling

After a good restful sleep, it was time to get some real work done. I mentioned in the previous post, several mistakes have been made in the assembly of the HS by other builders. I did not want to make the same ones and was now willing to take a swing at it.

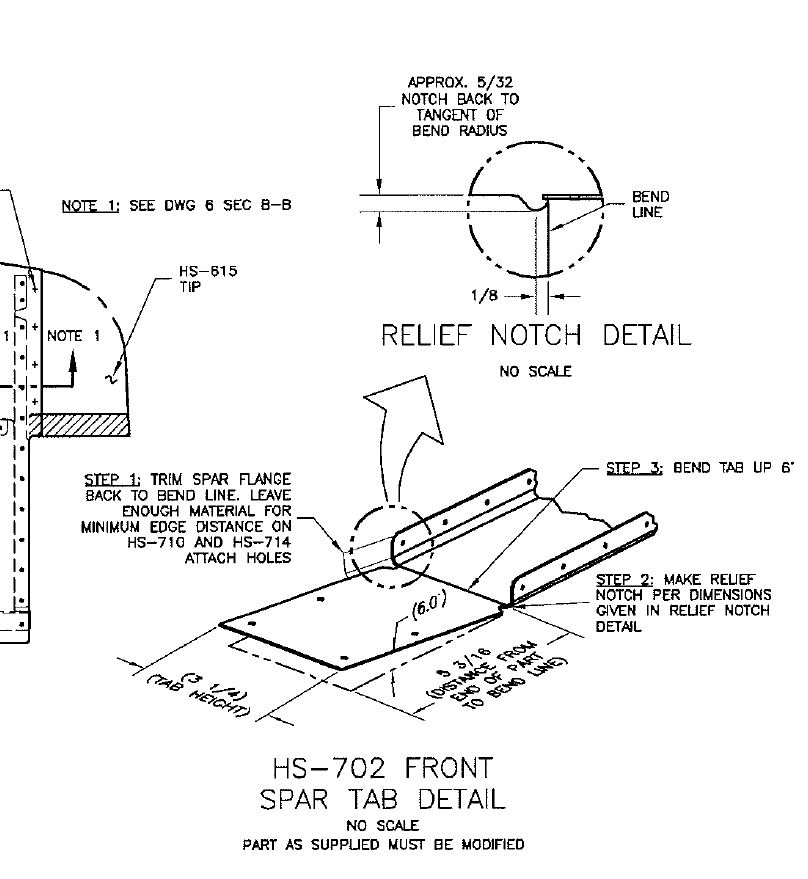
The first area of concern is the flange of the forward HS404 Rib to the HS702 spar connection. Despite my best efforts, I made a similar mistake that others have. The problem stems from needing to drill from the back side of the HS405 rib, through the HS702 spar into, the HS404 flange. You are essentially doing this blind. This left me with the 2 holes in the flange a little closer to the 2x Diameter to the center of the #30 hole distance recommended, but within the MilSpec (MS) required edge distance. The other contributing factor is that when the HS404 rib is installed into the skin opening for it, it causes the rib to concave some and moves the flange inward. The flange could be scabbed and replaced, but I have chosen to build on as it is not a structural connection and it is within the MilSpec.

The second problem with the backside drilling is that some have busted the edge distance of the stiffeners when drilling though the spar and the stiffeners. I was very concerned about this connection as it IS structural for the empennage. I was VERY careful here and pleased to report that on the left side, I was well within the edge distance when drilling these holes. Whew!!!

Left HS Match Drilling Complete!

Once the HS404 and HS405 ribs are match drilled to the skin, you then completely match drill ALL the holes in the skin to the sub structure. My hand got sore undoing and redoing all those clecos. Remember, they are on both sides of the HS in this picture. I love how precise all the punched holes are in all the parts Vans supplies. Made lining up everything a real dream. In older kits, you had to lay out the rivet holes in the skin and then drill them all then match drill them to the sub structure. I am glad I don’t.

Left HS Ready to be Disassembled

The above shot is of the Left HS complete and ready to be disassembled. Wait…I jut got it all together and looking cool. What do you mean I have to take apart. Welcome to building a plane. I took out all those clecos, and set the parts aside. Then next step is to dimple all the holes and the corresponding holes in the sub structure to accept the flush AD3 rivets. Then I will prime and begin to reassemble for the final time. The real riveting will begin soon enough.

With the left side complete, it is time to repeat all the steps just completed for the right side. With the hard stuff figured out, and experience now fresh…this will go like a breeze right? WRONG!

Remember back in the HS405â€ēs Prepped and Drilled post when I noted that forward flanges were not located symmetrically? Well it came back to bite me. I was able to successfully drill the HS404 to HS702 flange connection correct this time, but when it came to the stiffeners….well, I thought, heck it worked on the other side just right…it will work here fine too. Long story short, when drilling through the HS405 through HS702 through HS710 hole, I looked and was horrified to see that the hole looked to have busted the 2x Diameter edge distance. After a few thumps to my head in frustration, I measured the hole. I am at 0.250″ from the center of the hole to the edge! That 1/4″ looks way smaller when you are scared. Crisis averted.

New Builders beware of the HS405 webs….they are not created equal and must be the cause of this common mistake. The forward flange IS NOT CENTERED on the rib. You will get different height holes on the HS710 and HS714’s no matter what you do!

Right HS Completely Matched Drilled and Ready to be Disassembled

Once I recovered from what I thought would be a costly mistake, I pressed on and match drilled the right HS Skin to the skeleton. If I had enough clecos, I could have made a full HS looking structure temporarily. Alas…in time, I will do it permanently.

The HS Skeleton Overview Shot

The last thing to get accomplished today was to clean all the skeleton parts, lightly scuff them, and then mark the part numbers and locations on them. I will dimple the parts sometime this week and then clean once more and then prime them. Additionally, I will use my DRDT-2 to dimple the skins and then prime the inside of them. Then the fun of riveting will begin. THAT was a good day of real progress.

Categories: Horizontal Stabilizer

HS Skins in Works

May 13th, 2011 No comments

Left Skin Fit to Sub Structure

Now that the sub structure/skeleton is completely prepped/drilled, it is time to cleco on the skins and match drill them together. Here is the start of the left HS skin. Once this is on, you have to complete the drilling and fluting of the inboard ribs that surround the fore spar. Then you match drill them to the skin, the spar, and the stiffeners. Here is where I have seen several make some mistakes that are costly.

Another View of the Skin Attached and the Inboard Ribs Slipped In

It is starting to look like I am building a plane. I called it good for the night. It was late and I needed to take a break and snuggle with my lovely wife.

Categories: Horizontal Stabilizer

Ribs Nearly Ready For Assembly

May 11th, 2011 No comments
Ribs Fluted and Deburred and Nearly All Cleaned

Here is a shot of the HS ribs marked, separated into Left and Right sets, and half are cleaned and deburred. I fluted using my fluting pliers and they all came out straight. A little more cleaning and they will be ready for assembly into the skins for match drilling and beyond. I am almost to the point where it will look like I am starting to build a plane.

Categories: Horizontal Stabilizer

HS405’s Prepped and Drilled

May 11th, 2011 No comments

One Side Drilled, One to Go

After the HS404’s are notched, the next step is to mark and drill the forward flange of the HS405 ribs. These are located between the forward spar and the rear spar of the HS. The tricky part is making sure that the holes you mark and drill here provide adequate edge distance to not only the flange you are drilling, but the flange of the HS404 tab that was left after notching it, and the stiffeners on the forward spar. I followed the plans to the “T” and still measured 15 times.

I noticed that while the ribs are symmetrical top to bottom, the bends for the skin flanges are not. This means the forward tab is higher than the other if you place these back to back. So, as you can see, the marks on the tabs above are not exactly a mirror of each other. They are offset by the differential in the bends for the flanges being different.

That being said, I was able to mark and drill so that it met all the required distances and compensate for the offset of the tab just fine. This will ring true when they are matched drilled to the spar and stiffeners and the leading edge ribs (HS404’s).

I also learned the value of a good center punch. Makes locating accurate holes a breeze.

Categories: Horizontal Stabilizer

HS404’s Notched

May 11th, 2011 No comments

HS404’s marked per plans

One of the next steps after getting the Fore HS Spar prepped is notching the inboard leading edge ribs for the HS notched to go around the stiffeners prepped in earlier steps.

Here you can see the full size detail on the plans and the ribs with the areas that need removing marked in red. I first drilled the corners with a #30 bit and then rough cut the edges close to the limits with my band saw. Then I cleaned up the edges of the cut with a fine file until they were blended with the holes in the corners.

Here is the result:

HS404’s after Notched Per Plans

They are spot on with the plans and ready to be drilled to the spar. The trick is…TAKE YOUR TIME and file as little as needed. I am learning patience in these early build steps. I think that will be the more valuable lesson as the build progresses.

Categories: Horizontal Stabilizer

Spars Ready for Ribs

May 7th, 2011 No comments
Fore and Aft Spars Together

Here are the two spars of the Horizontal Stabilizer together on the bench. Almost time to get the ribs started and get these two assemblies joined.

Categories: Horizontal Stabilizer