Anyone who is anyone in Aviation knows that at some point, you have to make the trip to Airventure. Oshkosh, Wisconsin hosts the biggest General Aviation Fly-in/Airshow every year. If you are a home builder, the requirement is increased as it is hosted by the EAA and draws many “experimental” aircraft and pilots to it. I have always wanted to attend since I was young, but more so since deciding to build a plane myself. I figured someday it would happen but never this soon.
A fellow CAP pilot and RV-6 owner Kent and I were chatting early one morning in July after he had just finished a check ride. He asked me if I was going this year. Turns out this was a big year for RV guys as the RV-1 was being flown in and donated to the EAA museum. Additionally, the EAA was going to have some special events to recognize Richard VanGrunsven, the owner and designer of RV aircraft, due to it being the 40th anniversary of Vans Aircraft. Needless to say, it was the year for an RV builder to go.
I responded to Kent that I was not sure as I had no real way of getting there. He then said the magic words, “I have an extra seat, why don’t you come along?” Say WHAT?!? I told him that I would need to check with the wife first, but I was all for it. There were several reasons I was really excited at the prospect. 1. I get to go to Airventure 2012. 2. I get to fly in a RV-6 which is the predecessor of the plane I am building. 3. His plane is a tail dragger, and I need to get some familiarity with it to better make a decision as to the configuration of my landing gear. I figured I could get some serious time and education. It was a heck of a deal for me. Kent on the other hand would have to deal with a guy that would be geeking out the whole time. Poor Sucker!
After a conversation with my lovely bride, we decided I could go. (More like she relented and I ran with it!) I do love my wife! So it was settled, I was going to Oshkosh in style. It was decided that we would go for as much of the week as possible. We would also camp at the Home Built Camping area. Talk about a full immersion, I was going to be in Mecca, in a RV, camping in the middle of many other RV’s for a whole week. This is going to be SWEET!
I nearly could not stand the next 2 1/2 weeks left due to the anticipation of the trip. We decided that we would head out Saturday the 21st as early as we were able. We started chatting about weight and balance, routes, fuel requirements, etc. It became clear that me and Kent, full fuel, and day bag would be all we could carry and stay at gross for his RV-6. (I guess I am a big boy…translation…fat.) This meant that we needed to ship our clothes and camping gear to KOSH a week in advance. Apparently this is a common thing for participants/attendees because Airventure has a system set up that takes care of this very situation. So I packed a 34 pound box with my tent, sleeping bag, bed roll, clothes, and toiletries and shipped them off on the 17th. Kent did the same. We were committed now. If we did not go, we would have to work with Airventure to return our gear as soon as it arrived. Not a fun prospect either of us were planning on.
The weather looked to be good for the weekend out of KOGD. At this point, it was painful to go to work. After all, I was going to be having a blast in a few days. Saturday rolled around and I got up around 0400. I showered, kissed my wife goodbye and headed out the door attempting to drive the 45 minutes or so to KOGD to meet my ride and pilot. It is amazing how quiet Utah is at 0430. I arrived at about 0545 and there was the plane on the ramp with no pilot. Kent apparently was talking with some other guys that we were going to head to KOSH as well. He showed up and we quickly jumped in N216KW and started our adventure.

Airventure Bound
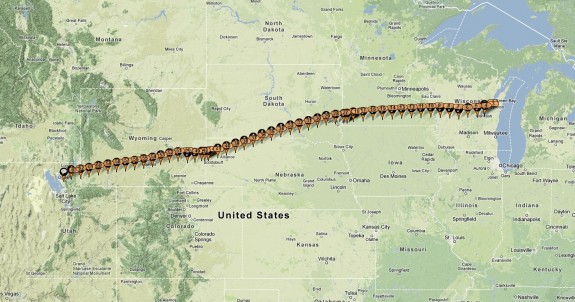
Wheels up was shortly after 0600. Kent had me follow along on the takeoff on the stick. Admittedly, I was more excited than paying attention, so I cannot say I learned anything on that one. 😉 We started out as a 2 ship flight. Phil in his RV-4 was in tight tow as we took off RWY21 and departed to the east. I was able to borrow a Spot ® to use for our trip. This way friends and family could track us on our way. Additionally, I set up the alerts so that at fuel stops and destinations, the device would notify our wives we were OK. As you can see from the map above, it works really well.
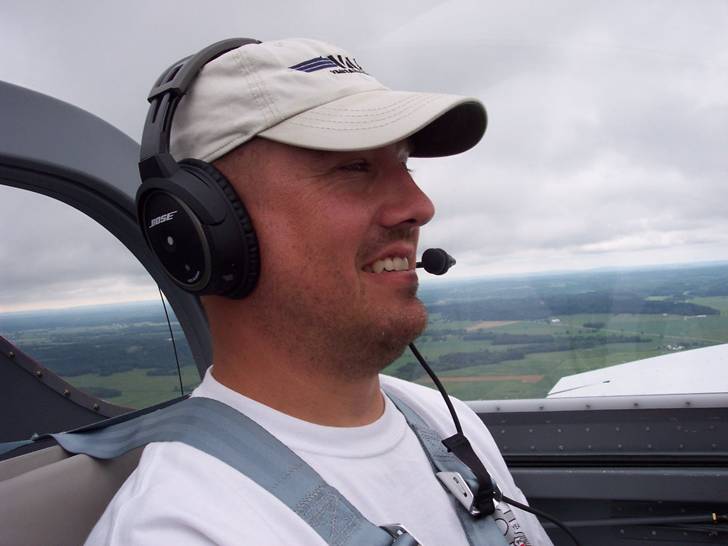
The sun was just coming up as we left. It made for a really nice view as we headed east. Fortunately we had some cloud cover to keep it out of our eyes. The Mountains of Utah are beautiful in the morning. Kent told me I had the plane shortly after takeoff and simply advised, via his Garmin 496, where I should point the nose. Phil tucked in nicely under the wing of Kent’s RV for a good portion of our first leg. I had never flown formation before, it was neat to be in that close proximity to another airplane and see just how pretty these birds are. Flying lead was fun. This was my second time flying an RV. I do not have a lot of center stick time, but I can tell you, it is soooo natural feeling. It was not long before I had a feel for the inputs required to control the plane. Kent’s RV-6 and the prior RV-6A I have flown are very neutral on the stick and very responsive. Already…I was in love with the way these planes fly. The other thing I immediately noticed is the speed. These planes can move.
We were on our way. There was another flight of two, a RV-6a and a RV-7 that took off about 10 minutes behind us. Eventually we all gathered up together and became a flight of four. Our first fuel stop was planned to be Torrington, WY (KTOR) which was 357 nm or just over 2 hours as fast as these RV’s can move. The flight over Wyoming was uneventful. We stayed at about 7500 MSL for this leg to find cool air. There is a lot of barren land and not much to see. Fortunately, the formation flying was entertaining enough. Winds were out of the west and air was smooth. I was on the stick the entire time and was getting a good feel for the plane.
We arrived into KTOR and set up for a RWY28 downwind. Once established, I gave the plane back to Kent to land. He got us down with a nice landing. I watched and observed as this was officially my first landing in a tail dragger. He made it look easy. We taxied in and got fuel.

Gaggle of RV’s Gathering for Fuel
We hopped out, and introductions were made with all the other plane crews in our flight. We also picked up two more planes in the flight. Roland and Al in RV-6’s. We got organized, paid for fuel, took a bathroom break and then piled in and departed. KTOR is a nice place. Nice FBO, nice facilities, nice dog. It was starting to warm up. It was time to get flying again. Kent had me on the stick a bit more on this takeoff. With the tail on the ground, it is different on the takeoff. You cannot see down the runway over the nose. So you get the plane rolling, push the stick forward to get the tail up, then it feels the same as the tricycles. The pushing the nose forward will be something I will need to work on as I am so used to just holding a little back pressure to start. We were off and forming up again.
This time Phil took lead. This gave me a chance to fly formation on him. That is a LOT of work. I gave it a good try for about 5 minutes and then backed off some. I loved the challenge, but I can see it making one tired really fast. So I stayed in loose trail for most of the flight over Nebraska and South Dakota. That was very educational. I love learning all this new type of flying. Kent got a seat full of excitement next to him.
We flew past some large fires in SD. The smoke was pretty thick in places, but we avoided it. There is a whole lot of prairie out there. Ripe for burning. Next stop planned was Quentin Aanenson Airport in Luverne, MN (KLYV) which was another 362 nm away. After another 2+ hours we lined up for a nice arrival on RWY18. Kent had me follow along with the stick to get a feel for the view angle and power management. He set it down nicely and we taxied over to fuel. To our surprise, the fuel was $4.85 a gallon. However, nothing is cheap in aviation, as the pump kept having issues while all six planes were trying to fill up. The FBO building was very nice and well air-conditioned. At this point the humidity was starting to become noticeable. We were now hitting mid day and it was clear, we were no longer in the west. After briefing the arrival into KOSH and getting some water and using the facilities, we jumped back into the planes for the last leg. Kent really had me on the stick this time for the take-off. Again that whole muscle memory of holding back on the stick was hard to overcome. Kent gently reminded me to push forward and let the tail come up and we were flying in no time.

The Crew In Flight
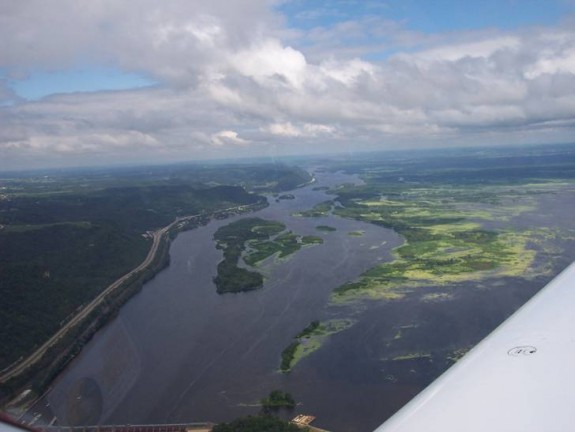
We took lead again. It was decided since Kent had flown to KOSH several times before, that he would take lead and bring us all in. We stayed a bit lower as a cloud layer was above. Minnesota and Wisconsin are much greener than South Dakota. We dodged radio towers and windmill farms as we chugged along. We did have some patches of rain that cleaned a few bugs off, but other than that…it was a nice scenic flight. We crossed the Great Mississippi River at LaCrosse MN. I had forgotten how green the Mid West was. Staying low was nice, I liked the sense of speed it gave the flight.
KOSH is 333 nm from KLYV. With the tail wind, that put us about 2 hours until arrival. The time was close to entering what can aptly be described as “The Hornets Nest.” For those that have done it before, it seems they handle it like old hats. For newbies like me, it seems like orchestrated chaos. Basically the fun begins at the town of Ripon, WI. Prior to arriving at Ripon, I pulled out the NOTAM describing the procedure for arrivals so I could stay ahead of the tasks. Just before Ripon, I turned the controls back to Kent and began looking for the called out visual points. That is when it became clear, this approach was going to be fun.
We arrived at Ripon and found the requisite railroad tracks. At this point you are monitoring a frequency and acknowledging calls with wing rocks. We got slowed down to 90 KIAS and followed in behind a high wing. My head was on a swivel as airplanes were sneaking inside of the conga line and then realizing they were too close, exiting. Planes were starting to converge from all directions. Our flight of six were trying to stay in line together with our required 1/2 nm spacing and planes just appeared in between. Apparently, there are controllers that are sitting in a field with binoculars and a radio calling out planes as we entered the procedure. Occasionally, they would tell an offending plane to move out and start over. It gave the feeling of some level of order, but it felt much different.
So there we were, a flight of 6 RV’s aligned along the tracks heading for FISKE, a nav fix just outside KOSH Class D airspace. At this point you should be monitoring the Tower at KOSH and getting ready to enter the pattern to land. You still are only acknowledging calls from the controllers with wing rocks. They don’t have time to listen to your call backs. A basic controller instruction set goes something like “RV, red and white tail, rock your wings. Good, now make right close traffic RWY27, keep behind aircraft in front of you.” You simply do, not reply. Interestingly enough, we had planes trying to sneak in at FISKE. Tower would call them on it and tell them to get out and start at RIPON. It does not pay to cheat.
Now, we were in the pattern and getting ready to land. You would think at this point the end is near…Oh No. As we were getting ready to get the call for cleared to land, something happened on the runway. The controllers called it an “incident” yet from my vantage point, I could not see anything. The call was simply “All aircraft in the pattern for RWY27, go around.” So we did. I think we had 10 airplanes at least in the pattern at this point with others still trying to enter from FISKE or sneaking elsewhere. The concept of following the guy in front appeared to be a suggestion to some pilots as they would turn tighter patterns than others and the line would become a mess.
We lined up again and settled in for another attempt at landing. As we got our second clearance to land, someone did not make his assigned spot and the call came again, “All aircraft in the pattern for RWY27, go around.” Around we went. More airplanes entered the pattern at this point. We were really stacking up. I was calling out planes to Kent left and right, up and down. I could not believe what I was seeing. Kent meanwhile was cool and calm…flying like a pro. He seemed like it was all normal…I think. Let’s see if 3rd time really is a charm. We lined up behind a Cessna and made a little wider pattern to allow room for all the other planes that had snuck in. At this point the flight of six RV’s was just a bunch of RV’s blended in with the rest. We were cleared to land…again.
Now here is the real beauty of KOSH arrivals. They land 3 planes at once…on the same runway! They have painted large dots on the surface and as they clear you to land, they call your landing spot. Talk about pressure. Here you have 3 planes descending at the same time for the same runway cleared to land at the same time with enough separation to let you roll out and clear the runway at nearly the same time. Say WHAT? You spend most of your flying time waiting for runways to clear before you are cleared and they are clearing 3 at time…wow! We got our call….again…”RV, red and white tail, cleared to land on the numbers!” The Cessna ahead was cleared for the spot ahead of us. Well, here we go. Kent got settled in on final nice and stable. We kept the speed on target and watched the Cessna ahead. Cessna appeared to be lower and not heading for his assigned dot. “Oh no…are we going to have to go around again?” Cessna get the call to continue to his spot and then land but does not quite make it. At this point Kent is nearly about to flare right over the numbers. A go around at this point would be bad, but we may have too. Fortunately the Cessna kept his roll out speed up and we were able to get on the ground and off the runway in good time for the folks behind.
We had arrived. Kent popped the canopy open and immediately it was clear, it was hot and it was VERY humid. Welcome to Oshkosh. We pulled out our “HBC” sign and the flag men started to direct us to Home Built Camping. We taxied for what felt like 20 minutes and finally got to home for the next week. Eventually all the other guys in our flight made it too. We shut down, hopped out, and stretched. Immediately I was geeking out. Look at all these RV’s. And we were early! That was the way to arrive at Airventure 2012.

Having a Great Time
As you can see above, this was home for the week. First things first, we tied N216KW down. Remember how we had to ship our gear? Well, Kent and I had to trek across the airport grounds to the location where the shipped goods were stored and waiting for us. Apparently, we made it just in time as the gal guarding the boxes said they closed at 1700 hours. It was 1705. We were sure it was 1730 when they closed up, but no matter, we got our gear and hauled it back. It did not seem like a long walk to get there, but the walk back was sure long. Once we hit our site again we set up camp. About this time a RV-9a out of Florida, flown by a former Utah resident showed up. Steve was planning on getting there before us and picking up our stuff. Thankfully we got there first or we would have had to snuggle with him for the night until we could get our own. 😉 He got lucky. Once all the guys got settled, we headed out for dinner. Time to sit back, relax and get ready for the weeks adventure.

The Famous Brown Arch Photo
I did not take too many pictures this trip. I suppose I could have, but I was just too busy seeing the show. Below is the list of highlights I found interesting from the show.
- Vendor Displays
- Garmin (G3X, GNS 750, GNS 650)
- Stein Air (All the pretty panels)
- Advance Flight Systems (AFS5600)
- TruTrak (Auto Pilots)
- AeroLeds (Lights)
- Vertical Power (VX-Pro)
- Aerosport Products (Carbon Panels)
- Lycoming (IO-390)
- ECI (Engines)
- EMAG (Electronic Ignitions)
- Trio (Autopilots)
- Beechcraft (Had to get a shirt)
- Vans (RV-14)
- AnywhereMap (Flight software for Android)
- Click Bond (Nifty way to install fasteners)
- Forums
- Mountain Flying
- Rod Machado
- Proper Leaning
- Meeting people I have chatted with on Vans Air Force, especially Paul Dye.
- All the static planes on display I could see.
- The Museum
- The Weather
- My blistered feet
- My terrible allergies
Needless to say, it would be hard to summarize all the things I took in at the show, but all of it was great. I snagged some freebies. Chatted with some folks about products I wanted to see and possibly put in my plane someday, and watched some good airshow performances. There was simply too much to take in all at once, I was glad we had a week to get through it all.

Micro Bursts will Flip You (borrowed from Rob Reece)
For the most part, the weather was HOT and HUMID. There was some reprieve for a day from the heat, but the muggy persisted. We had one day where it rained pretty heavily. That same day a micro burst of wind made a mess of the forum pavilions and tossed a plane on top of another. As you can see above, the planes in question are not your average aircraft. One was a replica of a German Fokker and the other was a 2/3 scale Mustang that was a real jewel. Once they separated the planes, the Mustang actually fared OK compared to the Fokker. Needless to say, good tie-downs in the grass are a must. The same micro burst tore tents to shreds and had them all over camp. Kent’s tent had a broken tent pole that tore through his rain fly. We were able to repair the pole and tape up the fly, but he still had a lot of water in the tent. He was able to dry out and even his soaked camera began working again. There were plenty others heading to Target to get a new tent. It also rained pretty good Wednesday and Thursday nights. I think Kent was found in a different location in his tent then where he started. Thanks to his air mattress, he was able to float it out.

The View in the Early AM. Look at All Those Planes
Here is a shot Wednesday morning after the storm had passed. Sunrise was pretty. The planes were prettier. You can also see my little 2 man tent I took. For $35.00, this little tent was a great performer. While other tents were getting tossed, bent, torn, etc. this little tent just sat there and took the beating. I was dry and sturdy all week.
By Friday, we had seen most of the show, seen all the vendors, gone to most of the sights, so Kent and I decided we should head home and be hero’s for our wives. We woke up early, packed up camp, ran our now soggy boxes over to FedEx to ship, and packed into the RV.
Kent however tossed a cookie my way and as we were getting ready to jump in said, “You take left seat.” Really?!? Don’t have to tell me twice! We jumped, started up and got in line with the other departures heading out. They lined us up in a staggered formation on RWY36. Four aircraft at a time in a box-like setup. Once ready, the controllers, sitting right on the side of the runway call out the plane and release you for departure. Seemed like a pretty slick setup all in all.
I put in the power, waited some, then gave the stick a little nose down to raise the tail and we rolled right off. We then made a right turn out and reversed course and once clear of the airspace, pointed westward.
Homeward Bound
We decided to simply reverse our course that got us to KOSH with the same fuel stops. I could have been told to go anywhere, I was flying Kent’s RV left seat!
Kent claims this was the runoff from his tent after Thursday
We crossed the Mississippi at La Crosse, WI again and Kent snapped the above photo. We simply do not see this kind of water in Utah. The Tower Controller both on our way there and returning, was a real nice guy.

Ahhh…Left Seat in an RV
We had to stay low again with the cloud deck, and the turbulence was a little more on the way home, but really, I did not notice it much, I was having fun. Above you see the “RV Grin” that so commonly happens when you fly an RV Airplane. I have heard about it, almost as if it where mythical, but Kent snapped this picture somewhere over Minnesota to prove it does in fact exist. Notice all the green outside? Beautiful.
We stopped again for fuel in Luverne, MN (KLYV). This was my first official tail dragger landing. I got it stable and Kent talked me through it (He’s a darn good CFI BTW). I felt I did a decent job getting it on the ground. We hopped out and checked the fuel price again. They must have caught on to the low price, because it was much higher now. As we walked into the FBO to take a stretch/pee break, the Airport Manager met us and informed us that they were serving a BBQ sandwich lunch and to help ourselves. Apparently they do this for KOSH attendees as it must be a popular stop along the way. We told them that we were leaving rather than going, but no matter, we got a nice free lunch. Nice people, nice airport. After the break, I looked over at Kent to see if I still had left seat privileges. To my delight, he climbed into the right seat so I took my place in the left again. I did another decent job of getting us off the ground and pointed west once more.
It was becoming clear we were heading home about half way to Torrington, WY. The landscape was changing from a lush green to a lovely (yah right) brown. Southern SD/Northern NE, and WY are pretty…bleh. We stopped, as we did on the trip out, in Torrington, WY. My landing there was not as clean as the previous. I let the plane get a little ahead of me and Kent stepped in and calmed it down. In then end, I carried a little too much speed. We’ll chalk it up to learning. He looked the plane over as we topped off and said all was well. Thinking I had lost my left seat privileges for sure, I again waited to see where Kent was heading as we strapped in. Looks like Kent is also a generous CFI and he again jumped into the right seat. One more leg to go and we’d be back in Utah.
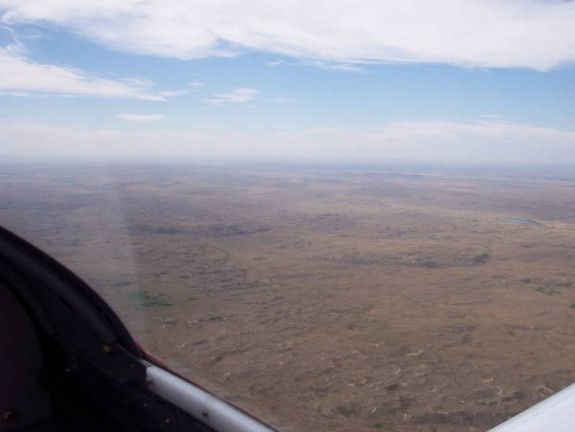
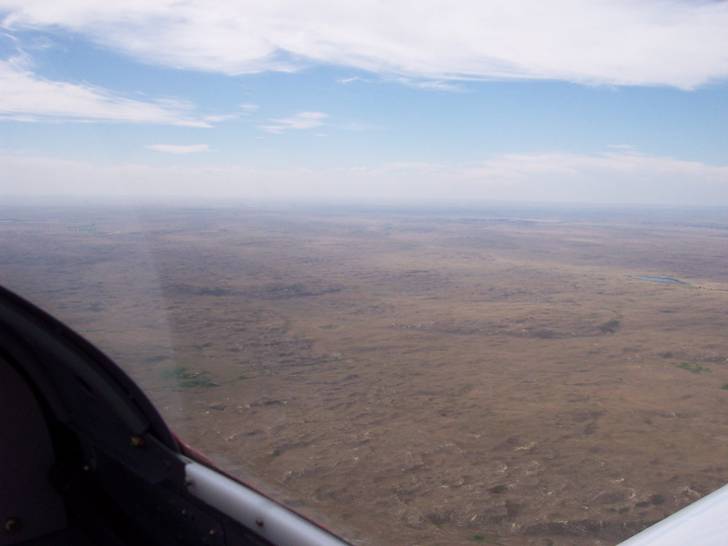
Dry…and Barren
Kent snapped this photo shortly after we departed. As you can see, we were clearly getting close to home. I could not believe the vast open area we were flying over. Then once I realized what it looked like, my disbelief changed to understanding. Who in their right mind would want to live out here. Occasionally you could see a rancher or two, maybe a head of cattle, but that was all. I spent most of this final leg trying to assess the last landing in WY. I was determined to do better upon arriving in Utah.
Near Rock Springs, we hit some weather. Rain was falling and there were a couple of cells around. Thank goodness Kent pays for the XM weather for his Garmin 496. I also own one, but have not used the XM Weather feature. It is very nice and a great tool for assessing the situation. We were able to find a path that kept us out of the big stuff with little deviation from our course. The turbulence was pretty good however and both of us had to tighten our harnesses. We hit a few rain showers, but nothing major.
Next up was the Wasatch Mountains and on to home. Having spent two hours analyzing the last landing, I had a plan to grease this bird onto the runway at KOGD. We took a route that nearly put us on a straight in for RWY21. Fortunately for me, that is what we got. I got it stable, on glide path, slowed down, flaps in, and wind correction set up. There was a slight cross wind, but nothing drastic. I was set to cap this trip off with a high note….
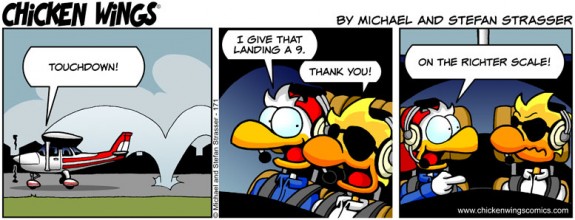
It was a great 3rd tail wheel landing and Kent confirmed it. 🙂
Airventure 2012 was a great trip. I can’t say enough about Kent’s generosity for offering to take a newbie along, let him hang out with his group of friends, fly his bird, and instruct the whole time flying. It was certainly a trip I would love to repeat…and repeat soon. It certainly was a shot in the arm for me to get more done on my build. Kent and I flying to Airventure in formation with the other guys is now on the list of to do’s once my RV is done.
Thanks Kent!

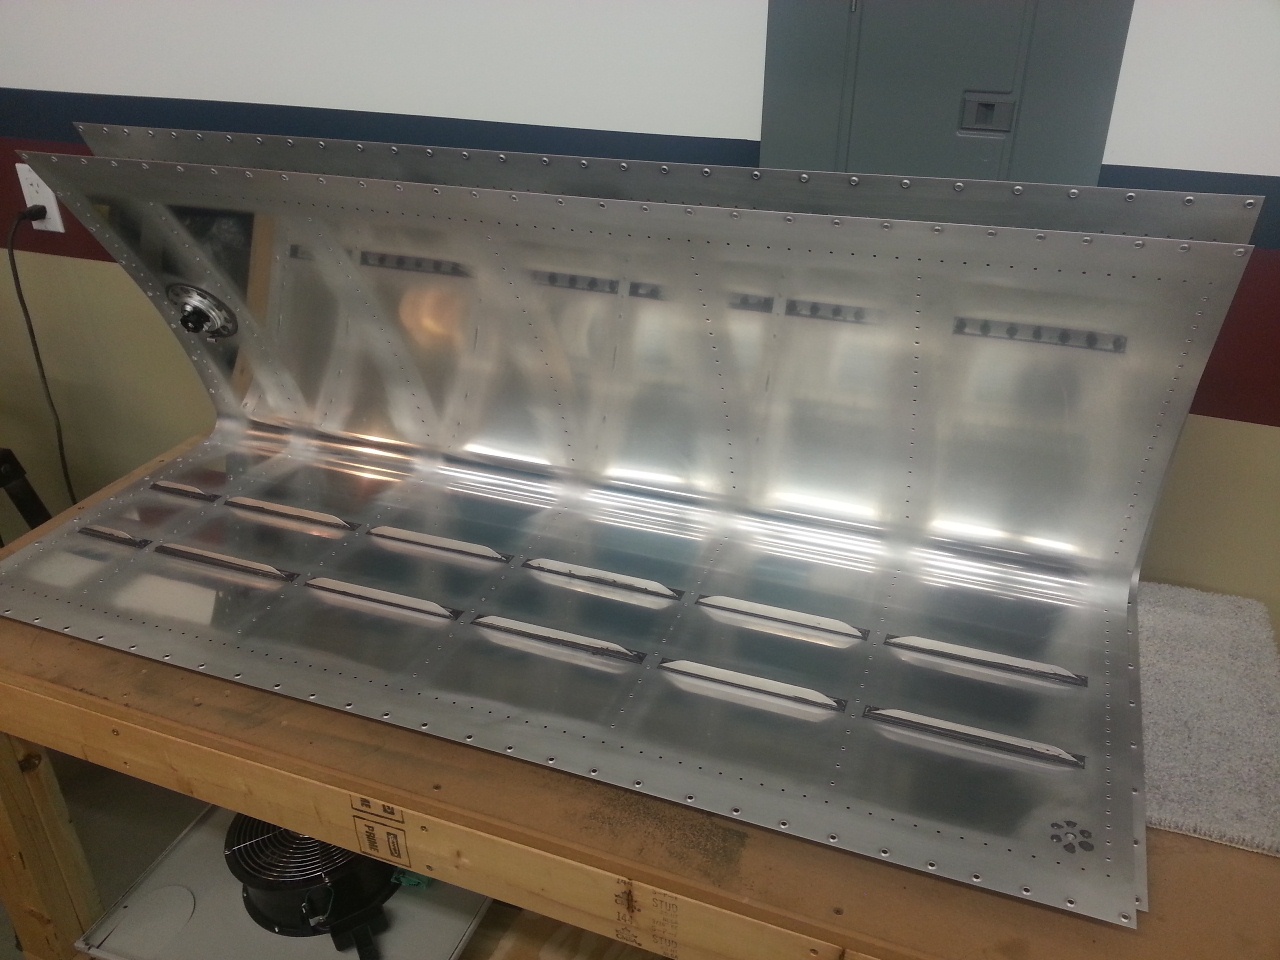


 Work Continues")


