NAS1097 or not to NAS1097…There is no Question
For some time, I knew the time was coming that I would need to install some nut plates to hold some screws that hold down things like access plates, fairings, etc. One of these places appears on the elevators. There is a doubler on the left elevator that allows for access to the trim actuator, be it electric (what I am doing), or manual. Basically, the doubler creates a flange inside the elevator skin that an access plate then screws into closing up the hole flush with the elevator skin. You find these access holes all over planes so you can service the aircraft in the long term. The trick is, that on a plane where flush rivets are used, you want your access plates to also use flush type fasteners. This requires dimpling the access cover and using flat head screws. Nut plates can be used with either as they are designed with a recess to allow for a dimpled doubler or can simply be attached to a flat skin to provide a nut on the backside. In all cases however, the fasteners that attach the nut plate to the airframe must be flush so that the access panel can lay flat against the doubler.
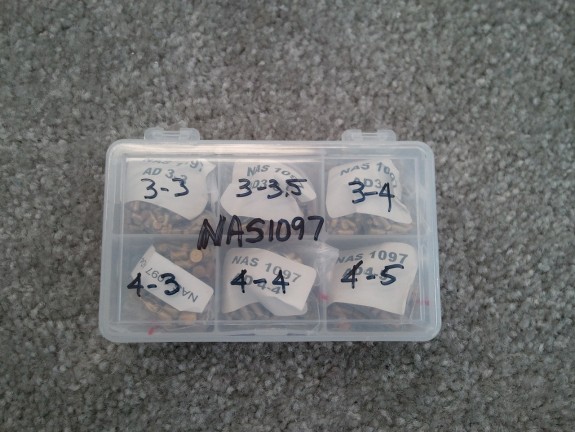
One of the things that I read up on was how people install their nut plates. There are two methods that work. One is to dimple the skin and the nut plate to accept a standard AN426 rivet. The risk here is that you can really mangle the ear of the nut plate as there really is not much material on them to dimple. The other is using NAS1097 rivets. These have the same shank size as their standard AN426 counterparts, but they have a shallower head. Since my local supplier required a 1/4 lb minimum purchase of each size at nearly $90.00, I found a kit by Avery Tools that met my needs. It has 2 different diameters with 3 lengths at 3/4 oz of each. You can buy many of these kits for the $90.00 required for one size. I think it will hold me over for many a nut plate.
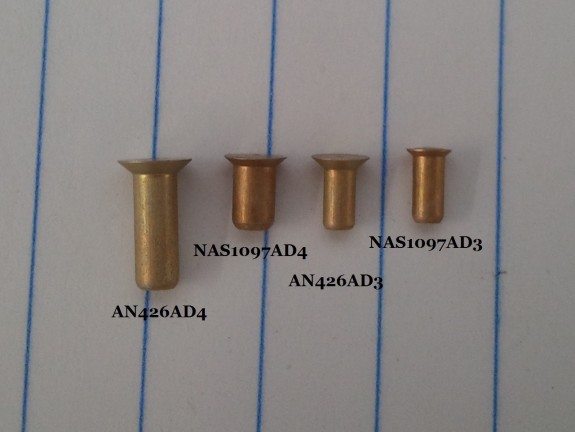
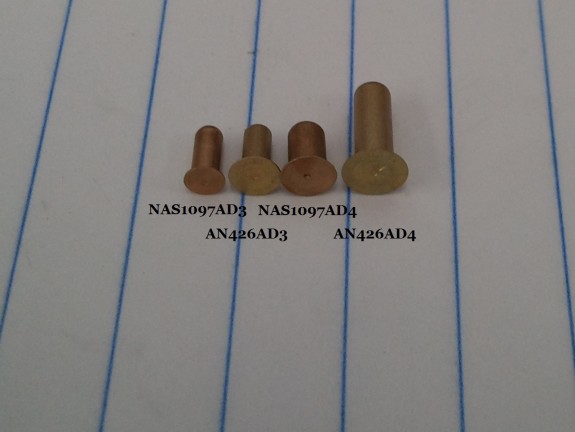
What is the advantage then? Well, instead of having to dimple the skin and the nut plate, you simply can countersink the skin very lightly and then insert the rivet in the hole and nut plate ear, and smash away. Since the rivets on the ears are simply keeping the nut plate attached to the assembly and keeping the plate from turning when a screw is inserted, the fastener is really only working in shear, not tension. As you can see from the picture above, the shanks of the rivets are the same across the diameters. You can also see that the shoulder of the rivet head is much more shallow. Where countersinking may cause a knife edge with a standard rivet (countersink goes to the backside of the sheet), you can countersink thinner material and still get a flush head. Again, the force is in shear when you are screwing in a fastener to the nut plate, so the shank is the more critical portion of the rivet.
But wait…there is more to these. Say you are doing an assembly that requires 3/32″ (AD3) rivets and you bugger up the hole they go in really bad? In that case, you still have some saving grace. Notice in the above picture, that the head of the NAS1097AD4 is the same diameter as the AN426AD3! You can replace the AD3 rivet that is now undersized with NAS1097AD4 and from the top, you would never know it was different. Now…you cannot do this to all of them in a row mind you…but 1 in 10, you will be OK. That is why these rivets are referred to as “Oops” or “Fixit” rivets. As it turns out, I had exactly that happen to me as I was back riveting one of the elevator stiffeners. The AD3 did not set very well and when I drilled out the rivet to replace it, I noticed that the hole was now too large for a new AD3 but I had good edge distance, so I opened it up to a #30 and slipped in a NAS1097AD4. I am not telling where and you will never know once the elevator is closed up!
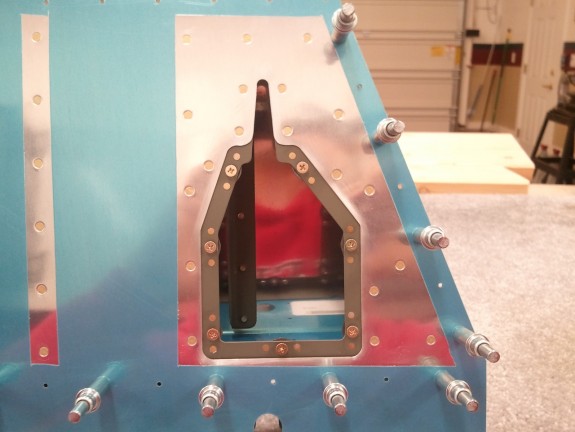
Here is the trim access hole with the doubler in place. You can see I have inserted the screws into the nut plates center. The NAS1097AD3’s are on either side of the screws. You can also see the difference in head diameter with the standard AN426 rivets that hold the doubler to the skin. They have the exact same size shank. A simple turn of the debur tool can produce a decent countersink, but I chose to use another little jewel I picked up with the rivet kit.
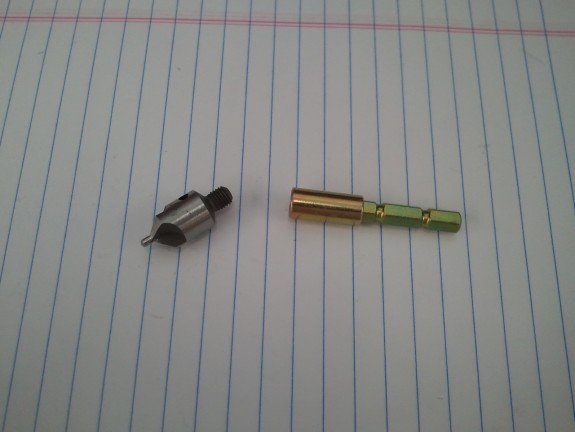
Basically, it is a chucking adapter with a threaded female side so I can thread in my countersink/debur bit into it and chuck it in a drill. This allowed me to more accurately and lightly countersink the doubler for the smaller head. Once all the countersinks were done, I hit the doubler with a shot of primer and let it dry. Once dry, I back riveted the doubler to the skin and then went back to prepping the stiffeners and skins for primer and back riveting.

