Trailing Edge Glue Up and Set
After a record breaking weekend of flying the “Spam Can” Sundowner for my Birthday, the family needed to recover. I was not looking forward to gluing the trailing edge together using the Flamemaster sealant I was able to procure locally. I have heard it is nasty stuff and hard to work with. The time came however and the night’s schedule was open so I figured, what the heck…time to get it over with.
I had already taken the time earlier to make up two pieces of aluminum angle to support the trailing edge during glue up and cure. The plans call for only one, but I chose to double up so that I could cleco from both sides of the rudder and have something to grab into. Additionally, the two stiffeners insure that the clamping force is evenly distributed to both sides and both skins.
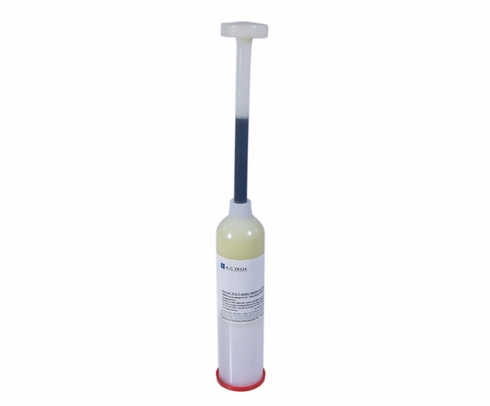
So now the moment arrived to get the sealant mixed and applied. I followed the instructions per the package and turned the white tube black. I do not have a dispensing gun yet so I simply took a piece of 1/2″ PVC pipe to push the plunger from the back and squeezed out enough on a paper plate. I then used a Popsicle stick to spread a thin even coat on both sides of the trailing edge AEX wedge. Be sure to wear some form of disposable glove when working with this stuff…it is sticky and very messy. Also make sure to remember which way the AEX belongs in between the skins. You do not want to have to take the AEX out and flip it after this stuff is on it.
Once the AEX was smothered and back in between the skins, it is time to take some MEK and wipe down the globs that may have squeezed out from the rivet holes and the trailing edge of the skins. I additionally took the tail of a #40 bit and pushed it through each hole so I could wipe it from the other side and free up the hole for clecos and eventually rivets with little mess.
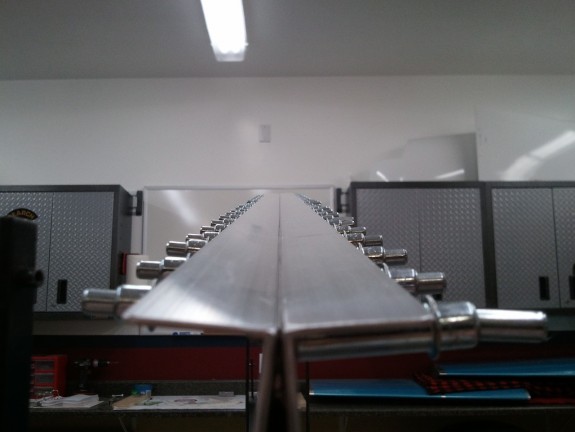
I then reinstalled the aluminum angle on both sides of the trailing edge and clecod every other hole starting from the middle and worked ever other side of the middle out. I figured this would line everything up and keep it straight as it was squeezing the goo out. I then flipped the rudder over and clecod the other side the same way. I felt that this was a good way of truly getting the same clamping force on both sides. It appears to work fine. I then hit the trailing edge with a MEK soaked rag to clean up the little that was collecting between my two aluminum angles. As the picture above shows…it is pretty darn straight. Excellent!
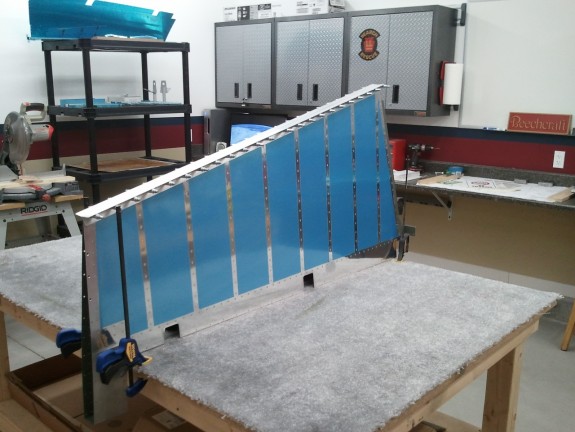
Once the assembly was wiped and clecod, I needed to set it aside so that it could cure. I noticed when assembling the rudder for riveting, that once the counter balance was installed, the rudder would get a slight twist in it sitting on the bench. I shimmed the counter balance when doing the perimeter to minimize the twist and it seemed to work. I also saw the slight twist when I slid the gooped up AEX. To eliminate the twist all together while the rudder was curing, I decided to mount the rudder vertically on the bench. so that the counter balance was pointed down and thus removing the problem. Here you can see the setup. I simply put clamps on either side in case it decided it wanted to fall. The carpet did great at allowing the non bent leading edge of the skins to sink into the carpet while the bent edge stayed afloat on the surface. They sat pretty level and allowed the rudder to sit vertical on the bench at rest. Here the rudder will sit for a couple of days curing. Once cured, I will then set the “acorns in the dimples.”


