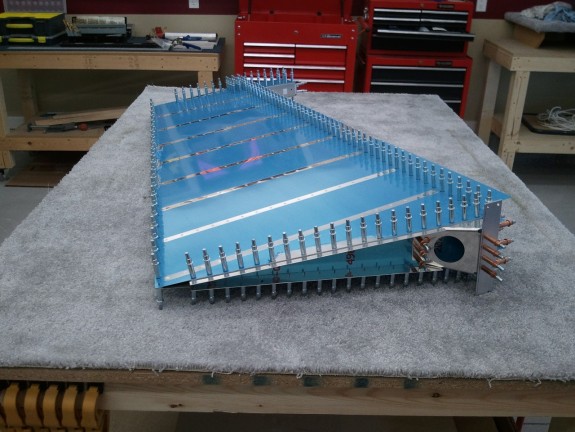
Weekend Adventures in a Baby Beech…Virtual Log!

September 29th, 2011 No comments

Oh the places a Baby Beech will take you!

This last weekend was my birthday. It was also my wife’s 15 year High School Reunion in Southern Utah (near KDXZ). Most can imagine where a guy would rather be on his birthday. (Some examples include; Dentist for a root canal, Proctologist, beauty salon getting leg hair waxed off….you get the idea) She really wanted to go (dang cheerleaders) so I proposed a compromise. “Let’s Fly!” She agreed.

The weather was forecasted to be severe clear with a large chance of sun. Temperatures were to top off at 85 degrees in SLC so that put the DA at about 6500+ MSL. Not bad, but something to consider when potentially loading a plane to gross and heading off for a cross country flight. I spent the next couple of days planning the trip, doing performance calculations, getting W&B worked out, and watching the extended forecasts.

Turns out, it was going to be a perfect weekend to fly. We have made the trip to Southern Utah once before as a whole family, but everyone was a little smaller then. My kids are growing up too fast. Needless to say, the math all worked out and as long as we did not pack the kitchen sink, we’d be OK.

Seeing that it was my birthday after all, my generous mother-in-law offered to watch the kids for the night once we arrived so my lovely bride and I could get away to a B&B or something. That again got my wheels a spinning in my head. We looked at options locally down south but all were pricey and not easy to get in short notice. Then it hit me….”Let’s go to Vegas, Baby!” Again, she agreed!

I had heard that North Las Vegas can present a challenge getting in an out. I like a good challenge, and I really like showing my wife how fun interacting with ATC can be. So KVGT it was.

The day of the trip arrived. I decided to take the day off work. As such, I was asked to fly a CAP mission flight that morning. The kids were not out of school until at least 1400L so heck, why not. By noon I had logged another 3.9 hours in a CAP G1000 Turbo 182. Spoiled I know, but I rarely argue when the US tax payers are paying for my flight time. On my way back home, I stopped off at my home base and pre-flighted the Sundowner, got all my charts in order, plugged in all the headsets, and generally got the bird ready to show and go.

Got home, loaded the kids and wife into the van, and headed off back to the airport. Shoe horned all them into the Sundowner and started the engine. At this point, we were at the height of the day as far as temps and density altitude. I quickly checked my takeoff and climb numbers to insure we were good to go. With the math giving a green light, we taxied on to Runway 34 and throttled up.

For those of us that operate at higher altitude airports, we are used to reduced performance from the get go. I chuckle at times when other owners of my type of aircraft will get on the forums and comment how they had to get to 4500 feet to get cool temps and smoother air. U42 is at 4620 MSL! 🙂 Climbs of 250 fpm at gross are a godsend here. I love it when I can get over 500 fpm solo. You guys down near sea level have it good.

The takeoff was as expected, slow and the climb was shallow. We got to pattern altitude about mid field on the downwind. The stall horn chirped a little on the upwind climb. Needless to say, I was watching the airspeed like a hawk. I have been using the mousevator flap technique for some time and it made a ton of difference with this departure. Once established on the departure to the south, the Sundowner climbed OK to our cruise altitude of 8500 MSL after we dodged the SLC Class B and a few Restricted Airspace areas over Camp Williams (you don’t want to be shot at by a tank do you?).

Interestingly enough, I had an Piper Archer from a local college flight school just ahead and below us. Either he was throttled back a little, or I was going faster with a tail wind at my altitude, but we kept pace with each for half of my flight until he landed. I was pleased with my little bird as we chatted back and forth a bit on the radio. The other pilot was clearly a CFI in the right seat.

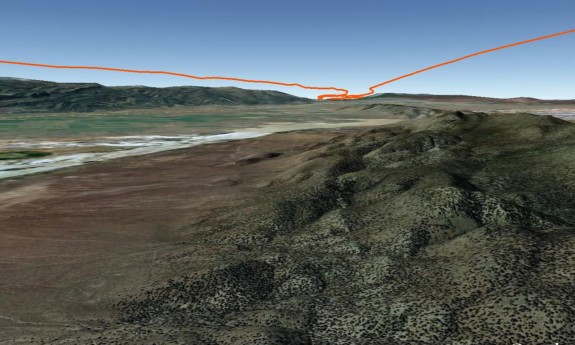
GPSMAP 496 Resolution shows turbulence!

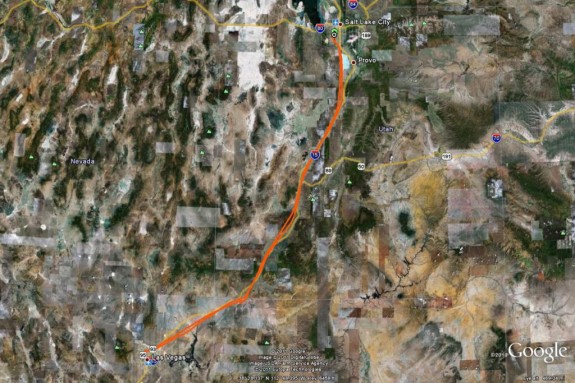
One of the items I love to fly with is my Garmin 496. The refresh rate and the information it provides are simply excellent. I love to download my tracks when I make long flights like this to see how the plane behaved and the route I took and the telemetry it shows. Here you can see an overlay of the route at altitude. The left track is my track down south and the right is the return leg back home. Notice anything? The route down was pretty bumpy. While it is typical this time of year to get turbulence, this particular afternoon posed a bit of work for me. I love how the recording resolution of the 496 actually captures the subtle changes in altitude and directions. I was constantly having to adjust the altitude and power with all the thermal activity. At some points I was getting 1000 fpm swings.

I apologized to my wife for all the bumps. The kids were clueless as they had long passed out. She told me she prefers the turbulence at times as it makes the ride fun. If she knew how much more work it was, she may change her mind. I love that she loves to fly with me. I cannot wait when the RV is done and we can travel faster and higher and farther together. The pattern of bumps continued the entire 2 hours of this leg.

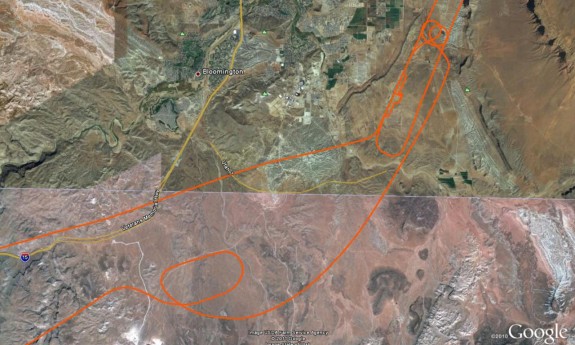
There really is an airport there!

We kept chugging along to KDXZ. As you can see from the shot above, KDXZ is too new for even Google Earth. It was finished late last year and replaced the long time operating KSGU airport. This was the first time I had made it down both personally and with CAP, so I was anxious to try out this new facility. The approach was pretty straight forward. I began a decent at KCDC and called straight in runway 19. At this point I was 20 gallons lighter and I had a perfect touchdown. The surface of KDXZ is VERY smooth. I had to check to see if we had landed because the roll out was sooo nice. The fact I was no longer getting bumped around actually should have clued me in we were down. 🙂

We had arrived. The FBO came out to greet us and asked if we needed anything. I asked for fuel to the slots again and if he had internet capability. The FBO is sooo new, the building really was a shell still in process. The bathroom at least had a working sink and toilet. The tile for the pilot/crew shower was still being installed. Looks like it will be a great facility when complete.

My In-Laws arrived at 1800L and we discussed options again. At this point, I had not booked our room in Vegas just in case our plans may change or something came up. It was then decided that my wife and I would ditch the kids and continue on to KVGT. I asked the FBO if I could use his computer and then checked Hotwire for a room in Vegas. They came back with a couple of cheap 4 star rooms downtown so I snagged one. If you don’t know how Hotwire runs their really good deals, you do not know the hotel until after you book and pay. So to this point I was rolling the dice. Turns out, our room was at the Golden Nugget and we were confirmed…so time to get going.

We said goodbye to the kids, thanked the in-laws for taking them, and piled back in to the Sundowner for 1 more hour of fun.

A friend of mine once worked for Vision Airlines (based at KVGT) helped me get a plan of action together to deal with the LAS Class Bravo and get into KVGT. He said to get a TAC for LAS and once off KDXZ, contact LA Center for Flight Following. They would then hand me off and then follow directions to the letter and I should be OK.

Plan in hand, TAC in hand, wife strapped in, we took runway 19 at KDXZ for departure at about 1830L. With 1 hour in flight, we should be at the hotel near 1900L with the time change. Once off KDXZ, I called LA Center. The controller was really nice and I declared my intentions. He gave me a squawk and off we headed VFR and own navigation to KVGT.

As we got over Mesquite NV, I briefed my wife on the fact that LAS Class Bravo will be busier than anything she and I had experienced in SLC Class Bravo and the need for a sterile cockpit when LA Center hands us off to LAS Approach. She understood and we prepped for the decent from 8500 in. Up to this point, LA Center was pretty quiet. It turned out to be a foreshadow of things to come.

As I was 45 miles out of KLAS, LA Center handed me off to Nellis Approach and wished us a good night. I thanked him for the help and switched to Nellis. Upon initial contact, Nellis Approach gave me the following; “Sundowner 76R, cleared into Class Bravo, direct North Las Vegas, own nav, maintain VFR, decent at pilot discretion.” I was 45 nm out and he gave me a path right to KVGT. I could not believe my ears. I figured it would change as I got closer. After all, it was still only 1815L now that I had made the time change. I was almost a little bummed as I wanted a challenge.

We continued inbound and began a nice shallow decent. I stayed under Class Bravo until I reached the segment that went to the ground. I was cleared so I went. I told my wife…”ok, now it should get busy.” I kept on inbound until I was abeam Nellis on the South end when Nellis called and said; “Sundowner 76R, contact North Las Vegas Tower, goodnight.” Between my initial clearance and instructions to now, there were NO other calls to me or anyone else. I could not believe it. Am I really going to get into KVGT this easy?

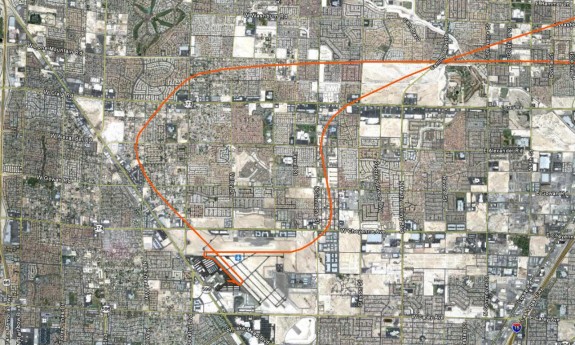
Land and Depart from KVGT

I read back my instructions and switched over to KVGT Tower. A nice happy sounding controller acknowledged and gave me one traffic advisory for a student doing T&G’s and then said, “Sundowner 76R, make left base, cleared to land runway 12R.” Did I really get cleared to land? Is that really it? Did Vegas shut down? Is there something wrong? After a couple more traffic advisories, I was on final with 12R in sight. Had a great flare, touch down, and roll-out! Where are my check pilots when I need them. 🙂

Tower advise to contact ground off runway and have a nice night. I looked at my wife and said…I have had more trouble getting on the ground at U42, and uncontrolled airport, than this was. She was surprised too. We taxied up and followed the “follow me” van and parked. Nice ramp worker got out, grabbed our bags, helped me tie down and put our cover on, and hauled us off to the terminal. He called dispatch to get us a cab.

After check in at the desk was complete, we headed out front and there was our cab. We headed into town, got checked in, got our room, liked it, then headed out for dinner. Vegas is not exactly our kind of town. In fact, the primary reason for us going there was the challenge (or perceived) of getting into the area via a general aviation plane, and to just be together and have a break from the kids. Being in Vegas was not a high priority. She and I feel that if you are somewhere you cannot take your kids, then you should not be there. Vegas is not for the kids. None the less, the food is good and the room was nice, so we focused on those aspects. We had a good Italian dinner at the Grotto in the Nugget and then walked around a bit. That was enough for both of us. After all, I had already logged 7.2 for the day in 2 separate planes at 4 different airports and travel to/over 4 separate states. That was a great birthday present.

We called it a night and headed back to the room. Golden Nugget as really done a nice job renovating the hotel. Nice place…especially for the rate we got it for.

After a restful night ;-), my wife and I packed up and headed down for breakfast. We found a nice restaurant and sat there smiling as we watch the morning in Vegas start. Needless to say…it is REALLY quiet in the AM. It was actually nice.

Caught a cab and headed back to KVGT. I thought again, maybe now we can get some ATC busy action. No such luck.

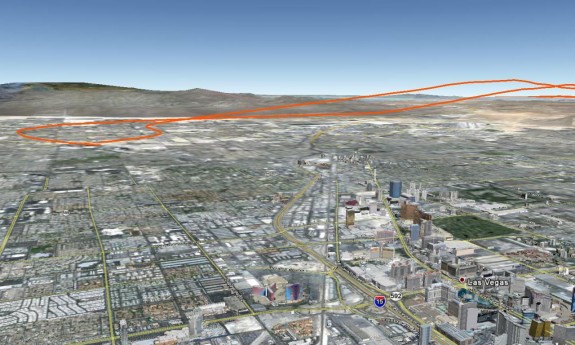
In-N-Out of Vegas

Once pre-flighted and running ground gave me a heading and a frequency to call when established. Run up complete, call made to tower, and we were cleared for departure runway 7. I turned to 340 when off and contacted Nellis Approach. His response was; “Cleared into Class Bravo, direct KDXZ, own nav, altitude at pilots discretion, maintain VFR.” That was it until I was cut loose outside of Bravo.

I could not believe it. Being that it was morning and temps were cooler and it was just the 2 of us, the Sundowner climbed like a champ. Being at 2200 MSL did not hurt either. We were at 9500 MSL by the outer limit of the Class Bravo and heading NE.

The air was smooth as glass and the visibility was unlimited. Sun was just above the mountains and we had a great view of Lake Mead. Stupid me forgot to get out the camera. Did not matter, I was flying my plane with the love of my life next to me holding my hand. We had a little head wind slowing us down, but I had all morning to burn as the reunion was not until later that day. I love to fly, but I really love to fly with my wife.

I declined flight following on this leg. I wanted to just enjoy the view and enjoy chatting with my wife. The leg is relatively short and the traffic apparently was light. Was a good choice.

As we began our decent into the KDXZ area, a King Air called in and stated that he was on the RNAV approach for Runway 1. He called out his DME and we were at the time, about matched in distance and on converging courses. I opted to let him continue in on the approach and I simply executed a 360 degree turn to give him room. He was spinning 2 engines and I only had one and lots of time. I then resumed the inbound course as he executed a circle to land for a T&G on runway 19. I watched as he did his landing and climb-out and off he went. He thanked me for my help and was gone.

Now it was my turn. I called established on downwind and noticed that a local freight carrier had taxied to and was holding short of runway 19. I pressed on thinking he was waiting for me to land and would then go. WRONG!!!!

As I called my base turn, he began to roll out on the runway….I thought…”seriously, is he going now? I just called Base genius!” I then decided, I do not want to be anywhere near this guy when he departs…so I will do a base 360 degree turn to the outside. Not exactly standard, but I did not want to do a go around and have him climb right into me even if I side stepped the runway. I advised that I was doing my 360 and got no reply from him. After coming around to complete my base, I looked over and HE WAS STILL ON THE THRESHOLD!!! So I called another 360 at which point he simply said “OK” and then throttled up and went along his merry way.

After the second turn around, I saw him climbing out and I said to myself, “Let’s get down and off the runway before he realizes he left his brain on the ground and comes back for it!” I came in and made another sweet soft landing and taxied off. Shortly after I pulled in, a nice guy in a REALLY nice Comanche 250 landed and taxied in. Turns out he was one of the original creators of SkyWest Airlines. Nice guy. He and I got to talking about the tool that just took off as he heard all the traffic and he said, you did the right thing…stayed alert and out of the way since he and I were the only ones that were clearly paying attention.

The FBO guy came out and also said he did not know what the dudes issue was, but he felt that he was not all there either. Apparently he seemed off in the next dimension when he was prepping to leave. Both the FBO and I agreed that we would submit complaints to the Company advising that there was a near incursion by a clearly dysfunctional pilot within their ranks.

The rest of the day was pretty routine. In-laws picked us up, we reunited with our kids, went to the reunion, and ended up at the in-laws house. I advised them all we needed to get to bed early because I wanted to be wheels up no later than 0730 the next morning. They complied and we all went to sleep.

The next morning we arose to a perfectly clear, star filled sky with the hint of sunrise to the east. I saw a couple of shooting stars as we loaded all the family up. Then we drove for 20 minutes back to the new airport. For those familiar with KSGU, it was centrally located right in the middle of town on a mesa. It was a unique airport as the terrain fell off on both ends of the runway. If you missed it, it was a bad miss. It is a shame it had to go, but progress is progress.

The new airport is out in the middle of nowhere and the road to get to it is very long. You nearly have to go to Arizona and then back north to get there. Not as convenient, but the facility is very nice and will support future expansion. As a side note, one of our CAP Cessna 182’s was the first Piston Single to ever land on the new strip. Governors order.

We arrived, pre-flighted, checked the WX, packed in, and got going. The early AM departure was sooo much better for the climb and the smoothness. The FBO let my in-laws drive his golf cart to the edge of the taxi way to send us off. Nice guy.

As you can see in the second picture, the return trip was super smooth. Once I got to cruise and leaned out the engine and trimmed it, I think I touched the yoke maybe 4 times until decent. The rest was a simple rudder peddle press or two. All the kids and the wife were asleep and the traffic was super light. It was heaven on earth. I had the mountains to the right, the desert to the left and home ahead. This is peace.

Decent in was uneventful. Had to dodge a few local guys doing pattern work and then snuck in. Another sweet landing at the end of the trip capped it off. We taxied back and unloaded and waited for the fuel truck to arrive.

Always know where your Prop is!

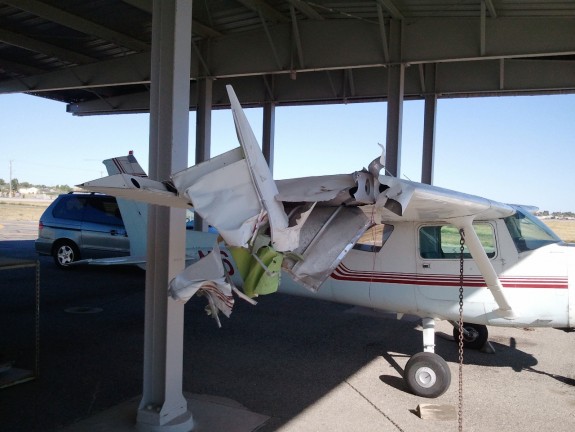
Once I unloaded and got everything ready to push back, I noticed a couple of guys looking at a hangar mate’s plane. It is an old Cessna 152 he uses for flight training. Apparently in runup before a flight, his wing met another planes propeller. Neither won the battle, but I think this poor old bird is done. The prop went right through the spar so a new wing will need to be located. I do not know the extent of the damage to the other planes prop/engine, but I imagine it will not be cheap. I wish them luck. It is a gnarly reminder to always be vigilant in all phases of aircraft operation.

We were fueled, pushed back, tied down, loaded into the minivan and headed for home. We had just enough time to get to church! Good thing, cause I had many things to be grateful for over the weekend and needed to focus on Him for a bit. After all, I did just have a great birthday weekend and logged 11.2 more hours!

 

Categories: Hangar Chat

Pop and Build On!
September 19th, 2011 No comments

Pop and Go!

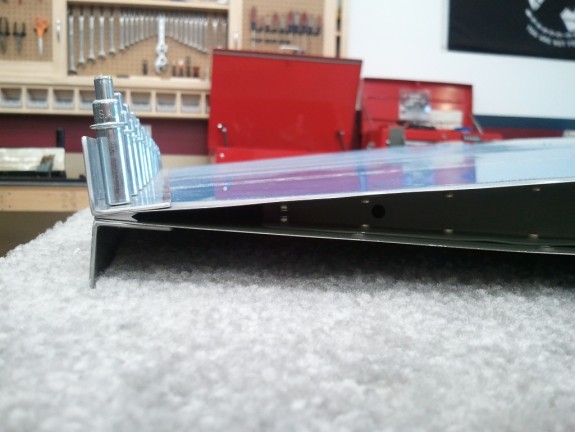
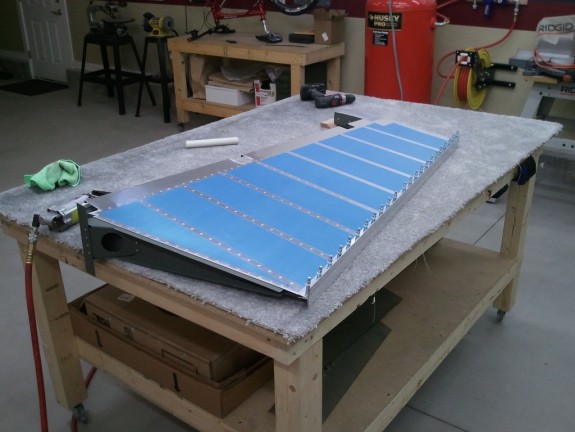
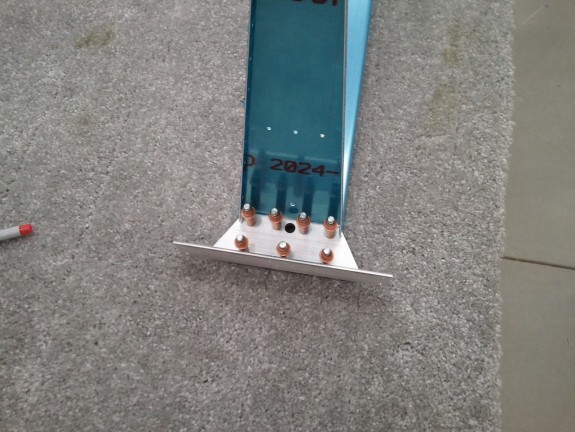
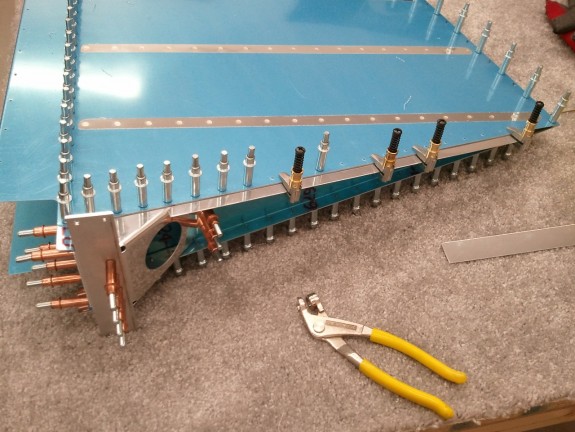
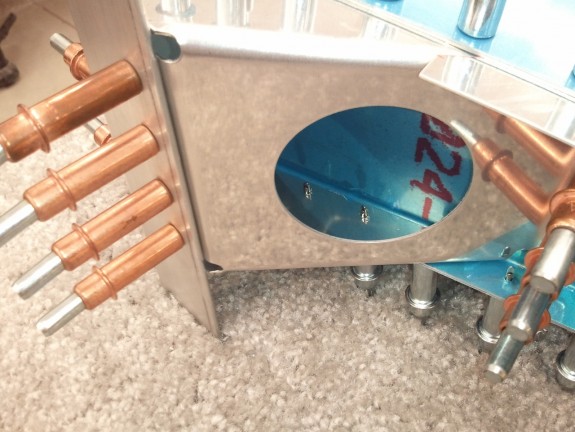
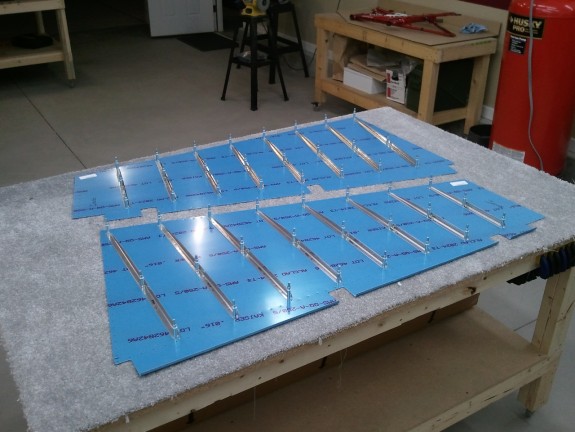
I have spent a good amount of time trying to figure out just how builders are getting the last 2 rivets in the upper rib of the Rudder set. I just do not see how it can be done. Sure there are techniques, but I have tried a few with little success. These little buggers are simply too tight to get at. I was pleased I was able to get to most with a squeezer and bucking bar…but it was time to admit defeat and take the safer and just as adequate route. Above you can see my work for the day.

I simply took a 7/16ths bit and opened up the holes in the last two dimples of the upper rib. The MK-319-BS blind rivets that Van’s state can be used here went in with no issues and look OK from the outside. A little filler at paint or even a small amount of JB Weld in the mandrel hole and shaved off and you would never know the difference. The biggest plus is that it is simply done and I did not risk mangling up the rudder trying to buck rivet solids in. At 200 mph and 15000 MSL…you’ll never know I cheated! 🙂

Now all that is remaining is the leading and trailing edges. Hope to get them done in the next week.

Categories: Rudder

Riveting as the Space Gets Sparse

September 15th, 2011 No comments

Almost Ready to Tackle the Trailing Edge

Today at work, the USPS Santa delivered a couple of new tools. I have been meaning to buy a no hole yoke for my squeezer and since the last rivets on the top and bottom ribs are really hard to get to the shop head…it was time to take the plunge. So I hurried home, took care of some “honey-do” items and then set up the new yoke on the squeezer and attempted to get the last of the rivets that I was not able to do during the last build session.

Turns out, I was able to get all the rivets on the lower rib with no issues. The yoke shines. I then got four of the six remaining on the upper rib. The last two are simply too tight. I tried the indirect riveting method as shown here:

My thin bucking bar is apparently too thin. It is 1/8″ plate steel and simply appears to bounce and take all the hits from the rivet gun and absorb them. It did not set the rivet well. I may see if I can get a 3/16″ piece of steel and see if that works. If it is still too tight, I may just give up on being a hero and use some CherryMax countersunk blind rivets and call it good. I hear there is no shame in admitting defeat in that area of the rudder! 😉 Either way, once these are set, it will be time to hit the trailing edge procedure and get on to the elevators.

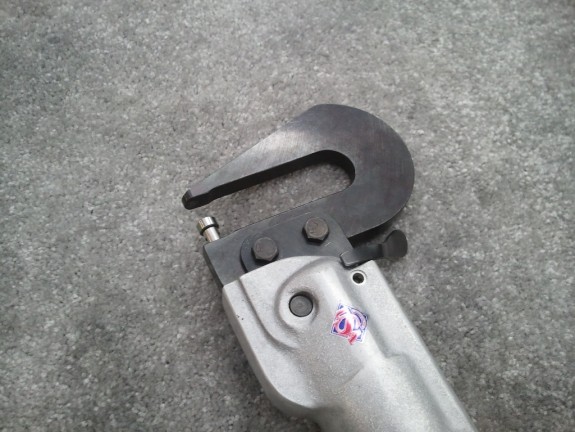
No Hole Yoke Saves the Day!

Here is a shot of the “No Hole” yoke in my squeezer. I wish I had bought it earlier because looking back, I could have used it in some other spots on the other parts of the tail I have completed so far. If you are just getting started on your tools or thinking what you need…put this on your list along with the longeron yoke.

Categories: Rudder

Rudder Final Assembly

September 3rd, 2011 No comments

Proof of Builder Working

I started the day out with a nice flight around the back side of the Wasatch Mountain Range. The Sundowner performed perfect and the flight was smooth as could be over the mountains in the summer here in Utah. I sure love to fly. I cannot wait until I can do so in the RV!

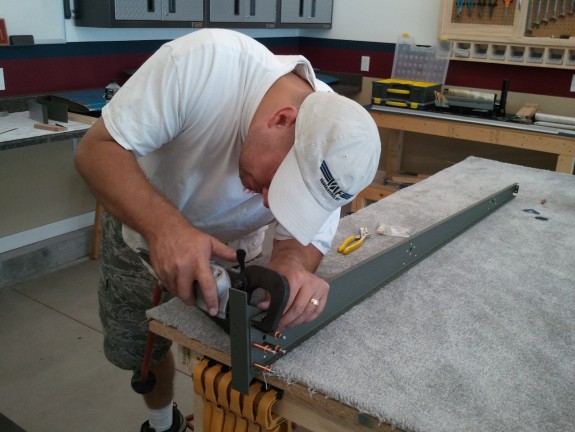
A friend of mine, Matt, has been asking to come watch/help for some time. It worked out that the holiday weekend was going to be the perfect opportunity to do so. Here is a shot he took of me assembling the spar and associated parts. The pneumatic squeezer made quick work of these AD4’s. I let Matt take a whack at a few as well. He commented, “This is just too easy!” Right! 🙂

Reinforcement Clearance Issue

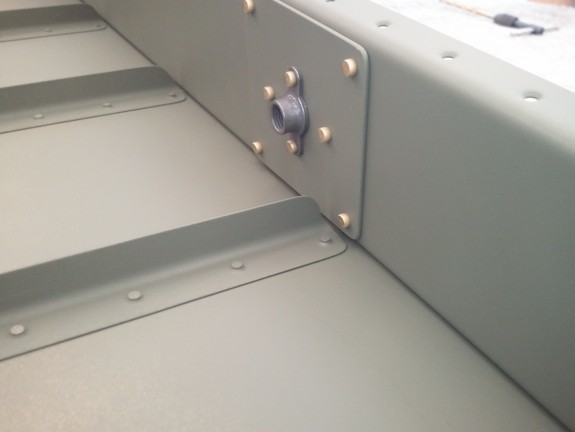
When I was doing the match drilling on the skins and the spar, I noticed that on the center hinge point reinforcement plate, the stiffeners come a little too close. I found this out after I had already back riveted the stiffeners on. So…what to do? I decided that I would gently remove some of the stiffener material and give the reinforcement plate some more room. Once I did, there was plenty of clearance and I felt much better. I shot the stiffeners with a little more primer and got back to work.

Was Just a Little Tight

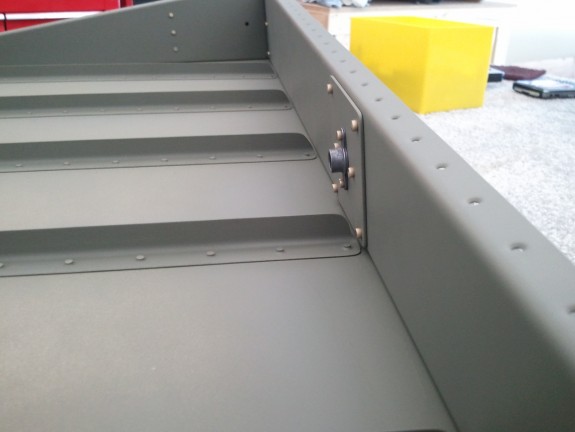
Here is another shot showing the clearance of the stiffener and reinforcement plate. Functionally and structurally, I think it is just as strong as the rest. I had to do the same to the other stiffener on the other skin as well.

If No Tool Exists...Make One

So Matt and I took turns on the squeezer around the perimeter of the skins. I did all the rivets that required my bucking bar and gun…Matt will be granted that chore when I have given him some practice pieces to test him on. We knocked out all but the last four on both sides of the top rib and the last 3 on both sides of the bottom rib. These require some different techniques and I decided rather than push myself to a mistake, I would attempt these after some research and rest.

It was time to wind the day down. We worked on the rudder for about 5 hours to that point. Matt was interested in the hinge points. As a fellow pilot it is fun to see how different designers do things so I pulled out the Heim Joints and hand threaded them in to the Nutplates we just riveted in. One was a little bugger and made me nervous it would cross thread. Since we had mostly closed up the rudder at this point, I was a little concerned. What if it is buggered up? How would I replace it now…grrrr. So we decided again not to mess with it now and take a breather.

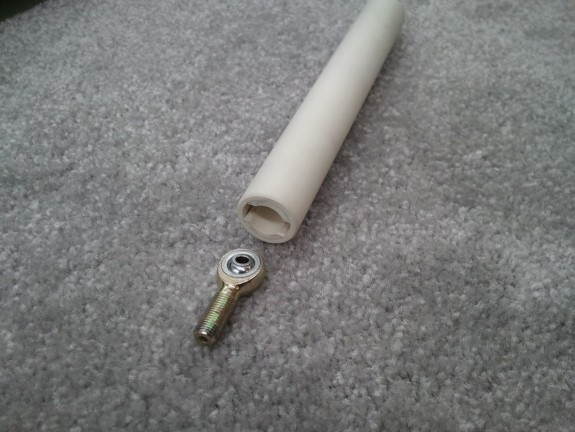
I remembered reading a blog or two talking about how you thread the Heim Joints in without messing the part up. Something to do with PVC Pipe. I had the concept logged in memory and dug it out and decided to take some time and make the tool. Basically, I took a 3/4″ scrap piece of Schedule 40 PVC pipe from my sprinkler redo and a similar length piece of 1/2″ Schedule 40 PVC I stole from a neighbor. I notched the 1/2″ pipe to be just a hair wider than the Heim joints’ flat sections and just deep enough to cover the ball joint portion. Then I used my disk sander to take a little off the outside of the pipe so it would slip into the I.D. of the 3/4″ pipe. I glued them together and then took some time to smooth out the ends and the shank for comfort and part protection. What was left was what I refer to as my Heim Screwdriver. If I got real fancy, I’d throw a bike handlebar grip on it…we’ll see.

That one nutplate was really bugging me…so I went back out to the shop, threaded it in a little ways and then put a little pressure on the head as to apply perpendicular force on it. I figured that riveting the nutplate on may have tweaked it a bit and may have put a little twist on it. With all the material ahead of it in the reinforcement plate and the spar creating a tight tolerance hole, the shaft of the Heim perhaps could simply be unable to fully line up if it was slightly twisted. I am happy to report that this did the trick…whew! I was able to then hand thread the Heim in and no cross threading occurred.  I then tested my new tool as well. It appears to be just the ticket for getting these installed.

Trailing Edge Remains

At the conclusion of the build session, I was left with a rudder that has some tight rivets to set and the trailing edge to glue up and then rivet. After that is the front bend and it will be done. I got done just in time to have some pizza with a bunch of family that had stopped by for the Holiday Weekend to attend and participate in a Baby Blessing in the family. Next week looks to be a busy one. Perhaps I will take a break, order a no hole yoke, and figure out the best way to get to those last rivets before knocking out the trailing edge. Until then…Happy Labor Day!

Categories: Rudder

Primed and Ready

September 2nd, 2011 No comments

Waiting for Assembley

It has been a few days since I was last able to work on the Rudder. I was debating what to do on the inside of the skins for primer. As you can see here, I decided to prime it…but VERY lightly. I did not scuff the major portions and lightly misted them. I did however scuff and prime the portions that would be mated with another part. Here you can see the end result. They are dried and ready for assembly. I was still early in the night so I clecoed the spar and the lower rib parts together. After that, I closed up shop for the night. Tomorrow should be a big day.

Categories: Rudder

Lot of Scuffing, Nearly Ready for Primer

August 22nd, 2011 No comments

Lot of Work, Few Pictures

After the crazy productive days in the shop last week, it was time to get the Rudder parts ready for primer. I am still torn about priming the inside of the pristine skins. I have primed where parts interface already and maybe I will simply prime the areas where the spar and the ribs may attach to and then mist the rest. I need to keep the area where the trailing edge AEX free of primer so that the ProSeal will stick.

Other than that, I spent some really good time on all the other parts, deburring, dimpling, smoothing, and edge dressing. All that is left is the AEX for the trailing edge and the rudder horn. The rest is ready to be shot with primer and put back together again.

I hope to have a completed Rudder by the end of the week. We’ll see!

Categories: Rudder

Stiffeners Done, On to the Substructure!

August 20th, 2011 No comments

Sub Structure Work Begins

With the stiffeners now complete and riveted onto the skin, it was time to move onto the skeleton of the rudder. Here you see the spar, ribs, re-enforcement plates, counter balance, and rudder horn clecoed together. This was after the top and counterbalance ribs were fluted straight. The structure is then match drilled to #30 and the counterbalance skin is match drilled to #40. Again…the precision of the pre-punched kits really shines through. It simply lines right up.

I think this Part is Important in a Spin!

Here you can see one of the important parts of the plane. It is the rudder control horn. Cables will attach to the outboard ends and then run up to the rudder pedals in the cockpit. The 3/8ths holes is for one of the ball joints that will make up a pivot point of the rudder. It took a little love and filing and Scotchbrite wheeling to get it to nestle in with the rib above, but it turned out a great fit. One of the parts that Van’s has you fabricate is a shim that fits under this horn so that you can tie the horn, spar, and the rib together all fitting at the same level. It was pretty easy to make out of 0.032″ sheet stock.

Fairing Strip Fabrication

Here you see the rudder nearly completely assembled and clecoed together. The substructure is complete, the Rudder horn reinforcement is in and drilled, and at this stage I am fabricating the other two parts Van’s makes you create. These little strips of sheet stock will be what holds the lower fiberglass fairing onto the rudder. A few simple cuts and you match drill to the rest of the already assembled parts.

Good Edge Distance Here

One of the more challenging parts of assembling the rudder is this reinforcement part. First, you have to cut some sizable ears off of it using the standard practice of trimming to the center of the guide holes Van’s pre-drills in the part. Some have found that it is difficult to do this and still retain good edge distance for the holes. Either I am lucky, or Van’s has improved the part because I trimmed to the center and then installed and match drilled and it came out with some room to spare. Here you can see that I have good edge distance and the part clears the web of the adjoining rib. Whew. I have also heard that they used to make you bend this part to the shape they now ship it as. Man am I glad…cause that would have been a bear.

Looking Like Something

After all the fabrication of parts and assembly it was time for all the remaining match drilling. I was able to get it done in short order. The one thing to remember on the rudder is that the trailing edge is NOT drilled perpendicular to the skin but IS drilled perpendicular to the cord. Careful attention however helps and avoids to much trouble as the AEX wedge is pre-drilled to the right angle and helps align the bit as you are match drilling the parts. Still remember not to fight the flow of the bit.

Another View of the Prepped Rudder

Here is another view of the rudder match drilled and ready to…take all apart again. Just when  you think you got something, you have to tear it down and do a TON more work. It is fun to show the kids though…”look at the size of this!!!” I love it when my kids reply, “WOW, that is soooo cool!” Motivation for sure.

After all That Work...Torn Down for Paint and More Prep

It got late in the evening by the time I was done match drilling the rudder. So I tore it all down and got everything ready to finish all the prep before paint and turned out the lights. Here is where the Rudder stood once it was all said and done. All in all…a great build session. Thanks for the shop pass Dear!

Categories: Rudder

Backriveting…Step by Step

August 20th, 2011 No comments

My Back Rivet Set and Other Tools of the Trick

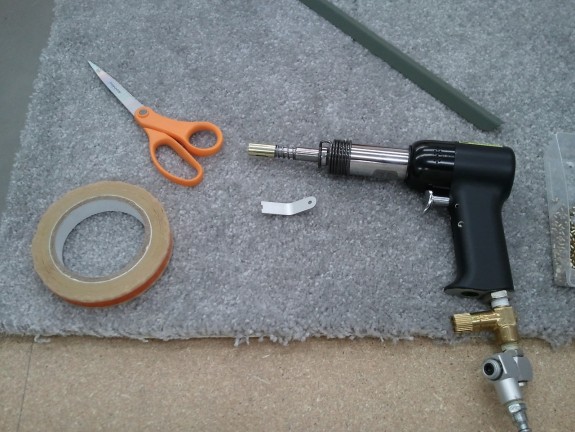
It’s Saturday and my Honey-Do’s are done…so off to the shop for another good and healthy build session. For some reason, I felt inspired to do a back rivet tutorial. Maybe it will be useful to someone else down the road. So here goes. There are some key tools that are needed to do back riveting correctly.

  1. Rivet Gun
  2. Back Rivet Set
  3. Back Rivet Plate
  4. Rivet Tape

As you can see here, I have my tools for back riveting in place. My back rivet set has a brass collar. I have seen others with a Delrin collar. Before I got started, I polished my collar to a smooth finish both on the sides and the face to reduce the chance of it marring my parts. I made sure to remove the sharp edge of the collar on the inside and outside radius. Turns out that was a good thing. I also lubed the collar and spring up with some dry lube called White Lightning typically used in Cycle lube. It is good stuff and won’t get all over stuff when the tool is in use.

My back rivet plate (not shown) is a 12″ x 4″ x 1/4″ piece of cold rolled steel bar stock a machinist friend gave me. I simply took some Harbor Freight Aviation Department metal finishing abrasive wheels and got one face finished to a mirror. It is hard and heavy and works well.

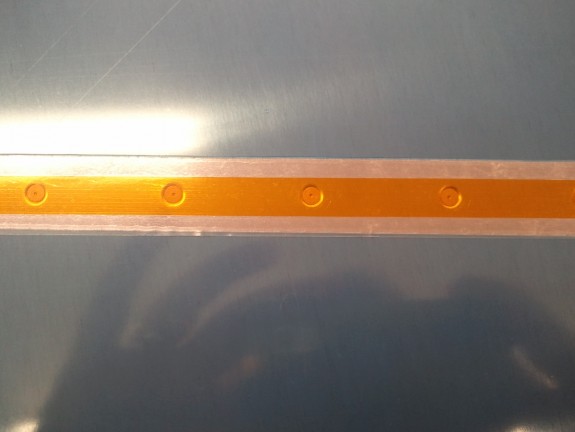
The Rivet Tape is Avery Tools version. The outside edges of the tape are adhesive, while the center portion that goes over the rivet head is not. I like it.

Lay in a Row of Rivets

Step 1, lay your row of rivets into the dimples on the outside part.

Avery Rivet Tape them In

Taped in and Ready

Step 2, place your rivet tape over the heads to hold them in place and to protect the heads from the back rivet plate. Here you can see my back rivet plate on my bench.

Ready for Part on other Side

Step 3, flip the part over and set over the back rivet plate. Ready the part to be joined.

Stiffener in Place over Back Rivet Plate

Step 4, Stack all the parts over the back rivet plate. You can see that I used the carpet on my bench to keep the skin the same level as the back rivet plate. Here you can also see the skin, rivet tails, stiffener all lined up and ready to smack.

Rivets Smashed and Stiffener in Place

Step 5, Smack the heads with your back rivet set. The key here is to make sure the rivet you are setting is on the back rivet plate…otherwise you will make a mess. You can see here that my back rivet set left some marks in the primer. I am sure that they would be far worse if I had not polished the collar. As it stands, they are superficial and a light dusting of primer will cover them nicely.

This concludes your photo Back Rivet tutorial, now back to regular programming.

Categories: Rudder

Skins and Stiffener Work Continues

August 19th, 2011 No comments

Priming the Stiffener Areas to Start

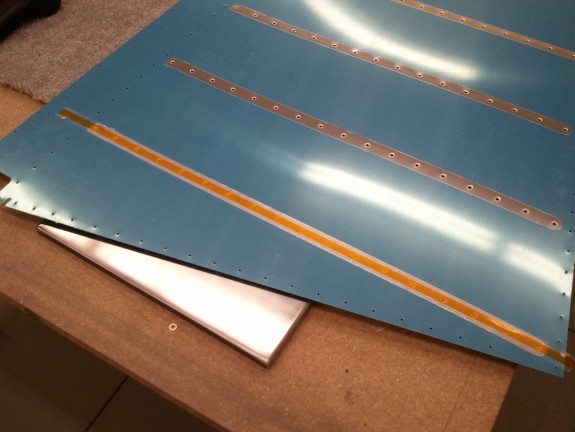
With the Rudder Skins now match drilled, and being that it is Friday, it was time to get some prep work done for tomorrow’s marathon build session. I deburred all the holes in the skins and the stiffeners and went to town on the DRDT-2 dimpling the skins and the stiffeners with my pneumatic squeezer. I then scuffed all the parts and started priming at least the sections of the skins where the stiffeners would interface. The vinyl coating makes a great paint mask. I am still debating if I will prime the inside of the skins elsewhere as that is the furthest part from them CG where extra weight makes a big difference. If anything I can Corrosion X the inside once it is built and painted. Or I can mist the rest of the skins with primer for a little help. We’ll see where it ends up in the coming days.

Skins Ready for Rivets

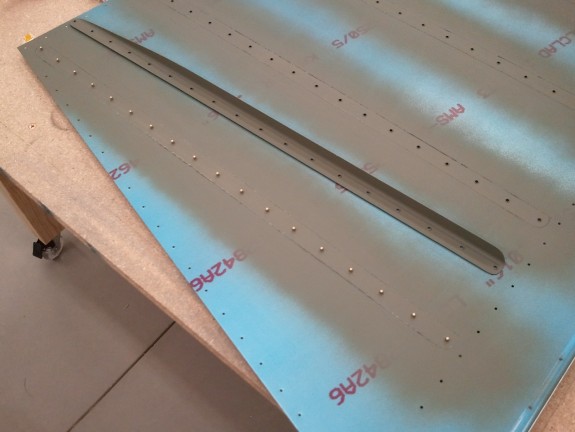
While the primer was drying on the skins, I finished deburring and scuffing the stiffeners and readying them for primer as well. I made up a little standoff for them all out of two sections of cardboard from the inside of the tail kit box. Basically, created two sections of cardboard angle and then notched the bend 18 times each so I could point the insides toward the sky and spray them. Once they were dry, I simply flipped them over and sprayed the backs. Here you can see the stiffeners and skins all set up and ready to be married together forever. I cleaned up the shop some and let them dry.

Got One Done, Time for Rest

It was late when the primer was dry on the stiffeners. I took the time to take a look at my back rivet set and polish up my back rivet plate some. I felt I needed to polish the face of my back rivet set collar as it has a brass collar rather than Delrin as I have seen elsewhere. I also had to lube it up some. All this prep made anxious to give back riveting a whack and I was not tired. So before finishing up the night, I decided to back rivet one of the skins. Here is the result. I like back riveting…you can get somewhere fast with the right tools. It makes you feel like you are moving along. I was able to back rivet this skin in 20 minutes and it turned out great. Not bad for starting out with a 1/4″ thick piece of 4″ bar stock I got from a friend and smoothing it out for a back rivet plate. I decided to call it a night. I am sure I said it before, better quit while you are ahead than risk really messing something up.

Categories: Rudder

Match Drilling the Rudder Skins

August 18th, 2011 No comments

The Sacrificial Table Tip

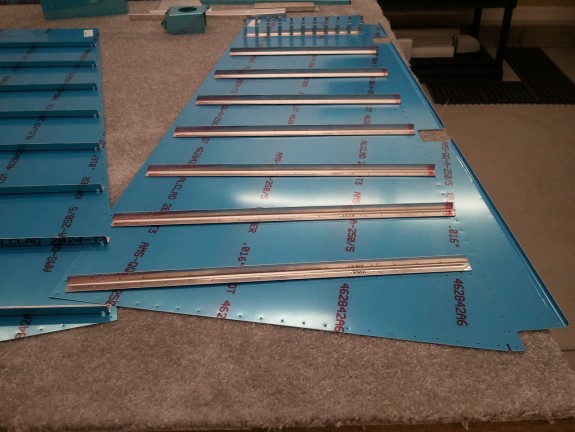
Once the kids were off to bed, I figured I could get at least one step in the build manual checked off. It calls for match drilling the skins and stiffeners together. Van’s has a tip in this step where if you have a table that you are willing to drill into, that match drilling can be made easier on these thin 0.016″ skins. I came up with a decent system that worked well.

  1. I laid the skin on the bench.
  2. I drilled the lower left hole in the skin only and clecoed it to the table.
  3. I smoothed the skin flat on the bench and then drilled the skin only in the upper right corner and clecoed it (thus anchoring the skin).
  4. I then would drill the skin only in the outer holes and another hole in the middle of that line of holes.
  5. I then clecoed on the stiffener using the 3 holes that we now in the bench.
  6. I drilled the holes through the stiffener and skin into the table adjacent to the holes used in step 5 and clecoed them down.
  7. I then removed the first 3 clecoes and completed match drilling the stiffeners to the skin and replaced the clecoes.
  8. I then match drilled each hole adjacent to a cleco and then clecoed them down to the table until all holes were drilled and clecoed.
  9. Repeat steps 4-8 in each stiffener until complete with all the stiffeners.

It sounds like a lot but it seemed to work like a charm and was fairly quick. I completed both skins within 30 minutes or so.

Using the Stiffeners as the Straight Edge

Once the skins/stiffeners were drilled, I thought about how I would remove the vinyl coating so I could then deburr and dimple the skins. I had an epiphany of sorts and thankfully it happened when I had not removed the stiffeners from the second skin. I was about to remove them when I remembered the EAA Video of Doug Kelly showing the hot soldering iron trick I have used in the past on the other skins.

It dawned on me that he used the stiffeners in the video to guide the iron. Well….duh! So I did the same on the skins. As for the outside of the skin, I simply flipped it over and clecoed the stiffeners to the outside using the holes from the prior skin so it would lay flat on the bench and it worked like a charm. Once complete, I simply repeated the process for the first skin I had left. My forgetting to do the first skin when it was on the bench actually turned out to be a good thing. Because I had drilled both skins prior to wanting to remove the coating I could use the holes drilled into the bench for both sides. I just lined up the respective set of holes and clecoed the stiffener on and melted away.

Ready for Next Session

Here is what the end of the day left me with. With both sides sans vinyl over the rivet lines I can deburr, dimple, scuff, and prime the rivet lines. I can now do the same on the stiffeners. If all works out, I can be back riveting the stiffeners on Saturday!


Categories: Rudder

Stiffeners Cut and Smoothed

August 11th, 2011 No comments

Proof of Builder Working!

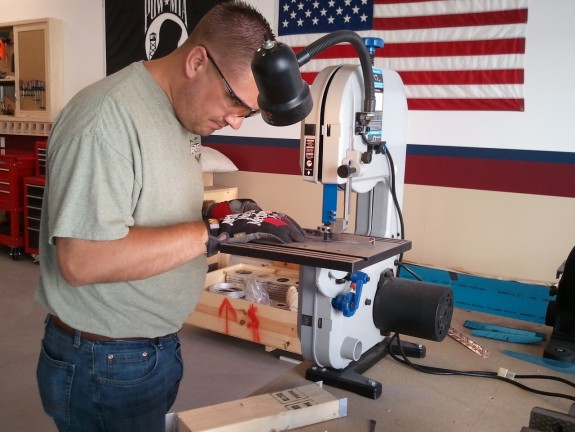
My lovely wife paid the shop a visit and caught me working. I have been told it is a good idea to get some pictures that prove I actually did the work on the plane. So while she was there, I had her snap a few shots of me cutting the stiffeners to shape on the band saw.  I purchased this saw several years ago and boy am I glad I did. It made very quick work of getting the stiffeners cut to close to final shape. I got through them in about 40 minutes, taking my time.

Once I had them rough cut, I then moved over to the 12″ disk sander and finished the shaping. Knowing how to mass finish these will come in handy when I get to the flaps and ailerons…or so I have been told. 😉

Tacked and Ready for Drilling

Once the sanding to shape was complete, I headed over to the Scotchbright wheel and hit the edges to lose the burrs. Where it could not get with the wheel, I touched up with my files. I learned with the practice kit and some of the HS parts, that the Scotchbright wheel can take more material than you think in very little time, so I was very careful and methodical when hitting these little buggers with it. Once I get to the priming stage, I will clean up all the deburring with some maroon Scotchbright pads. For now however, they are ready to be match drilled. For another night however as it is late.

It’s neat to step back and look at how nice the fabricated stuff you do turns out. With all the prep work Van’s does on the kit, when the parts you make look like they belong, it is a good feeling. I will take a moment and admire every so often and then clean the shop a little before lights out.

Toothpick Anyone?

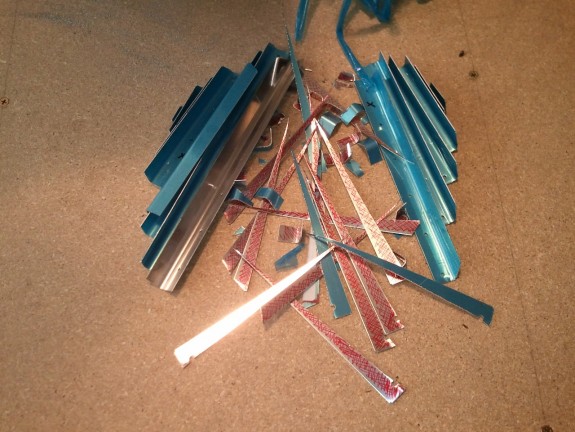
Before I called it a night and after patting myself on the back, I cleaned up a bit. Somewhere in the work period, one of my kids came in and must have done some art. I found this pile next to the band saw. I have a Picasso running loose in my shop. Who will start the bidding?

Cleaned up and put the tools away. Next up, drilling, dimpling, and the first try at back riveting for this build.

Categories: Rudder

Something Little Everyday!

August 10th, 2011 No comments

Not Much, but Enough

A fellow builder once told me that in order to keep the project moving, you should try and get something done every day. In that spirit, I got home from work and took care of my husband/fatherly duties and then headed out to the shop. I had earlier rough cut the stiffener stock to close lengths, so tonight I simply marked the portions that need to be removed.

It took about a half hour and at that point it was late. I decided to cut  at least one to final shape to see what I was up against and to plan the next build session. You can see it clecoed to the skin above.

My builder friend was right, it is good to simply get out and do something, even if it is a little research.

Categories: Rudder

Rudder In Works

August 6th, 2011 No comments

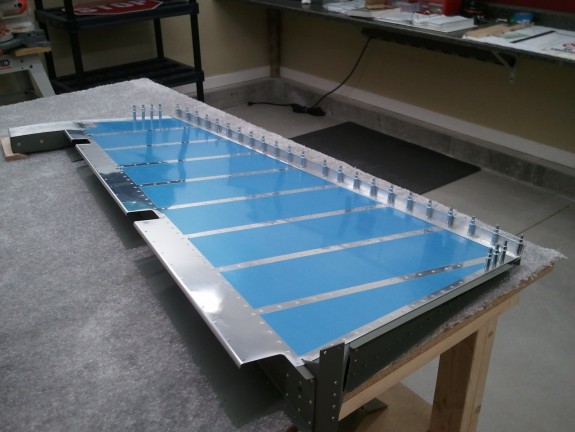
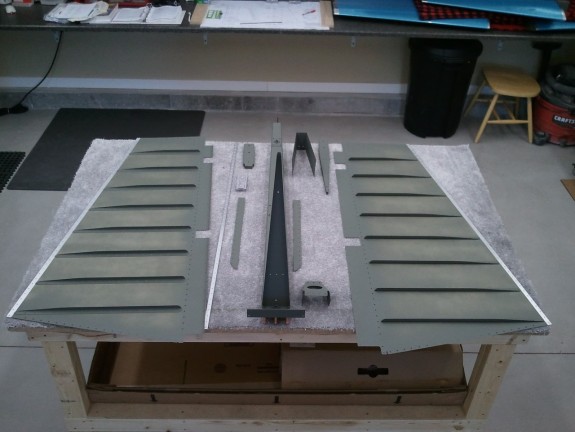
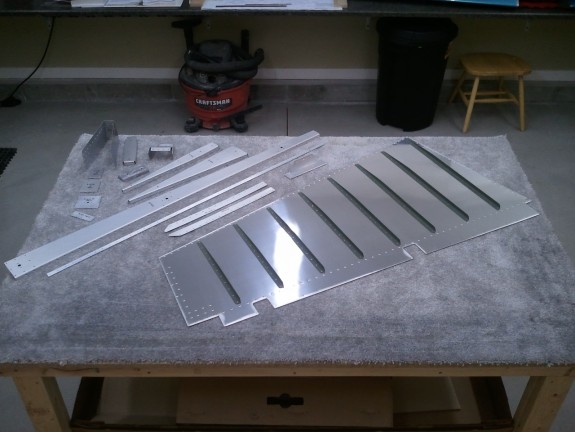
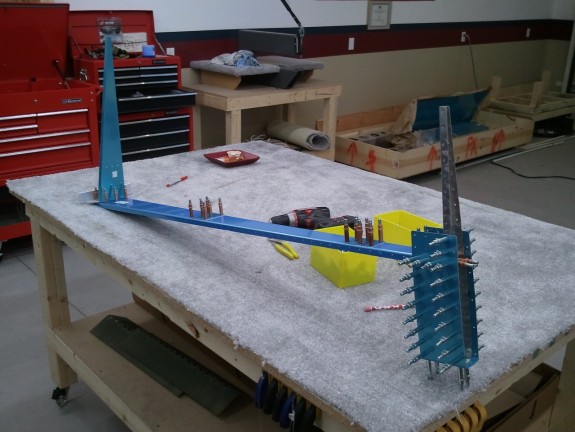
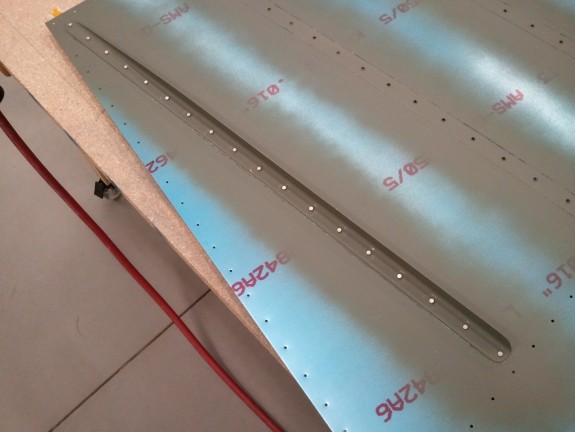
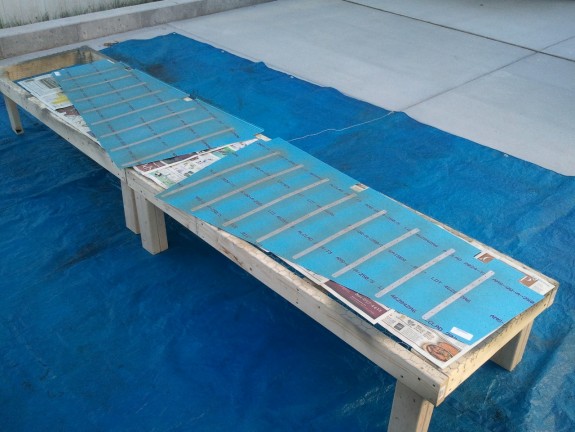
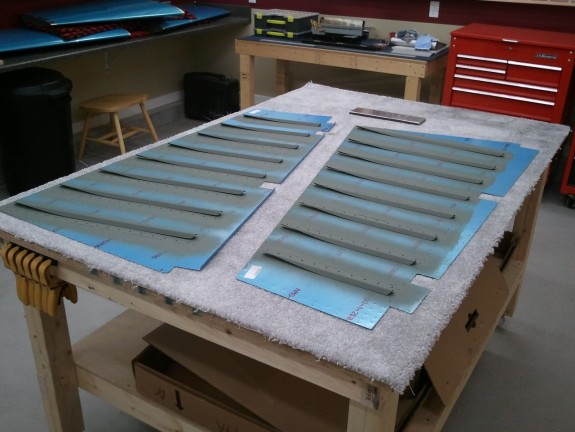
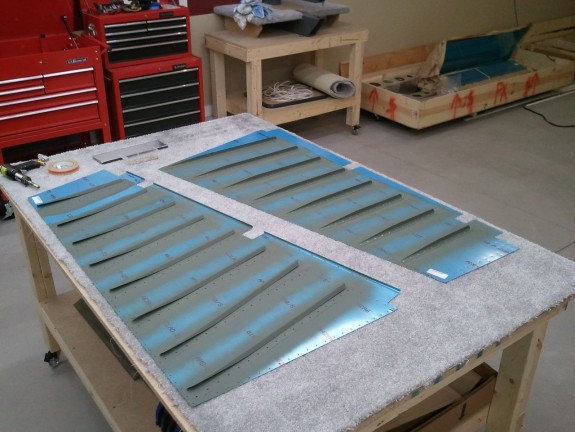
Rudder Work Begins

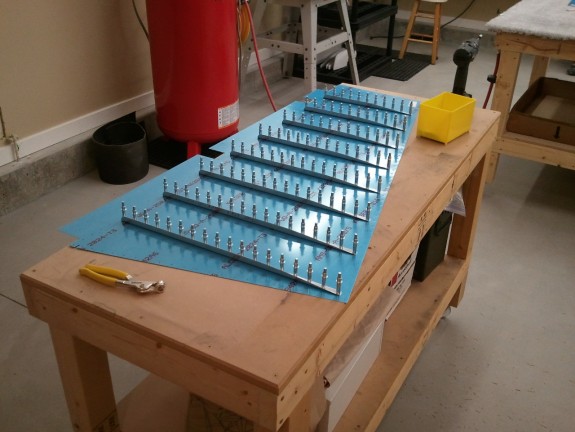
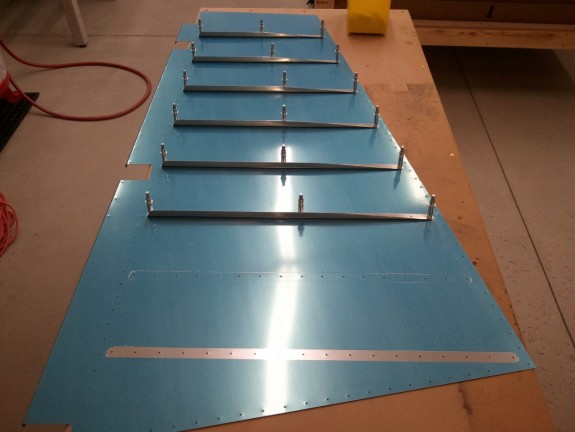
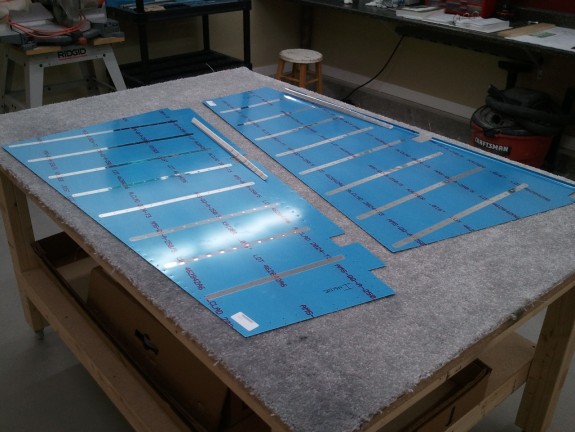
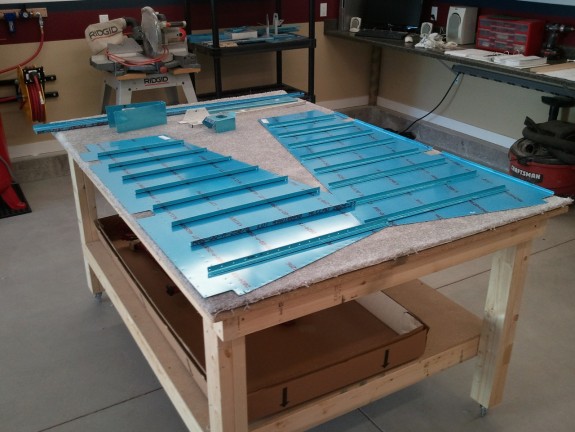
With the VS now complete and still some hours left in the day, I decided to get started on the Rudder. I laid out the parts on the bench and started with the stiffeners. I split the lengths in two, and then laid them on the skins. I then labeled each and ROUGH cut them to length. Since I had been at it all day, I decided at this point, I should stop and take a break. Better to stop when you are doing well than wait until you make a mistake. So, until next week, have a great Sunday!

Categories: Rudder