Archive

Archive for the ‘Builders Log’ Category

Left Rear Spar Work Continues

May 17th, 2012 No comments

Left Spar Doubler Hole Matching Begins

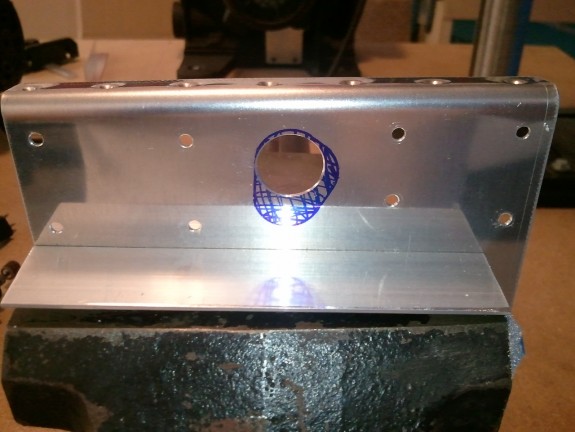
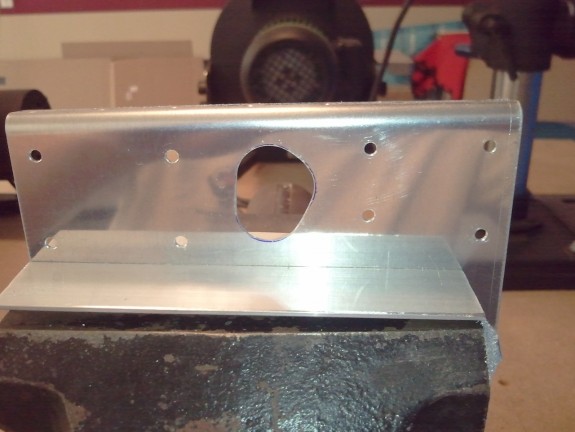
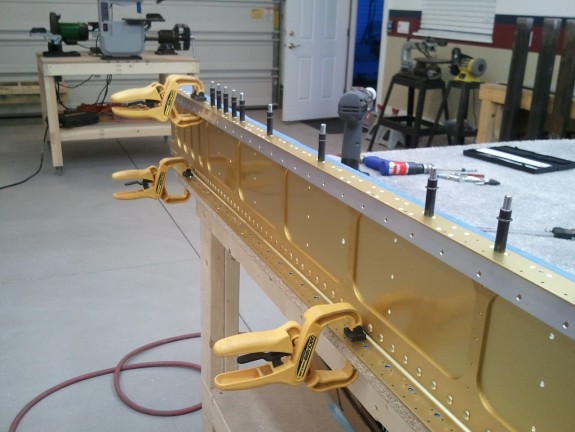
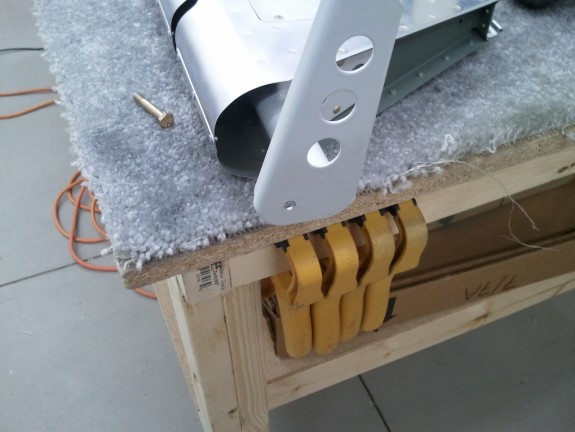
Tonight task was to repeat the processes done on the right spar on the left. Here you can see the center doubler clamped in the vice and ready to sand out the hole for the aileron push rod to exit. Instead of filing this one, I simply used a course grit Dremel sanding drum to get close to the line. It went much faster, but really chewed up the drum fast. Once close to the line I mated it up with the spar and finished it off as I did with the right spar.

After Some Dremeling

Here it is after the sanding drum and ready to be attached to the spar. The one caution I offer with the Dremel is that it takes material faster than a file and may allow one to get carried away. I sanded a little too much out on the right side of this hole between the upper and lower radii. Nit too bad, but a little off.

Ready to Prime

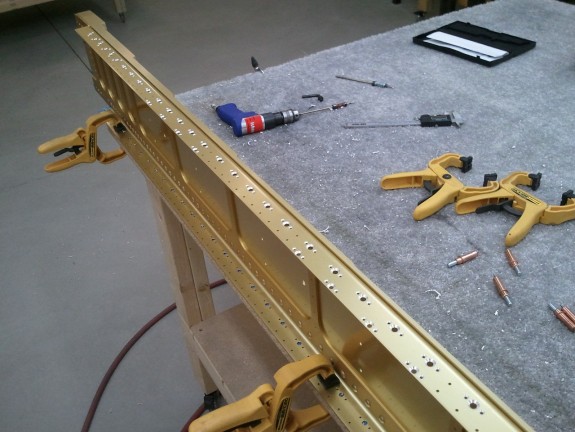
Once the left doubler fork, and outboard spar doubler were match drilled and dimpled, I scuffed all the parts for priming. I also dimpled the skin attach holes on all the holes where the spar forks would make it difficult to get to later as well as where all the doublers were where dimpling would be hard due to the double thickness at these locations.

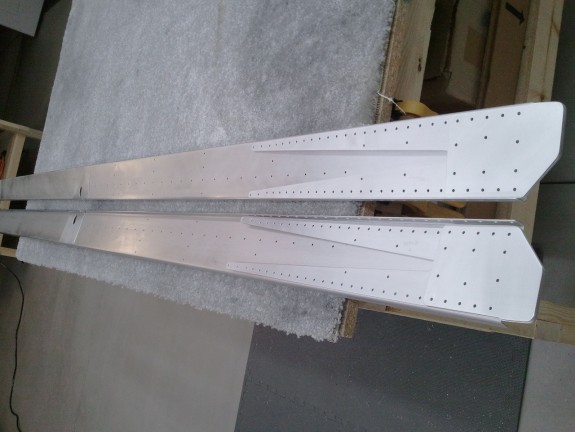
The rear spars are now ready for priming. I hope to do that tomorrow so I can rivet the parts together on Saturday.

Categories: Major Wing Sections

Right Rear Spar Work Continues

May 16th, 2012 No comments

Match Drilled Right Rear Doubler

Tonight I continued the rear spar work by match drilling the doublers. I read on several builder sites about the furthest outboard holes on these doublers and the need to countersink them for flush rivets. The reason flush rivets are needed here is because an aileron bracket goes over the top. I felt the doubler was too thin to safely countersink. Other builders felt the same. I prefer the stronger joint that is made by dimpling the holes. This is an acceptable modification per Van’s as well. I simply have to remember to dimple the end rib holes as well. This will leave all the material thickness behind the aileron bracket that will be attached later. It may be overkill, but it is my plane.

Holes done for Right Aileron in Spar and Doubler

Another thing that has to be done is matching the aileron push rod exit in the center spar doubler. I clamped the doubler tight against the spar, match drilled and clecoed it on, then traced the hole dimensions onto the doubler. I then removed the doubler and used my step drill bit to remove a majority of the hole material. Then I clamped the doubler into my bench vise and filed the hole just shy of the trace line. Once close, I clecoed the doubler back onto the spar and finished the hole with my Dremel and sanding drum until they were an exact match.

Once the holes were matched, I then put a Scotch Bright wheel in the Dremel and polished the holes together. They turned out great and took about 15 minutes for this spar.

Right Rear Fork Match Drilled

Next up was match drilling the doubler fork on the inboard end. Nothing special here, just hit every hole with a bit.

It was late so I called it a night.


Categories: Major Wing Sections

More Main Spar Work

May 15th, 2012 No comments

AP Servo Bracket Installed on Right Spar

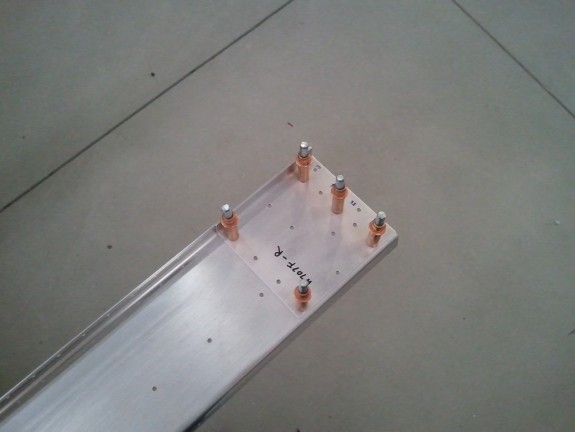
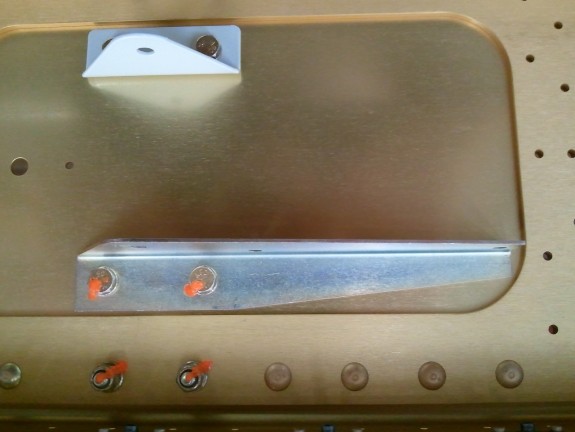
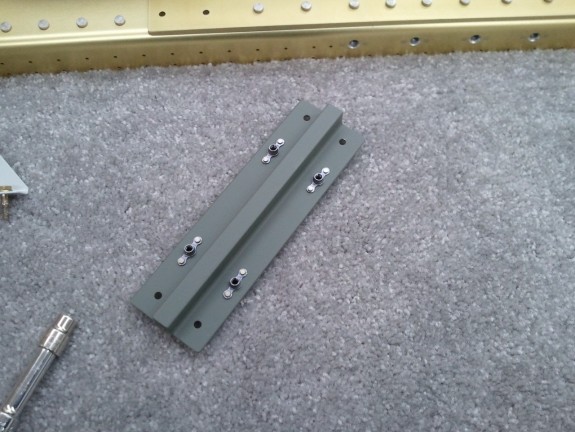
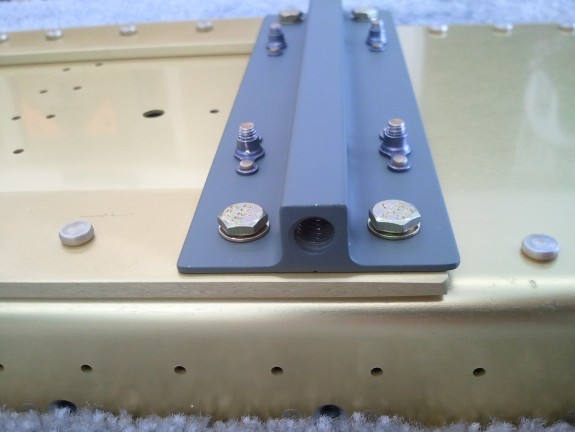
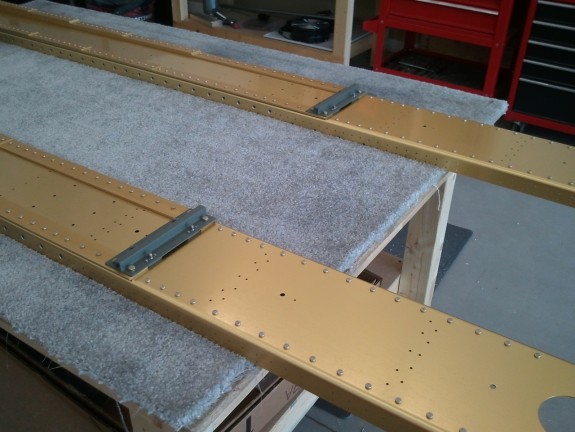
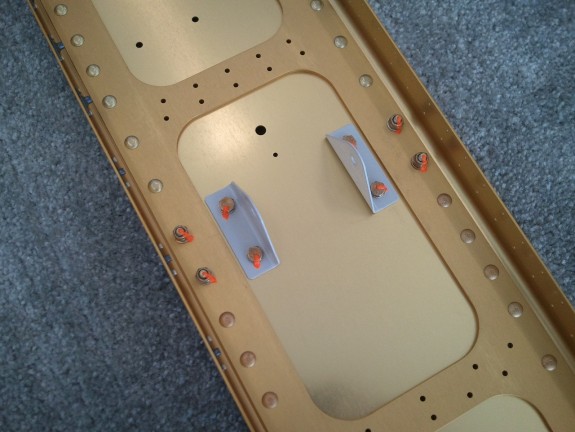
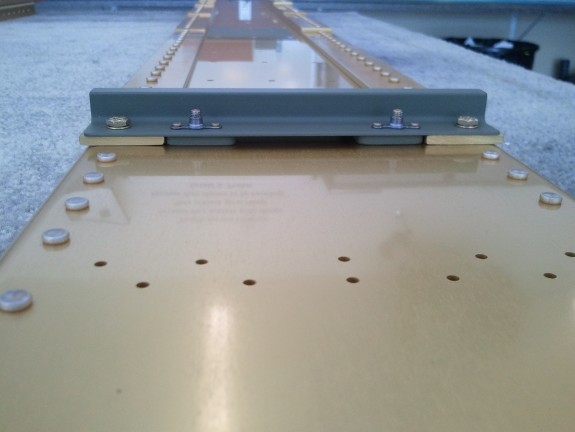
A few things showed up in the mail today. One of them was the the TruTrak autopilot servo brackets I was able to get from SteinAir. As I understand it, they typically do not sell the brackets sans the servo, but they accommodated me. I had a few minutes so I installed and torque sealed the bolts through the bracket onto the right spar. Now when I do buy the autopilot once I settle on the EFIS/AP combo, I simply need to bolt it in to the ready bracket.

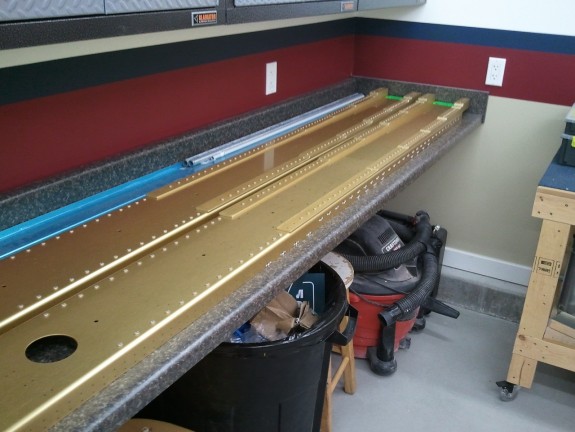
I spent some time cleaning up the bench and shop to start work on the rear spars with less clutter.

Categories: Major Wing Sections

The Little Details

May 9th, 2012 No comments

Cleaveland Tie Downs...After Polishing

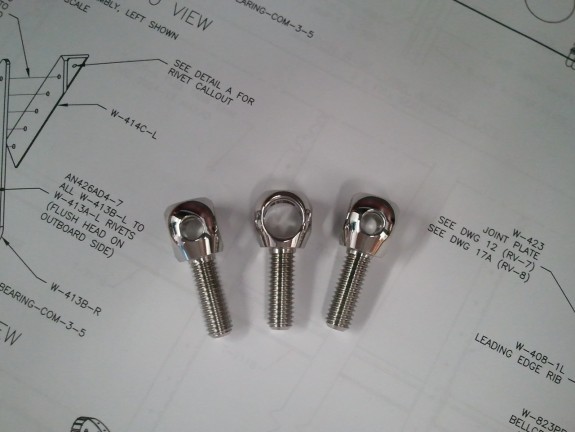
Since I tapped the tie down blocks, I figured I should test them with some tie down rings. Van’s does not supply them in the kit. I think because they are an easy to source local item for standard forged 3/8″ eye-bolts. I went to my local Fastenal and looked at them. They seemed very ugly to me. You spend all this time building a nice looking plane to have nasty looking eye bolts hanging off the wings? I remembered once that Cleaveland Tool sold some VERY nice looking stainless steel machined tie downs. While not as cheap as standard eye bolts, they are much better looking. I needed to order some other tools anyway, so I tossed three of these in my order. I figure if I go tail wheel, I can have a spare. If I go nose wheel, I have enough.

They arrived today and they are a thing of beauty. The machining is amazing. The finish however was simply satin. I have polished metal before and figured, I can get these to look REALLY good. My wife had church work to do, so I had all the kids come out and enjoy the weather while I tossed my buffing wheels into the drill press and started to polish them. The finish was so nice that it really only took a little buffing to bring out the shine. Near the bolt part, the machining left small lines in the surface that I hit with some 600 grit wet/dry sandpaper. Once sanded, I simply buffed again.

Now that they are polished to a mirror shine, they look like they belong on a nice plane. It may seem overkill, but little details can make the difference. It was the only thing I had time for anyway.

Categories: Major Wing Sections

Rear Spar Work Begins

May 2nd, 2012 No comments

Marking the Doubler for Trimming

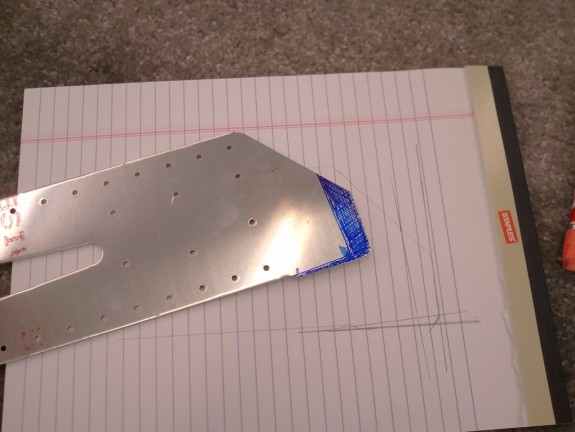
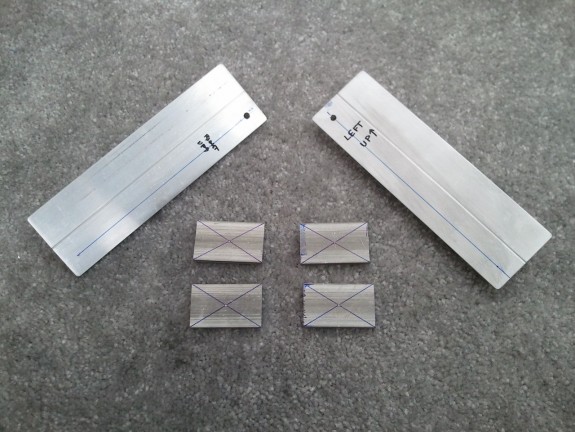
I got out to the shop for a little bit after work and started the rear spars. First task is to trim the doubler forks and doubler plates that attach to the fuselage and spar. This apparently is only required for the RV-7 and RV-7a’s. The 7 and 8 share the same wing with a few tweaks. These are 0.040″ parts, so cutting them is not easy. My band-saw did make it easier and I was able to trim close to the line, run over to the 12″ disk sander and sand them closer, and then finally hit it with the scotchbright wheel. The layout was not so easy as the plans use extended lines drawn from the part itself. I simply traced the part onto some paper, superimposed the same lines from the plans onto the paper and then transferred the marks back to the part and then cut. I then used the first cut one as a template for the rest.

As a side note, Van’s does appear to have a full scale drawing in the plans of this trim, but it is not sent until the fuselage kit. Seems a little silly. Van’s should move that drawing to some empty space on one of the plan sheets for the wings. Thank goodness for preview plans however.

All Trimmed and Cleaned Up

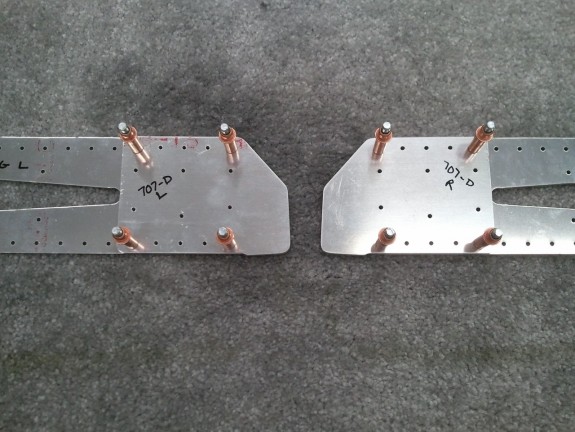
Here are the parts after trimming and deburring them. It was then time to debur all the remaining edges. For this, I pulled out a file and the bench vice. I then hit them with the scotchbright wheel on my grinder and then completely buffed them with a maroon scotchbright pad. They have to be primed anyway, might as well get them ready for it now.

Ready to Match Drill

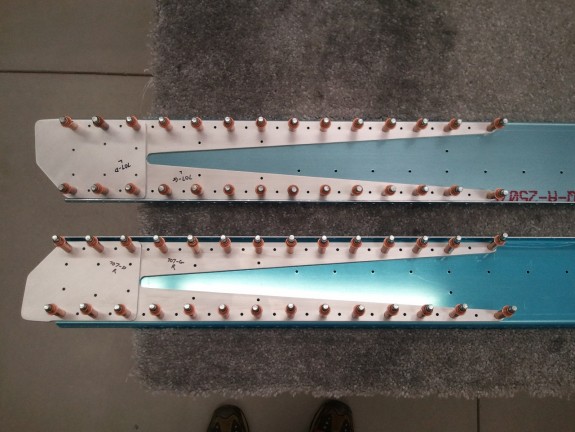
Once buffed, I clecoed them in place on the inboard side of the rear spars. They are ready for match drilling. At this point, it was time to call it a night.

Categories: Major Wing Sections

Main Spar Prep Done

April 28th, 2012 No comments

Nutplates All Done

Saturday arrived and since I had done the yard work earlier this week, I was ready to have a decent day in the shop. First order of business was to spot prime all the nutplate attach rivet countersinks and rivet on the 150 nutplates to the spars. This took a good portion of the morning to do. That is a lot of nutplates Vans! I was able to easily reach the nutplates near the root of the spar in the center of the web with my 3″ yoke on my squeezer. I only primed the countersinks for the attach rivets because I plan to prime the entire flange once the countersinks for the skin dimples are done. As for now, the nutplates are on and look great.

Tie Down Block Work Begins

Next up on the list were the tie down blocks and spacers. I dressed the edges with my scotchbright wheel on the AEX blocks themselves and then laid out the first holes to be drilled. Van’s has you drill one with the dimensions from the plans, then run a cleco or bolt through that hole and the matching hole in the spar and then match drill the rest. Before you do that, you have to make 4 spacers that will go in between the AEX stock and the spar itself. These are made out of 1″ bar stock. I simply cut them to size with my band saw and then marked the center for the lightening hole. I debated on what to use to cut the lightening holes with. I have a fly cutter, but the 1″ hole is a little tight for it. I ended up running to Lowes Aviation Supply and picking up a 1″ Bi-Metal hole saw. I also picked up a drill press vice to hold parts on the drill press platform. Word to the wise, lube the saw. The next half hour was spent cleaning up the inside radius of the holes with a Dremmel tool with a sanding drum.

One Tie Down Block Done

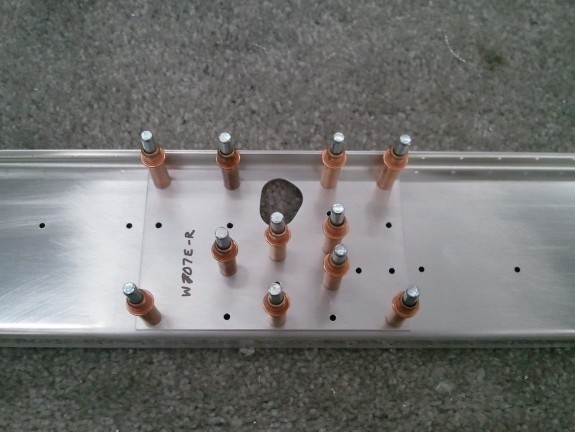
Once the blocks and spacers were cleaned up, I match drilled them to the spar holes. I taped the spacers down to the spar so they would not move and then clamped the tie down blocks over them. Once drilled, you have to then match drill the spacers AND the blocks for the rivets that hold the nutplates for the aileron bellcrank bolts. After drilling I deburred all the holes and got the parts ready for primer. The parts were then primed and riveted together. Above you see the complete tiedown block/spacer assembly. Van’s designed it this way in case a nutplate had to be serviced. If one is bad, you can remove this block and replace the nutplate. Interestingly enough however, to get to the block assembly, you have to remove the tank on a finished wing. I do not see how you could get to it otherwise. I hope to not need to find out either way.

Nice and Tapped

Before you can install the blocks onto the spars, you need to tap the bottom end to accept the tie down rings that will thread into these blocks. The AEX block is pre-drilled. You have to then tap this to a 3/8-16 thread to about 1″ deep. I do not have this size of a tap, so I called around to those I thought that would with little luck. Finally, I decided to check with my back fence neighbor Jeff, and see if he had one. His is an expert mechanic after all. Turns out Jeff did…and it was a nice one. I promised not to ruin it and he handed it over. After about 5 minutes and some bo-lube, I was able to get these nicely done and they look great and straight. I cleaned up the tap and ran it back over. Thanks a bunch Jeff! (Incidentally, Jeff’s son Pat is an aviation tech for the USAF in Korea, and currently works on A-10’s!)

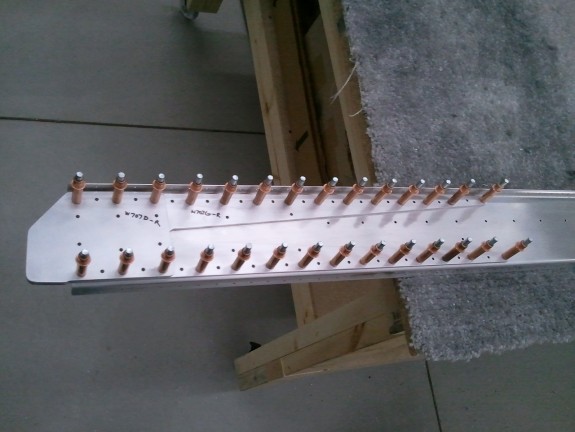
Both Wing Tie Downs Complete

Here you can see the assemblies bolted on on both spars. I torqued the bolts to spec. It seems so weird to only torque these to 25 in/lbs. Seems light, but it is right.

Aileron Brackets On

Here are the aileron bellcrank brackets bolted on and torqued to spec as well. I torque sealed them too. Turns out, I should have waited as I need to take at least one off to install the autopilot servo bracket. However, I can just clean off and re-torque.

Spar Prep Done...ish

Here is another shot of the tie down assemblies and spacers. As it stands for now, the main spars are prepped for ribs. Next up…rear spars.

Categories: Major Wing Sections

Nutplate Location Countersinsks Complete

April 26th, 2012 No comments

Nutplate Locations Complete on Both

I was able to get the right spar nutplate countersinks done in short order. Having done the left the night prior and having the angle pre-drilled made for really quick work. Having my 3 countersink cages already set was great too. I spent the rest of the night getting hardware into bins for easier access and organization. I hope to have the spar prep complete this coming Saturday.

Categories: Major Wing Sections

Left Spar Nutplate Countersinks Complete

April 25th, 2012 No comments

Chatter Free Countersinks

I was able to get some time in the shop tonight and continue the prep work on the Left Spar. I needed to countersink the nutplate locations for the #8 screws that hold the tanks to the spar. Additionally, I needed to countersink for the #6 screws on the bottom that hold the inspection covers on. These countersinks are a challenge only because they are deep enough to open the hole wider than the pilot of the cutter and can allow for it to move around once deep enough. You have to use something beyond the flange to hold the pilot after it cuts the countersink beyond the flange. I have read several build sites that describe what can be done to accomplish this task. Van’s states that you can install the nutplates first and then use the nutplate as guide for the pilot of the countersink. That seemed a little hokey to me, but several builders said that it worked OK. I guess I just did not like the idea of possibly ruining the threads of the nutplate with the pilot of my cutter and the possible chips that could get lodged in between the nutplate and the spar flange.

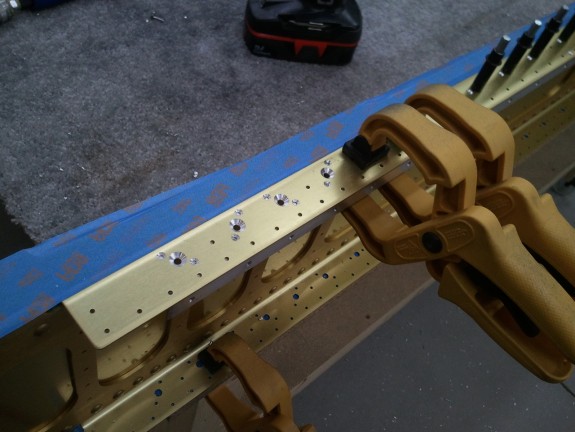
Another option some have used was to use a piece of 1/16″ aluminum angle to back the holes that are to be countersunk. You simply clamp it to the flange and match drill the holes to the angle and then use it to keep the pilot centered in the hole. Since I had my angle from the rudder lying around, I decided to give this technique a shot. In the above picture, you can see that I have clamped the angle to the flange and have already match drilled the center holes with my #21 bit. I then used some clecos to hold it down the flange as I clamped it closer with some alligator clamps.

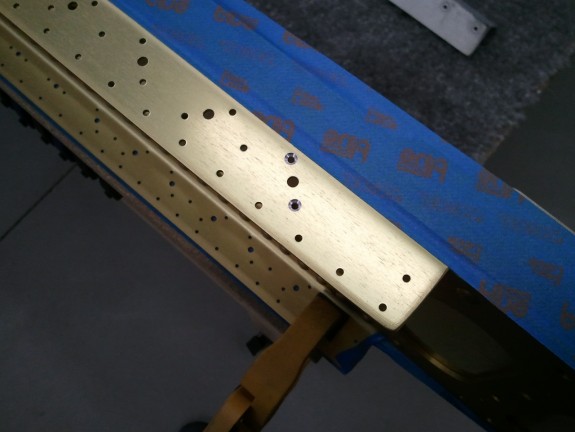
I then worked my way down the flange with my #21 piloted, 3 flute countersink. I tested the depth of the countersink in some scrap. I was aiming for a 0.370″ wide countersink (Van’s states it should be between 0.365″ and 0.375″ in diameter) and was spot on. As I would countersink, I would let the countersink cage nearly bottom out, then remove the chips, then finish the hole. This left a very nice, chatter free countersink. I figure that at .0370″ I can still adjust if needed, but many report that it will work great as is. As each was complete, I leapfrogged the two clamps so I could hold the angle tight to the flange.

How I did the Countersinks

Here you can see the angle down the length of the spar flange. The important thing is to not let it wander as the countersink is cutting. This is what eliminates the chatter.

The #6 Screw Holes In Works

Here you see the #6 holes for the inspection covers to spar interface. I used the same piece of angle to back these up. I simply offset the angle until I had no overlapping holes from the #8’s and match drilled them with #30 bit. I then used my #30 countersink cutter in a different cage set up to cut a countersink with a 0.312″ diameter. I found that Van’s recommends a countersink no greater than 0.3125″ for #6 screws. I tested on a scrap piece and then hit these. They come VERY close to the edge of the flange, but according to other builders, that is expected. Once complete, I was left with many shiny and chatter free countersinks that are ready for nutplates. The angle backer trick appears to have worked nicely. Now I simply have to repeat the process on the right spar. Thankfully, the angle I match drilled should line up with the holes already in it from this spar. I simply need to clamp and cut.

Left Spar Countersinks Complete

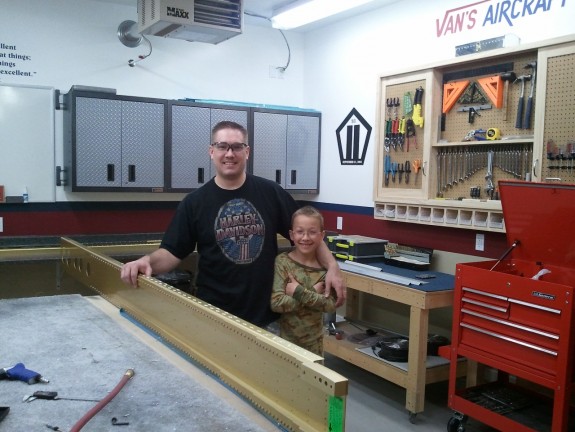
It was bed time for the kids and I just finished the countersinks and was cleaning up the shop when I got some visitors. My second son Alex is a real curious one, so we chatted a little as to what the gold thing was on the bench. I asked my wife to take a shot of me working/posing with the parts and he weaseled in the shot. Hopefully his curiosity sticks because I will need a bucking partner on the wing skins soon enough. With everything learned on the first spar, the hope is that the second will go a little faster.

Categories: Major Wing Sections

Wings Begun, Spar Countersinking on the Left Spar

April 19th, 2012 No comments

The Tank Nutplate Countersinking Begins

I had originally planned to take the day off from work to participate in a State/CAP exercise. The State of Utah decided that our assistance was not needed and they were going to spin down. So I had the day off…and I debated if I should go in to work or use it for fun. Fun it is. I spent most of the day building an empennage cart to store my finished tail parts in and get them out of the way. I will outline that in a separate update.

Once the cart was complete, I organized the wing kit crate parts and emptied the the crate. I also emptied the spar crate and pulled the spars out of the shipping plastic. After a close inspection, and only finding some minor nicks, I decided to start with step one of the wings…countersinking all the nutplate attach holes for the tank/inspection cover screws. So I chucked up my #40 piloted countersink in its preset cage, ran a test hole in some scrap, and started on the #40 holes on the spar flange of the left spar.

They are Gold in Color for a Reason

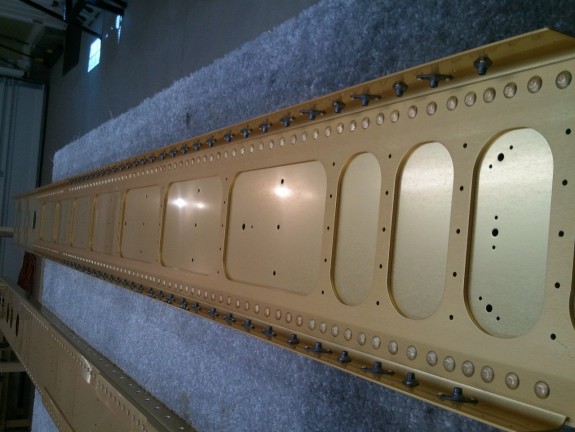
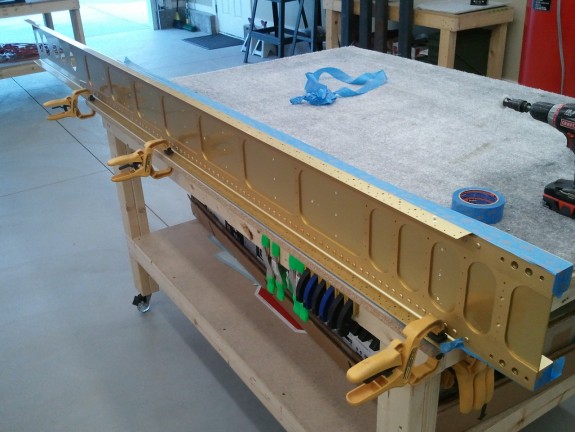
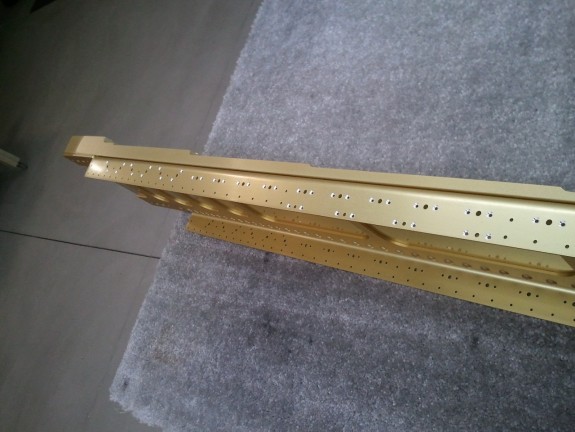
You can see here that I used some masking tape on the spar. This was to protect the GOLD anodization as well as keep chips from the countersinks from falling into the valley created by the spar channel and the spar bars. It works great. The spar is a work of art. It still amazes me that this chunk of metal can withstand +6 G’s. Engineers are cool. Once all the #40 holes were done on the top, I flipped the spar over and did the bottoms. I used my cordless drill on the low speed setting. More torque, no chatter. I tested all the holes by dropping a rivet in. Every one of them is perfect.

Nutplate Attach Holes Countersunk...in 1 Spar

I was able to get all the #40 holes done on the left spar and then the battery died on the drill. It was late anyway so I called it quits. I think I will use another trick I saw on the larger holes. Basically, I will match drill the larger holes with and #21 bit to a cheap piece of aluminum angle picked up from the local Lowes aviation supply. Then I will countersink the holes with my #21 piloted countersink to the correct depth for a #8 screw. The aluminum angle will provide more meat for the countersink pilot as these holes will end up with a knife edge on the bottom. This should eliminate chatter in these holes because the pilot will not wander as the hole in the spar flange opens up. Van’s has you install the nutplates and then use them for centering the pilot…hmmm.

We’ll see how it works out in the next couple of days.

Categories: Major Wing Sections

Preparing for Wings

April 14th, 2012 No comments

Building the Wing Stands

I have had the wing kit in the shop since it was delivered with the tail kit back in April of last year. I opened it up and did the inventory at that time too. It has been taunting me ever since. I have been researching several builder sites as to how they set up their shops for the wing spar stands. Vans has you make them from 4″X4″ wood posts that extend floor to ceiling. I did not like this design as it limits where I can set it up in my shop due to the over head garage door. That, and the wood could warp over time, though unlikely here in Utah.

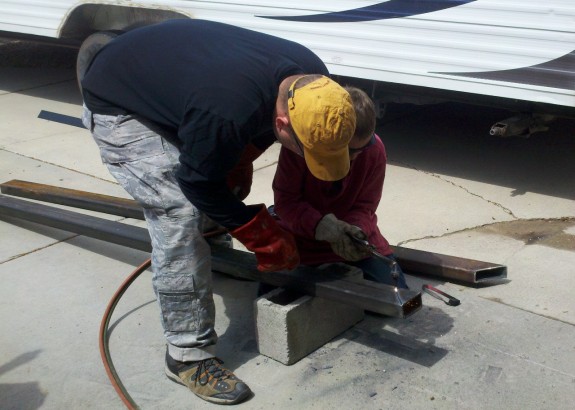
I really like the setup Rudi Greyling from South Africa devised. Basically he made the stands out of 2″X4″ tubular steel and bolted them to the floor of his shop. I have a friend/co-worker that used to be a pro-welder. We chatted it over and came up with something very similar in design. Instead of using angle for the feet like Rudi did, we decided to make a foot out of the same tube and weld it on. Each post will be bolted to the floor with 2 bolts instead of 4 like Rudi’s design called for. Basically we cut a 45° angle on one end of the foot and 22.5° angle on the other side. This made a nice trapezoid shaped foot. The reason for the 45° on one end was to give a little more leverage to the foot on the side that the spar will hang on.

In the picture above, you can see my son Taylor and me cutting one of the feet out with a torch. My welder friend insisted he learn…and so he did. Taylor did GREAT!! My friend was impressed with his steady and straight cuts. We traded off cutting out all the parts and getting them ready to weld together. It took a good 2 hours with all the grinding involved. I was amazed the torch cut through 3/16″ steel tubing like butter.

Once all the parts were prepped, my welder friend tacked the feet onto the posts and then finished the welds. That man can move and does a really good looking job welding. I used some scrap flat bar stock to cap the top of the tubes. All I need is to drop a tool down the 4′ tubes and not be able to get it out. He let Taylor try his hand at welding too. He did OK. He then had me do a couple of beads and then he finished up. I think these will be very sturdy and work well. I still need to file them down and clean them up for paint, but the hard part is done. Thanks Russel!

On the way home, Taylor looked over at me and said, “That was cool!” Made all the aches and pain worth it!

Once cleaned up and painted, I will get them installed in the shop.


Categories: Wings

Rib Flange Straightener Built

March 29th, 2012 No comments

Per the RVator...My Version

When I opened the Empennage kit last year, a nice little freebie in the box was a copy of the 27 Years of the RVator. It literally is a treasure trove of knowledge of all the articles that the Mother Land (Van’s Factory) had done over the last number of years. While many of the articles dealt with items that the earlier builders had to deal with, it is good read for the information and practices. It is apparent when reading through the info, that Van’s listens to it’s builders as many of these articles on how to do this, that, etc. are now just incorporated in the newer kits. Thank you to all those prior builders for your work and contribution!

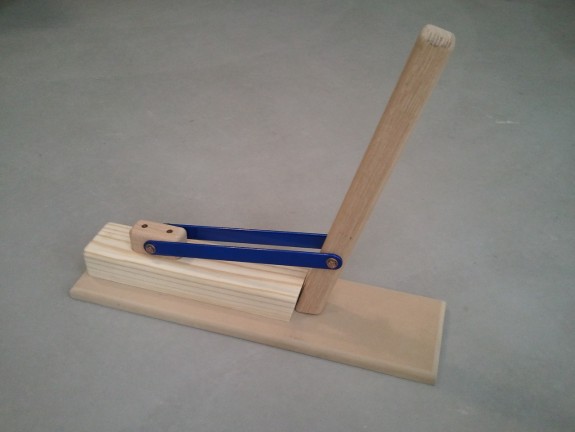
One of the articles I saw really caught my eye. It described this simple tool that builder Bill Gast made. I had heard of a mystical tool that one could build that would make the job of straightening the rib flanges to 90° a chore of joy.  Since one of the more tedious tasks on the wings is this rib flange straightening, I was all for making it less of a task if able. I read this article and set out to make my own version. Before I started, I also searched the forums over at VAF, like you should for most questions, and saw a few other versions with clearer pictures.

The trick here is having the right angle on the part that the flange gets pushed into (the anvil). Upon the advice of both the article and the posts on VAF, 11° seems to be about the consensus. With all the information in hand, It was time to construct a new tool.

Bill of Materials:

6″ x 20″ x 3/4″ MDF Plywood Base Plate

2″ x 4″ x 12″ Anvil with 11° undercut on one face. (Mine was actually a chunk of a 5″ x 5″ post that I cut to shape.)

1 1/2″ x 1 1/2″ x 30″ Oak stick purchased at Lowes Aviation Supply. (Note, my local Home Depot Aviation Supply had the same but it was two 1 1/2″ x 3/4″ x 30″ sticks laminated together.)

Cut a 3″ long piece to accept one bolt for the arms
Cut a 20″ long piece with a 22 1/2° angle cut on one end of the handle/pinch bar
The angle is so that the bottom of the pinch bar clears raised portions of the rib like lightening hole flanges.

3/16″ x 1″ x 36″ flat bar stock from the metal bins at Lowes Aviation Supply

I cut two pieces 12″ long for arms.

Two 1/4″ x 20 x 2 1/2″ Bolts

Two 1/4″ Nylock Nuts

Four 1/4″ washers

2″ and 3″ wood screws

After cutting the bar stock to the 12″ lengths, I match drilled on the drill press, the 1/4″ holes in both ends so that they would match exactly. I then radiused  the ends on the grinder and polished them smooth (No burrs to scratch parts or humans). I had some paint left over from a project years ago, and since the color did not matter, better to use it than toss it. I sprayed the arms for protection.

I then took all the wood, cut to length and with the angles cut into the handle/pinch bar and anvil, I ran all the exposed edges over a 3/8″ router bit on my neighbors router table. This makes the handle very comfortable to use. As for the other edges, I was there and the router table was setup, so why not.

I attached the Anvil to the Base Plate, centered on the the long axis of each, with some 2″ wood screws. I eyeballed the location of the metal arms on the handle (approx 4″ from the bottom) and center drilled a 1/4″ hole through it. I attached the arms with a 2 1/2″ bolt and washers on the outside of each bar and tightened the Nylock nut just shy of tight, allowing the bars to pivot on the pinch bar.

I then center drilled on both the length and height of the smaller 3″ oak piece for the other 1/4″ bolt hole, and attached the bars to it. Lastly, I positioned the small oak piece along the center line of the anvil until I had the pinch bar just proud of the anvil face. Essentially, this allows the pinch bar to fully push the rib into the corner of the anvil and the base plate without pinching the thickness of the flange itself. Once the position looked good, I attached the small oak piece to the anvil with 3″ wood screws.

There you have it, the rib flange straightener. I clamped it to the bench and did a quick test on a few leading edge ribs and it appears to work GREAT! Like all tools, it takes a little to get the feel, but with little effort, the flanges on the ribs turned out pretty close to 90° very quickly. I wish I had this when I was working on the Empennage ribs.

Thanks to Bill and the VAF guys for the ideas.

Categories: Wings

Empennage is COMPLETE!!!

March 9th, 2012 No comments

Drilling the Horn

I was eager to get home tonight and finish the last couple of items on the elevators. After all, these are the only items left on the entire Empennage as far as construction goes.
I cut and filed the last two HS skin clearances for the counterbalance arms on the top of the skins. The elevators can now swing free top to bottom. It was cool to just stand there and see them move through the travel range. They look like airplane parts for sure. At this point, drilling the horns for the center pivot bolt is the only step that remains.

Last weekend, I placed my order with McMaster-Carr for the requisite 8491A784 drill bushing to assist in tackling the drilling of the horns for the pivot bearing bolt holes. It arrived this last Wednesday. It was not cheap. It appears to come slightly oversize for the 1/4″ bolt hole in the bearing. Actually, I think the bearing is slightly undersized. To fit the bushing inside the bearing, I had to put the busing in my drill press and simply sand it down little by little until it slides into the bearing.

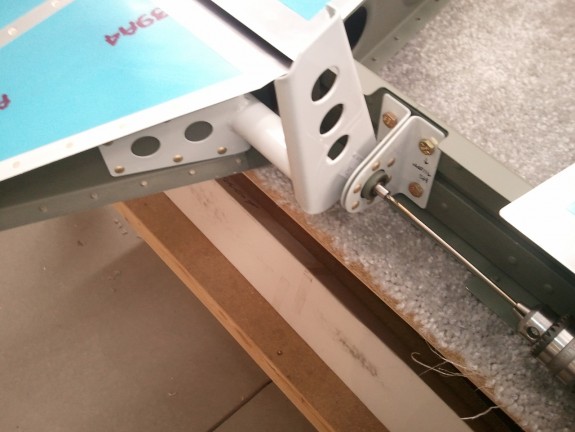
Above you can see the bushing in place in the bearing and my #40 drill bit inserted. This centered the drill bit and kept the bit from wandering. I clamped the right elevator in trail of the HS and committed to the hole. The bit drilled through pretty quick. I then opened the hole up with a #12 bit and then finished with my step bit to a finished size of 1/4″. I repeated the process on the left elevator.

Finished One Hole

Above is the finished result on the left elevator horn. All in all a pretty clean hole. I then installed the elevators back on the HS and to my delight, the two horns and the bearing all lined up and I was able to get the bolt in and some spacer washers in place per the plans. I then replaced all the temporary hinge pins with the bolts that go in each hinge point and tested the travel again. No binding from top to bottom travel. I was also enamored with the smoothness of the travel. Silky.

COMPLETE!!!

As far as major construction goes, the Empennage is COMPLETE! Only items that remain are the fiberglass tips on the Empennage parts. These will wait until later as they can tear up tools because of the composite nature. Van’s suggests that you wait, though not required, until you are doing more fiberglass work later on. Now I need to find a way to safely store these assemblies in the shop to get them out of the way and save them from damage. Time to move on to the WINGS!!!!

Categories: Elevators

Every Little Bit Counts

March 5th, 2012 No comments

Horn Clearance Done

After work, and my requisite hug and kiss I give the wife to say hello, I ran out to the shop to tackle another small task on the Horizontal Stabilizer. I was able to get the left HS skin notch for the counterbalance cut out and filed. I then got the call for dinner and had to put the tools down. I love having a dedicated space to build. Only one more step on the underside of the HS to go.

Once dinner and Family Night stuff was over, I headed out to take care of that last task. The lower flange of the HS rear spar interferes with the full deflection of the elevator horns. To solve this problem, you need to notch the flange to clear the horns. I am sure that it would have been possible to do this step earlier during the construction of the HS, but the manual has you wait until the elevators are mounted to do it. While the elevators were mounted on the HS, I made a mark on the spar flange in line with the outboard edge of the horns. I then added 1/8″ to that to give the horns clearance along the sides.

I had to remove the center bearing assembly that I had previously final torqued the bolts, but that was no big deal. I then masked over the spar reinforcement bars as the plans explicitly say, DO NOT REMOVE ANY MATERIAL FROM THE HS-609PP! I looked at the plans and basically notched the flange flush with the reinforcing HS-609PP bars inside the spar. I figure the lower travel stop that will more than likely stop the elevator horns from ever hitting this flange now so I have good clearance and clean lines.

I also noted as I was completing this step the obvious increase in my expected level of perfection. When I had started the HS, I rounded the corners of the spar where they met in the middle. The corners were not even close in shape though just fine. As I looked at the other parts in progression of completion, I noticed my attention to detail has improved. Perhaps Van, in his wisdom, knew this would naturally occur and left these last tasks where they are to create better results through natural progression. The accuracy of this kit keeps shining through no matter the mistakes I have made.

Horns Close

Once the center notch was complete, I remounted both elevators to the HS. To my delight, the horns appear to be very close in orientation to one another. Some other builders, and even the plans, note that these may not be exact as the manufacturing process is not perfect on the horn weldements. Vans has either improved this, or I am lucky, as mine are pretty darn close as you can see in the above picture.

Elevators Mounted, Almost There!

At this point, the spar/skin trimming on the underside of the tail is complete. All that remains is the counterbalance skin clearance portions of the upper side, drilling the center bearing/horn interface, and the fiberglass tips. I may wait to drill the horns when the tail is mounted to the fuselage, but the tips are definitely waiting until the tail is on the rest of the plane per the advice of many builders. Time will ultimately tell.

Stay tuned for the official “Tail Complete” announcement to hopefully come later this week.

Categories: Elevators