A Time for Reading, A Time for Bending
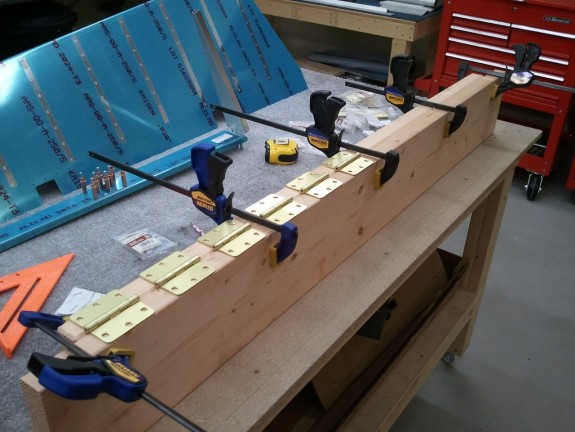
I spent some good time on Sunday researching and understanding the “Bending Brake” that Vans suggests be made in the manual. Several builders noted that the brake as outlined allowed for too much flexing in between hinges and to add more. Another debate was whether or not to leave a gap in the boards where the hinges were. I could not come to a clear dimension or necessarily the need for a gap. The last debate was if it was advantageous to use a dowel in the trailing edge when compressing the skins to insure the brake did not smash the trailing edge during the bend. You can see now, with all the “debate” why someone may worry a little when attempting to do a seemingly simple, but critical step. So here is what I decided;
- Make the brake out of 2×8 premium lumber. One half is exactly 60″ and the other was 54″. This gave side handles to the brake itself.
- Use as many hinges as practical. The number ended up at 12 – 3″ hinges.
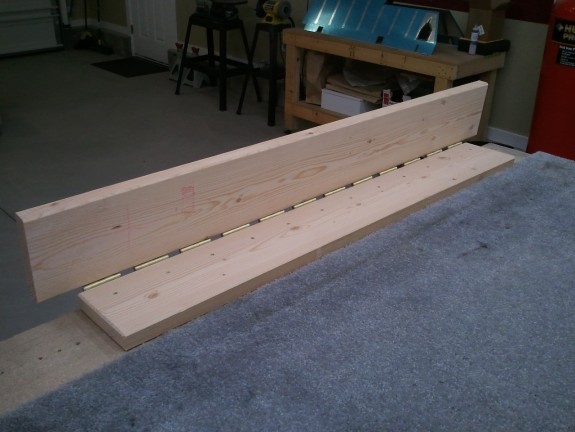
- No gap in the boards at the hinge line. I did however bevel the corners a hair to give the hinge barrel some area to clear.
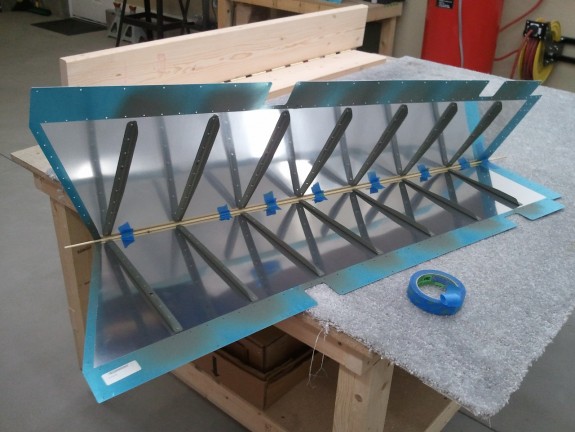
- 3/16″ Dowel in the trailing edge while squeezing to hold the radius (3/32″) in place while smashing the skins.
For family night, we piled into the mini van (friend calls his a “Swagger Wagon”) and went out for dinner. We then hit Lowes Aviation Supply for parts. We took in some of the Christmas Decor that was out for sale already. I know…nuts isn’t it? I picked up the nicest 2″ x 10″x 10′ plank I could find, a 3/16″ dowel, a 1/8″ dowel (just in case), and the hinges. A couple of other incidentals while we were there and back to the house we went. I then headed over to a neighbor’s house because he has some nice saws for woodworking. I cut the plank to length and dressed up the edges a bit.
Here is what I ended up with. I center drilled all the holes for the 12 hinges (72) and then mounted the hinges with the screws provided with the hinges. Interestingly enough, each hinge also came with a 3″ screw in addition to the six standard sized ones. Rather than waste them, I chose to countersink the face of the break and drill and screw the brake to my build table. So at each hinge, there was a 3″ screw holding it down. Needless to say, it does not move. With 12 hinges, it takes a little pressure to actuate the break. Translation…no slop. Once attached to the bench, I sanded the interior faces using my orbital palm sander to insure no bumps or potential dent makers. OK…we are ready to destroy parts now.
After some deep slow breaths…it was time to get smashing. Here you see the dowel taped into the trailing edge. The theory is that it backs up the bend to keep the radius intact while you are squeezing the skin together. The logic was sound so I incorporated it. OK…moment of truth. Time to slide the skin into the brake and push.
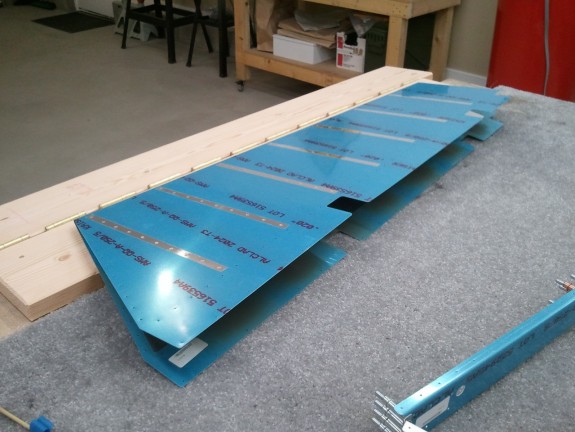
Once the skin was in the brake and the trailing edge was against the barrels of the hinges, I flipped the top over and taped the skin edges down to the lower part with “Gorilla Tape” and started to push. I noticed that my pushing was not doing much. I stepped back and realized that I needed to back the trailing edge away from the hinges a tad. Perhaps this is the theory behind the gap in the boards. Once I backed it out about 1/2″, I could see that the bending was starting to occur. I then moved it out 1″ from the hinges and pushed. Again, it bent a little more. It was getting close at this point. I decided to flip the skin over and back it off another 1/2″ and really push. It took me standing on a stool and kneeling on the brake to really get all the force I needed to close the skin together. I was a bit surprised actually. I periodically checked the trailing edge and when finished, was pleased to see a straight and nice radius at the bend. I did have to take the dowel out for the last application of weight to get it a little more closed up, but all in all, it worked and was not that bad. I repeated the same procedure on the left skin.
I may need a tiny bit of massaging to get absolute perfection, but as they are now…they will do just fine. I will evaluate down the road if the massage is really needed. These turned out pretty dang nice.
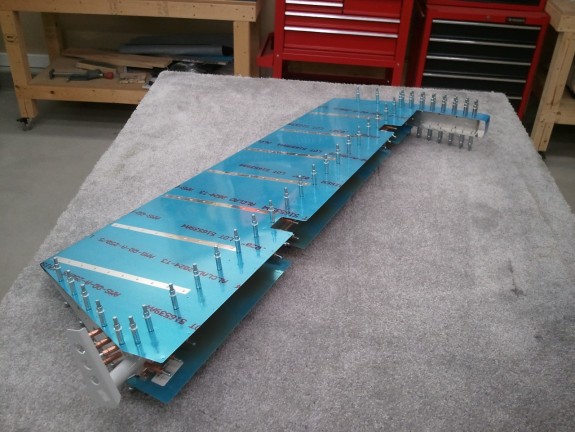
I inserted the spar in the left skin and the root rib to give the skin some rigidity and then placed it on a shelf. The manual has you work the right elevator first because it is a bit simpler since the trim tab is in the left. So I brought in the skeleton I had done some work on prior to bending the skins. It slipped right in and lined up like a dream. I clecod the skin to the under structure and then match drilled the control horn.
At this point I simply need to match drill the skin, deburr, dimple, prime, and assemble. OK…not true…but close. Rather than chance a mistake, I closed up shop for the night.

