Tanks Finally Sealed…Almost
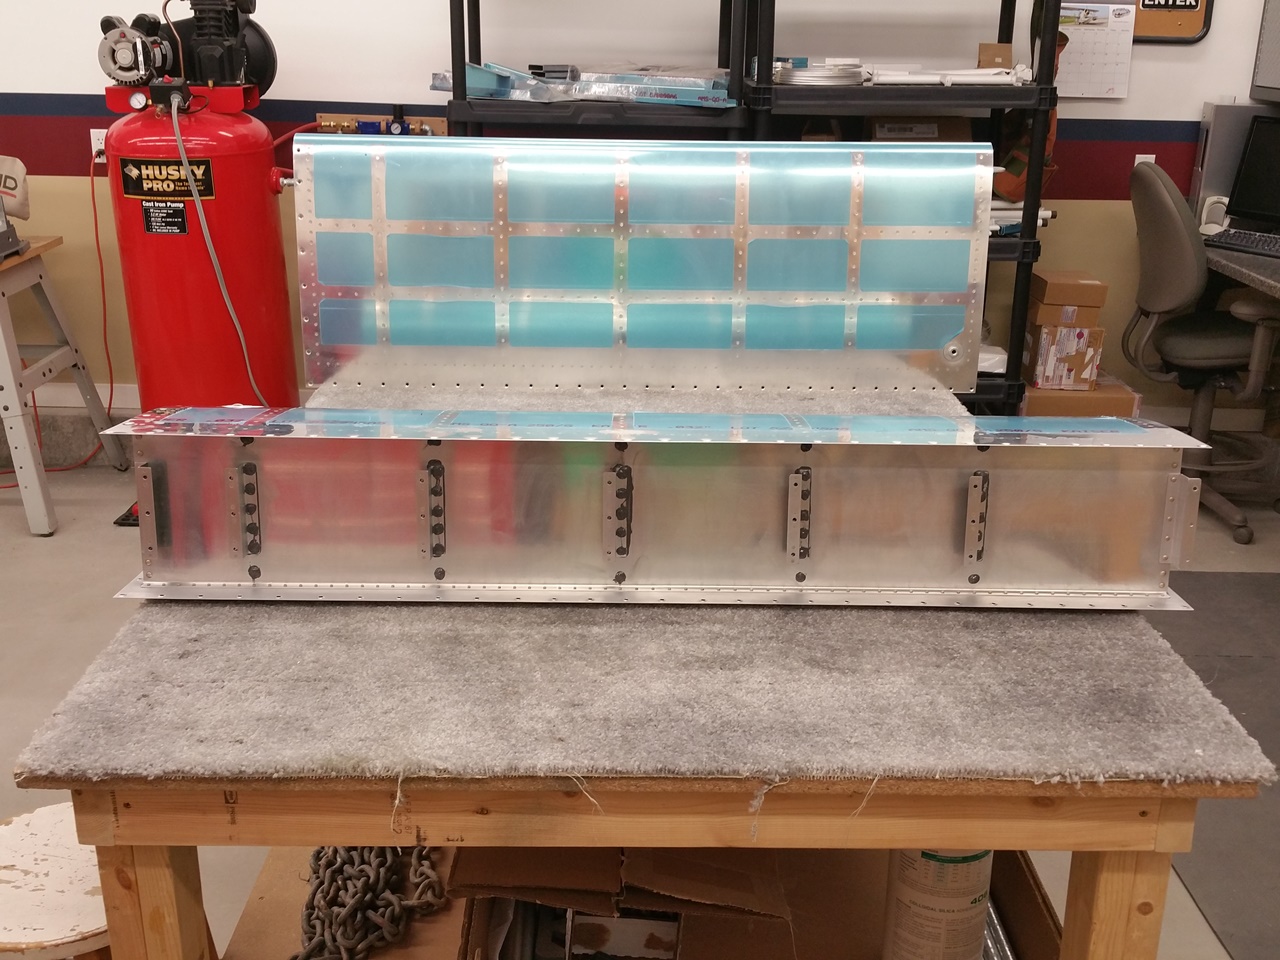
Left rear baffle
HAPPY MEMORIAL DAY! What a FANTASTIC day it was for me. I closed up both tanks today. I am SOOO close to being done with this nasty, horrible, and obnoxious sealant. Started off with the right tank. Cleaned every surface I could think of with MEK. I had made a good effort to scuff the baffle a bit more aggressively in the places where the sealant was going to mate with the rest of the tank on the Saturday prior. Once all the parts were clean, I committed to just getting at it. I was able to borrow my fellow builder and all around good guy Todd’s pneumatic sealant gun that works with the sealant cartridges I have been using. I do have a mechanical version (much like a caulking gun), but his lays the sealant soooo nice.
With tools, gloves, clecos, and anything/everything one needs to get messy with sealant, I went right at it. First I laid a nice bead of sealant along the forward edge of the rivet line on the top and bottom sides of the skin. Next up was a healthy glob at all the corners. I then laid a bead on the inside edges of the end ribs, then finally buttered each of the end flanges of the interior ribs. At this point, you simply slide the rear baffle down into place, squeegeeing the bead of sealant down as the baffle seats in its final location. It gives a nice satisfying squishy feel as you seat it. You then cleco each hole in the skin to baffle interfaces.
From here, it is now time to use your ground off or close tolerance pop rivet gun. Remember how I thought painting the freshly modified nose was a good idea? It wasn’t after all. Paint simply chipped off as I was using it. None the less, it was still effective in getting the job done. You first need to rivet the baffle to the top and bottom holes on each of the interior ribs with some cool little closed end rivets. The mandrel does not go all the way through on these, but is captured inside the actual body of the rivet. This solves the problem of at least fuel leaking through the rivet, but does not really solve the problem of it possibly leaking around the rivet. Van’s tells you to “twirl the rivet” in sealant before inserting…and while that coats the side of the rivet with some sealant, the holes have to remove most of it. None the less…as the rivet expands, with the coating of sealant, the hope is, that it creates a “fuel tight” closure to that hole.
Once you’ve done the top and bottom holes, I then proceeded to attach the “Z” brackets to the baffle/ribs. This is done with the same closed end rivets, but of a longer length. Van’s warns you to make sure that the orientation is correct, and for good reason…because once they are on, they are on. The modified pop rivet gun worked great. With all the “Z” brackets now on, you move on to riveting the skins to the baffle. My pneumatic squeezer made quick work of this task.

Hopefully a good enough bead
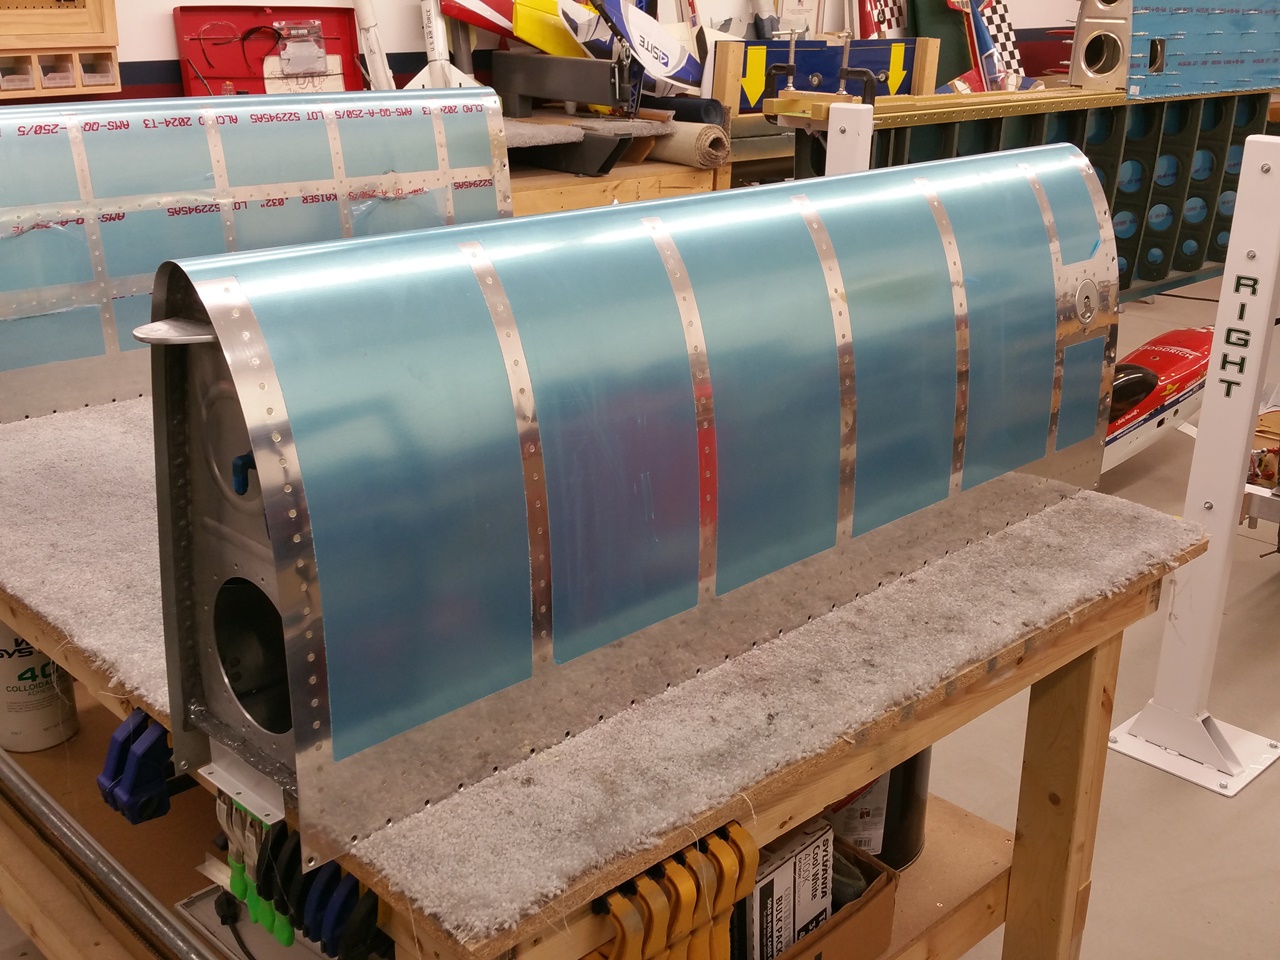
Once all the riveting was done, I added some more sealant to the outside of the corners to build them up a bit. I also likely put sealant on places that didn’t need it, but what the heck…just in case. In looking at as much as I can see of the beads done, they look pretty good so far. I am going to borrow a borescope and see if I can get a real good look all the way through, but if the beads look like the above photo all the way through, I think I will be OK. Once all this was done, I repeated the process on with the left tank.
Both now curing
Here’s the right tank, in all it’s sealed up glory. All I have left is to install the cover plate(s) and then pressure test. So glad to have the major parts done at this point. Fingers crossed that they are leak free and I can move on to just metal to metal joining.
P.S. I HATE TANK SEALANT!


