Tank Interior Plumbing Starts, Right Tank Lines Done
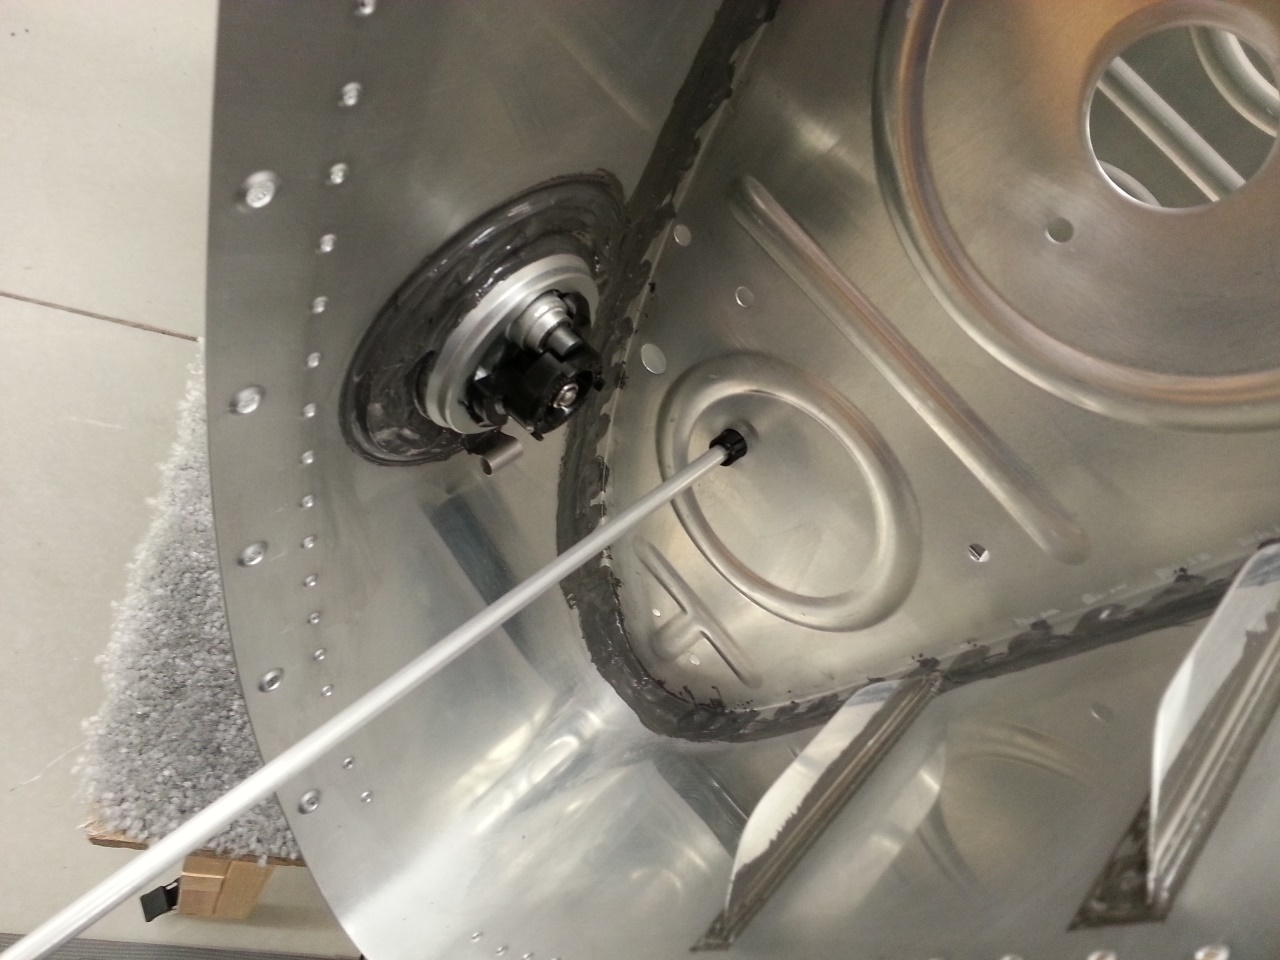
Measuring the Return Line Length
I decided to head to the shop after work and check on the cure status of the sealant on the rivets. Upon finding it was tack free, I figured I would just work on the return lines and call it good for the night. A long time ago, I bought some lengths of 5052-O tubing from Aircraft Spruce. I have been storing it ever since with the intent of using it in my tanks to replace the flimsier 3003-O that Van’s supplies in a coil. The Van’s supplied stuff is REALLY soft but usable. Many builders opt for the 5052-O to make better, stronger lines. I fall into that camp as well. I will use the 3003-O for practice and prefabrication.
Back to the return lines…I purposely drilled my return lines to be a straight shot from the fitting to the last interior outboard rib. All I had to do was insert the bushings in each rib, slide in the tube, measure, cut, flare, install. Sounds easier than it was because I had to remove and reinstall the most inboard rib a few times to get it all right and ready.
For those not familiar with why some builders opt for return lines while others don’t. I am simply because I don’t know what is coming, and doing it now is easy. Some injections systems use them, others don’t. Worse comes to worse, I simply cap it off and call it good. If I do end up needing them, easy as can be to use them.
Above you can see the tube stock, run to the last bay, before I cut it.
Left Tank Return Line Fabrication
Once I cut it to length and flared it, I simply inserted it and temporarily attached the AN fittings to the inboard rib for a test fit. Looks good. It took me about 20 minutes to complete the left, so I repeated to process for the right tank.
It’s amazing how doing it once speeds up the second time and beyond. The right tank return line took about 15 minutes to complete. Feeling like I was on a roll, I decided to press on.
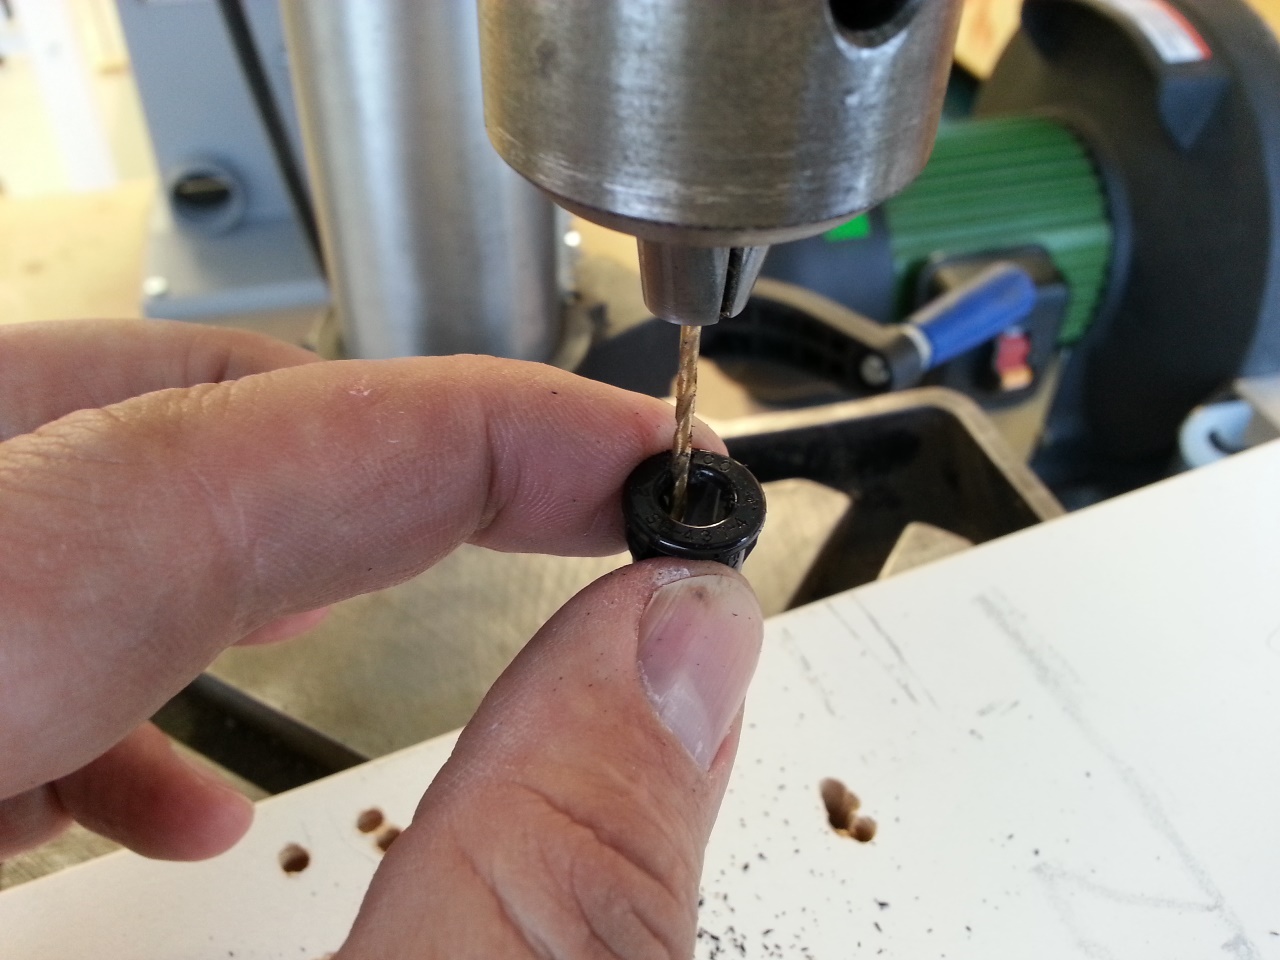
Modifying the Bushings for the Capacitive Sender Wire
Since I am using the capacitive fuel senders, I had to to modify the bushings that hold the vent line before I could install the line in them. This is because the capacitive plates are wired together and then share the same holes as the vent line to penetrate the ribs. I simply chucked my 1/16th” bit into the drill press and ran it at medium speed and “cut” a notch into each of the 8 bushings (4 per tank) needed. The wire will pass through the notches along side the vent tubing. In no time, I was ready to fabricate the right tank vent line.
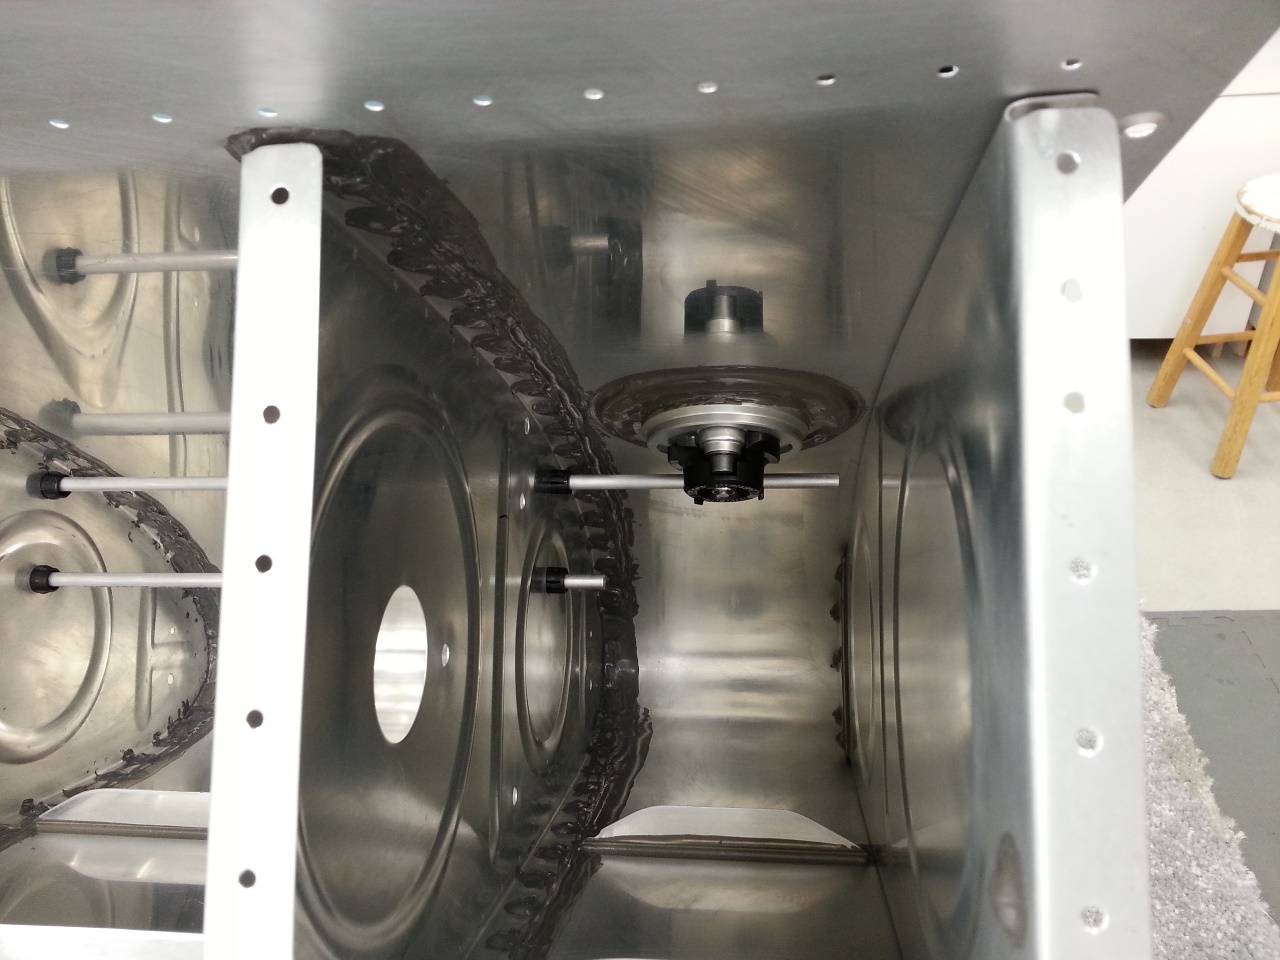
Right Tank Outboard Bay, Vent and Return Lines Cut
Here you see the right tank vent line, run above the return line, to the last bay in the tank. It was fun to push the line from the inboard side and feel it simply slide into the little clip installed with the filler neck with precision. This is after I finished the inboard end, and then cut the line to length. At some point, once the outboard rib is sealed, riveted, and nice fillets made, I will final install this vent line and bend the end up to get it close to the highest point of the tank, or closer to the skin. It’s good to go for now.
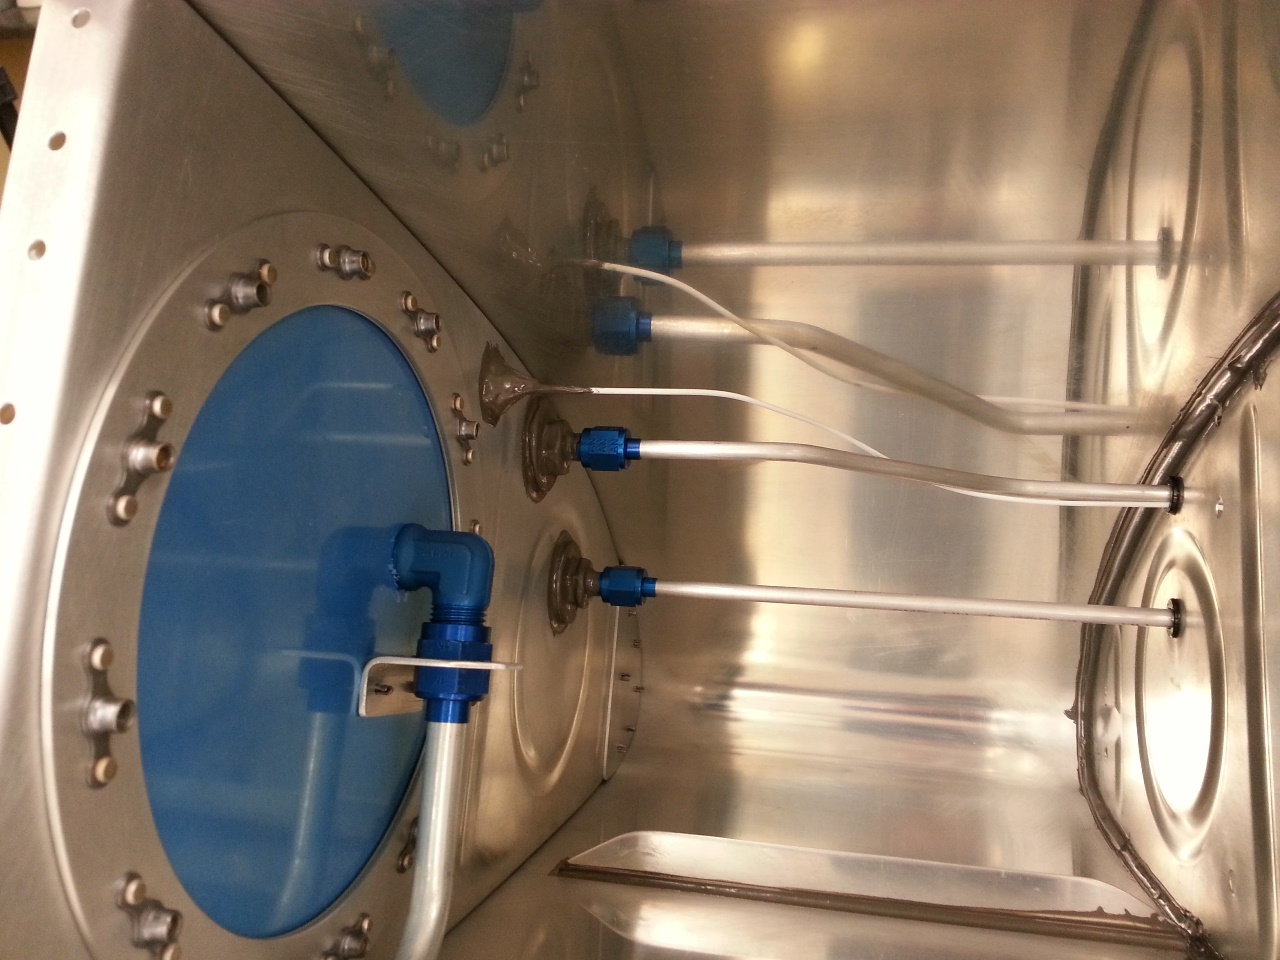
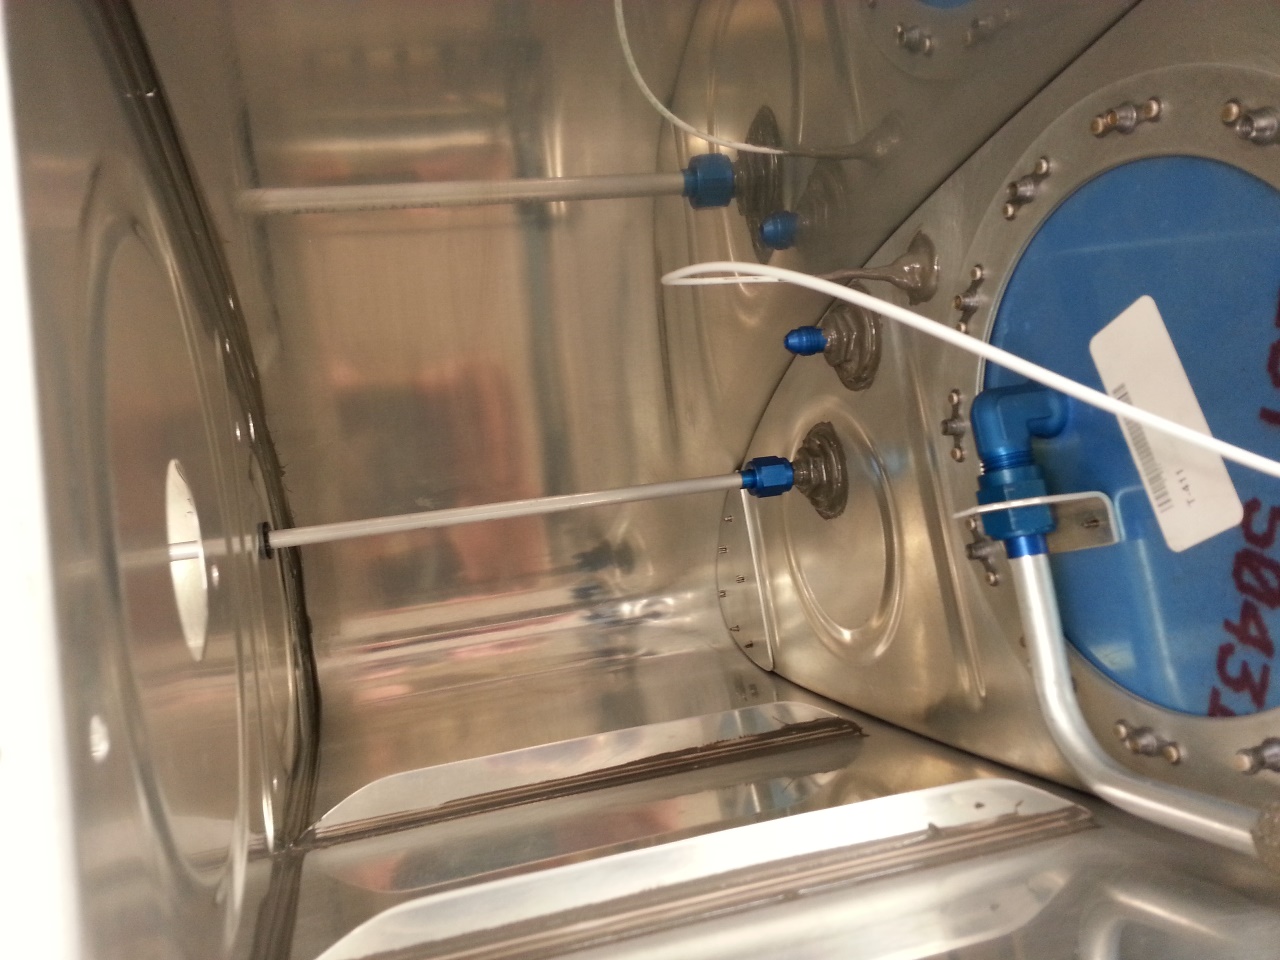
Right Tank Vent and Return Lines Complete
Here you see the inboard side of the lines complete. I pretty much did this by eye and either got lucky, or my skills at eyeballing are improving. I also threaded the capacitive sender wire through the first bushing for a test fit. I determined that I needed just a hair bigger notch in the bushings after this trial fit. I removed them, opened them a little bigger, and then replaced. It took me a hour or so to get the vent line bent, flared, cut to length, and attached as you see it here. At this point, it was late, so I called it a night. I will likely attempt the left vent line and the capacitive sender plates for both tanks in the next session. Then it will be time to seal and rivet the inboard and outboard ribs.
Feels good to be making progress again.


