More Sealant Tasks Done
With the work completed Monday, I was essentially ready to take care of the last of the little sealant tasks to be done before the “big smears” are to start.
Last night I had CAP meetings and then ended up hanging out at the airport, helping a friend rivet a bulkhead on a Harmon Rocket. Once that was done it was too late to start any sealing in my shop.
So tonight, I devised a plan of attack to maximize my success and knock out these little tasks. I started by prepping the T-410’s for the outboard end ribs. The manual clearly warns you about installing these on the inboard ribs, but the clearance on the outboard is just fine. Riveting them now is far easier. I scuffed them up and cleaned them off with MEK. I then grabbed 12 AN470AD4-5’s and soaked them in MEK for a bit.
I then loaded all the AN fittings and spacers into a jar of MEK to give them a good cleaning. I wiped both the inboard and outboard ribs down and from that point on, did not touch any parts without gloves on.
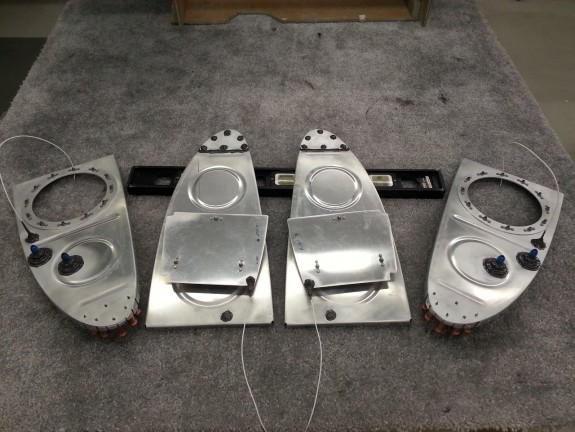
I grabbed a 6oz cartridge of ProSeal and mixed away. I first sealed the T-410s to the outboard ribs. I 100% clecoed them on and set them to the side for a bit to allow them to squeeze out. Then I went to sealing the fittings and spacers to the inboard ribs. I first put a thin layer of sealant on the shoulder of the AN fittings, inserted them into their locations and then, after smearing the backside of the spacer with a coat of ProSeal, placed it over the fitting. I then put a small fillet at the fitting on the top of the spacer and then threaded the nut on. This caused a thin gasket of ProSeal to squeeze out from under the nut. I torqued the nut to spec and then repeated this process for the other three fittings.
Next up were the BNC fittings for the fuel senders. I was tempted to put the same thin layer on the shoulder, but the barrel of the BNC needs good continuity between it and the tank. I decided to insert them dry, then tighten the nut, and then seal them good from the backside. With a good “Hershey Kiss” of sealant, it should not leak. Once installed, I did just that, gave it a healthy covering to extend well over the wire and solder joint. It really does look like a black “Hershey Kiss” when you are done.
Once the fittings and BNC’s were in, I went back to the outboard ribs and squeezed the rivets. I then proceeded to “mill” all the sealant. I made nice fillets around the edges of the T-410’s, cleaned off any over done squeeze out, and then covered each shop head with sealant. The manufactured heads will be covered once the rib is attached to the skin, so I cleaned the outside of the rib completely. I then went back to all the fittings and created nice fillets around all the edges of the spacers and nuts. Once that was done, they were nearly covered completely, so I just decided to finish it off. Should not leak here.
Lastly, I hit the outboard Capacitance Fuel Sender plates, where the wire/ring terminal are bolted on, with sealant on the bolt/screw/terminal/nut, as well as sealing off were the wire enters the ring terminal. I think the purpose is for providing good strain relief for the wire. Some say it is to keep fuel from wicking into the strands of the wire. Either way, mission accomplished.
Once all that was done, I went back and cleaned up all the strings of sealant left on parts, cleaned up my tools, and called it a night. These parts will sit for some time while I do the rest of the tasks needed on the tanks, so the sealant should be well cured by the time I mess with them.
Next up…Tank Assembly!


