Preparing for Wings
I have had the wing kit in the shop since it was delivered with the tail kit back in April of last year. I opened it up and did the inventory at that time too. It has been taunting me ever since. I have been researching several builder sites as to how they set up their shops for the wing spar stands. Vans has you make them from 4″X4″ wood posts that extend floor to ceiling. I did not like this design as it limits where I can set it up in my shop due to the over head garage door. That, and the wood could warp over time, though unlikely here in Utah.
I really like the setup Rudi Greyling from South Africa devised. Basically he made the stands out of 2″X4″ tubular steel and bolted them to the floor of his shop. I have a friend/co-worker that used to be a pro-welder. We chatted it over and came up with something very similar in design. Instead of using angle for the feet like Rudi did, we decided to make a foot out of the same tube and weld it on. Each post will be bolted to the floor with 2 bolts instead of 4 like Rudi’s design called for. Basically we cut a 45° angle on one end of the foot and 22.5° angle on the other side. This made a nice trapezoid shaped foot. The reason for the 45° on one end was to give a little more leverage to the foot on the side that the spar will hang on.
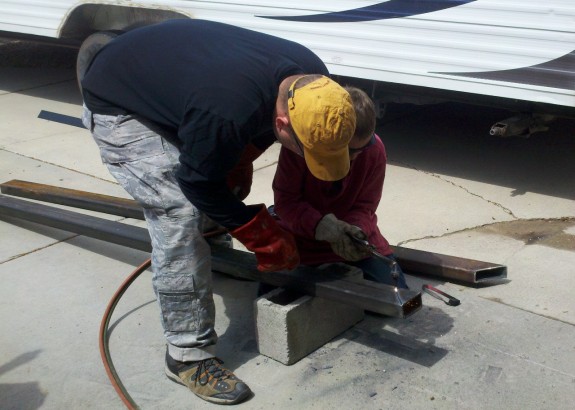
In the picture above, you can see my son Taylor and me cutting one of the feet out with a torch. My welder friend insisted he learn…and so he did. Taylor did GREAT!! My friend was impressed with his steady and straight cuts. We traded off cutting out all the parts and getting them ready to weld together. It took a good 2 hours with all the grinding involved. I was amazed the torch cut through 3/16″ steel tubing like butter.
Once all the parts were prepped, my welder friend tacked the feet onto the posts and then finished the welds. That man can move and does a really good looking job welding. I used some scrap flat bar stock to cap the top of the tubes. All I need is to drop a tool down the 4′ tubes and not be able to get it out. He let Taylor try his hand at welding too. He did OK. He then had me do a couple of beads and then he finished up. I think these will be very sturdy and work well. I still need to file them down and clean them up for paint, but the hard part is done. Thanks Russel!
On the way home, Taylor looked over at me and said, “That was cool!” Made all the aches and pain worth it!
Once cleaned up and painted, I will get them installed in the shop.


