Archive

Archive for May, 2016

Tanks Finally Sealed…Almost

May 30th, 2016 No comments
Left rear baffle

Left rear baffle

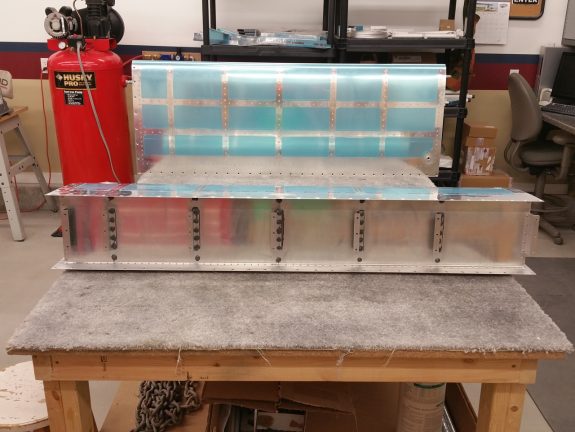
HAPPY MEMORIAL DAY! What a FANTASTIC day it was for me. I closed up both tanks today. I am SOOO close to being done with this nasty, horrible, and obnoxious sealant. Started off with the right tank. Cleaned every surface I could think of with MEK. I had made a good effort to scuff the baffle a bit more aggressively in the places where the sealant was going to mate with the rest of the tank on the Saturday prior. Once all the parts were clean, I committed to just getting at it. I was able to borrow my fellow builder and all around good guy Todd’s pneumatic sealant gun that works with the sealant cartridges I have been using. I do have a mechanical version (much like a caulking gun), but his lays the sealant soooo nice.

With tools, gloves, clecos, and anything/everything one needs to get messy with sealant, I went right at it. First I laid a nice bead of sealant along the forward edge of the rivet line on the top and bottom sides of the skin. Next up was a healthy glob at all the corners. I then laid a bead on the inside edges of the end ribs, then finally buttered each of the end flanges of the interior ribs. At this point, you simply slide the rear baffle down into place, squeegeeing the bead of sealant down as the baffle seats in its final location. It gives a nice satisfying squishy feel as you seat it. You then cleco each hole in the skin to baffle interfaces.

From here, it is now time to use your ground off or close tolerance pop rivet gun. Remember how I thought painting the freshly modified nose was a good idea? It wasn’t after all. Paint simply chipped off as I was using it. None the less, it was still effective in getting the job done. You first need to rivet the baffle to the top and bottom holes on each of the interior ribs with some cool little closed end rivets. The mandrel does not go all the way through on these, but is captured inside the actual body of the rivet. This solves the problem of at least fuel leaking through the rivet, but does not really solve the problem of it possibly leaking around the rivet. Van’s tells you to “twirl the rivet” in sealant before inserting…and while that coats the side of the rivet with some sealant, the holes have to remove most of it. None the less…as the rivet expands, with the coating of sealant, the hope is, that it creates a “fuel tight” closure to that hole.

Once you’ve done the top and bottom holes, I then proceeded to attach the “Z” brackets to the baffle/ribs. This is done with the same closed end rivets, but of a longer length. Van’s warns you to make sure that the orientation is correct, and for good reason…because once they are on, they are on. The modified pop rivet gun worked great. With all the “Z” brackets now on, you move on to riveting the skins to the baffle. My pneumatic squeezer made quick work of this task.

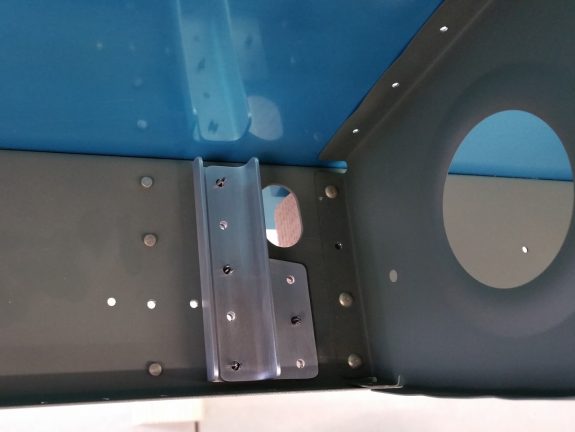
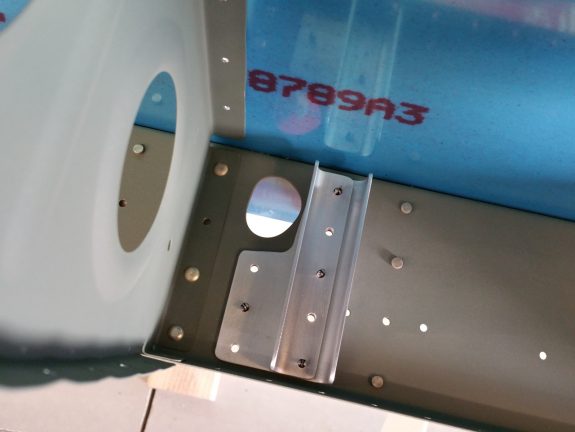
Hopefully a good enough bead

Hopefully a good enough bead

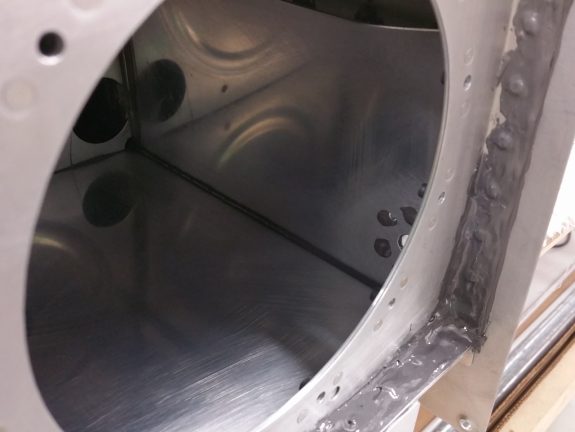
Once all the riveting was done, I added some more sealant to the outside of the corners to build them up a bit. I also likely put sealant on places that didn’t need it, but what the heck…just in case. In looking at as much as I can see of the beads done, they look pretty good so far. I am going to borrow a borescope and see if I can get a real good look all the way through, but if the beads look like the above photo all the way through, I think I will be OK. Once all this was done, I repeated the process on with the left tank.

Both now curing

Both now curing

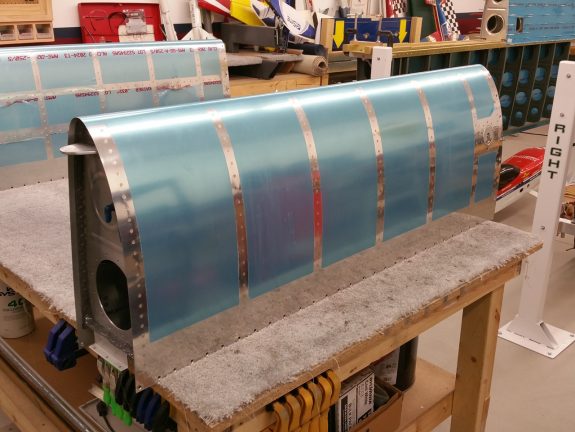
Here’s the right tank, in all it’s sealed up glory. All I have left is to install the cover plate(s) and then pressure test. So glad to have the major parts done at this point. Fingers crossed that they are leak free and I can move on to just metal to metal joining.

P.S. I HATE TANK SEALANT!

Categories: Tanks

Sealing the Fuel Pickup Tubes

May 28th, 2016 No comments
Done and Curing

Done and Curing

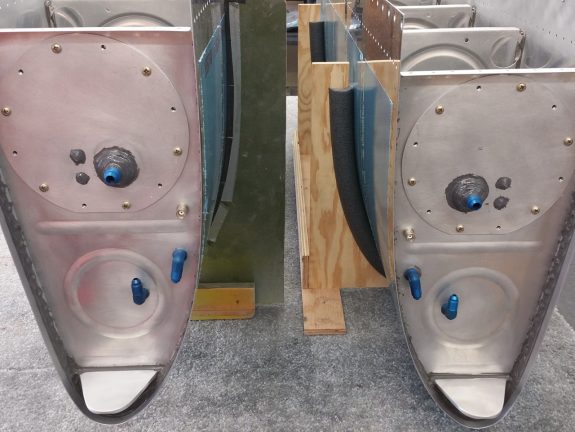
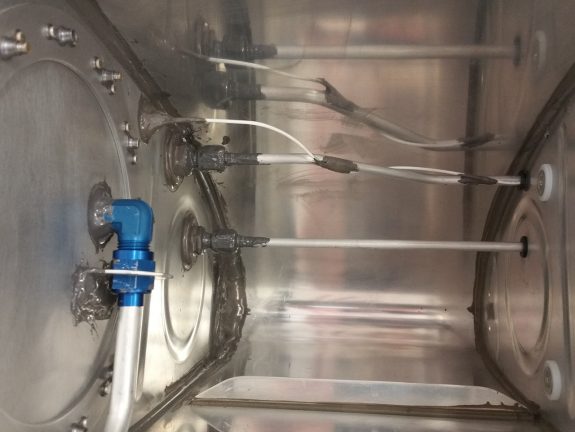
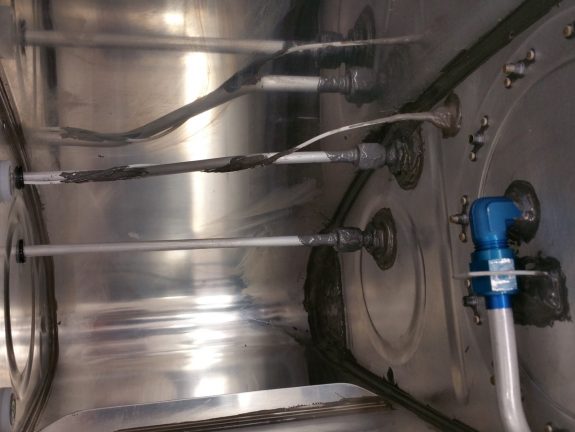
Spent the afternoon, after running all over town to find some “crow feet” wrench adapters (DON’T get me started on Sears!) and other lawn care items, sealing up the last of the tank penetrations. I used a cartridge of B 1/2 and made quick work of the left and right pickup tubes and anti rotation brackets. I also torqued the vent and return line nuts (with the crow foot adapter and torque wrench).

Right Tank Fitting Overkill

Right Tank Fitting Overkill

I always wondered how folks were insuring that the nuts on the vent lines, and by virtue my return lines, couldn’t back off. Technically, they are inside the tank and other than losing the high point of the fuel tank on the vent line, the risk is minimal if they did back off, but still…I didn’t like the idea of lines “potentially” coming off over time in a relatively sealed up area of the plane. So…once I had the pickup tube done…I simply gooped up the nuts with some sealant and called it good.

Left Tank Fitting Overkill

Left Tank Fitting Overkill

Hopefully, I never have to get them off…ever. I don’t think I would be able without some serious work. That said, I don’t think I have to worry about them ever coming off when I don’t want them to. I’ve done cleaner sealant work, but I have also done worse. I’m just glad I am closer to not having to deal with sealant any more.

Categories: Tanks

The Final Tank Tool

May 25th, 2016 No comments

[Update 5/30/2016…Don’t paint the head. It didn’t stick as well as I thought when using it on the “Z” brackets]

Old is New

Old is New

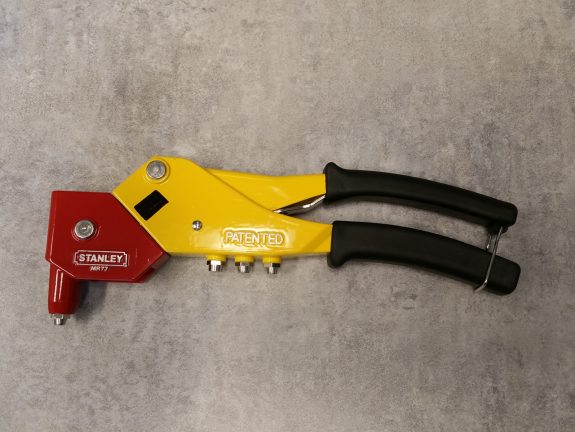
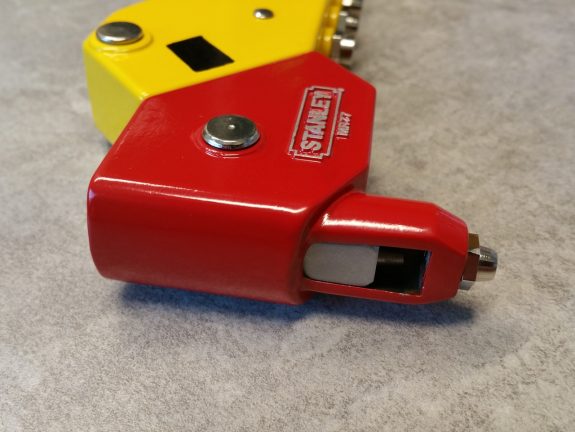
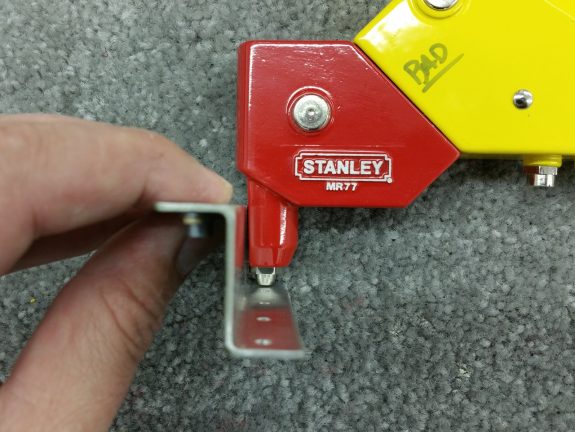
One of the tools that one requires to properly finish the fuel tanks is a close quarter pop rivet tool (which are becoming harder to find these days) or even using a close quarter wedge like Cleaveland Tool sells to set the fuel tank rear baffle “Z” bracket pop rivets in place. If neither of these are desirable, you can always grind down the nose of a regular pop rivet tool. That’s exactly what I decided to do. Interestingly enough, I had a spare Stanley MR77C due to me thinking I ruined it once, so I bought another only to discover later the original was OK. So, having two, I committed to converting the “old” one to a close quarter version today.

Modified and Ready for Action

Modified and Ready for Action

All I did was grind away at the nose, little by little, until I felt I had the clearance needed to get right on the head of the rivets and adequate clearance from the “Z” bracket side. I made sure to do this while the handles were in the “open” position so that the pulling mandrel was seated in the start or bottomed out part of the nose. Once ground down to my satisfaction, I disassembled the head and cleaned up all the grinder marks to a smooth finish on both the head and the pulling mandrel. Most would call it good at this point…but not me. I decided to spray paint the now paint free surfaces of the head to protect them, which quickly turned into painting the entire head. I actually chose a contrasting color, so as it hangs in the shop next to the unmodified version, I can quickly know which is which. A little overkill to some. Oh well.

Just Right

Just Right

As you can see by the bracket above, it’s just right and will set all these dang pop rivets nicely, and I was able to make an ignored tool from the past, a nice useful tool for the near future need. A little bonus is now being able to show the kids and friends how a pop rivet gun works with a cool cutaway version. Was nice to get out to the shop again and do something RV related. No “tool” excuses now getting in the way of finally closing up the tanks for good and moving on. Hopefully soon as the weather is warming and the air is drying here in Utah.

Categories: Tanks

Service Bulletin 16-03-28

May 21st, 2016 No comments
Right Wing Doublers

Right Wing Doublers

As one can clearly see, it has been some time since the last log entry again. However, it turns out that the “slow build” has proven OK at times. Van’s Aircraft recently released another Service Bulletin. The last one they issued is required on a completed assembly (horizontal stabilizer) and I still need to accomplish it. This new one is on the wings, which in my case, are still very much open. I decided that for the $10.00 in parts, I’d get them in the shop and see what can be done to incorporate the fix into my “in progress” wings now.

Left Wing Doublers

Left Wing Doublers

Van’s did mention in the SB that accomplishing as a “preventative measure” is not recommended on “wings that have been fully assembled” but as we know, mine are far from the “fully assembled” stage this point. That said, once getting the parts separated and deburred and cleco’d in place, it’s clear that a good re-write of the order of assembly is required, even for the new wing builders. If you follow the current order on the plans, you won’t be able to get two bottom skin rivets installed (see above picture) and perhaps not be able to set one rivet on the aileron gap fairing nearest the doublers now added. I “think” if you replaced the respective rivets with “cherry max” type pulled rivets, you could actually get the doublers in place with little impact to the build order. I will have to let it sit perhaps until Van’s shows us “new” wing builders how it should be done.

Categories: Major Wing Sections