Archive

Archive for May 18th, 2011

HS Ready for Primer

May 18th, 2011 No comments
Parts Prepped and Ready

After work, I was able to get started on deburring the HS skin rivet holes.  First I removed the vinyl coating completely from the inside of the skins and then only over the rivet lines on the outside. Lots of debate on the right thing to do, but I chose to retain it as we are in a dry climate and I want to protect it as much as possible until paint. As for the holes, basically I took a 3/16″ bit and spun it in my fingers in each hole. It knocked the burrs right off and it does not take to much material with it. There has been a large amount of discussion as to what is and is not too much deburring. I was pleased with the outcome and feel it is just right.

After getting the left skin done, it was time for my two boys pack meeting. They are progressing well in Cub Scouts and Webelos. Their shirts look like hard working cubs…completely covered in patches.

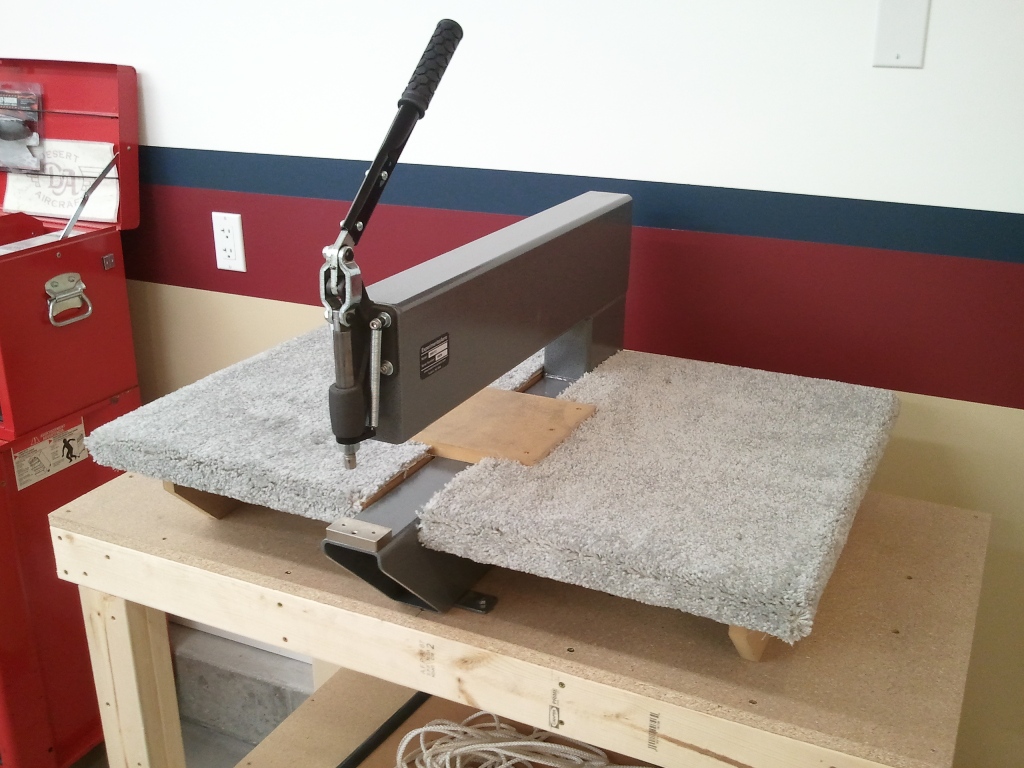
Once pack meeting was over, and the three kids were tucked in bed, it was time to see what else I could get done. I got the right skin deburred, then deburred the edges of both skins to a non finger slicing smoothness. I had not completed the setup of my DRDT-2 Dimpler to date. I needed to bolt it down and wrap the support table with some scrap carpet. No time like now, so I knocked it out. Check out the RV Factory/Shop topic for more.

Once that was complete, I got to dimpling my skins. The DRDT-2 make single pilot dimpling a breeze. I did have to take a couple of breaks in between each half to let the arm recover from the plunger lever. All in all, this thing makes great, consistent dimples.

I did read a bunch on preload on the DRDT-2. I simply set the plunger to 0″ clearance on the dies, then made one more turn on the plunger and then tested on some scrap .032″ Vans pleasantly supplies in the kits. Simply perfect dimples.

Once all the dimples were complete, I scuffed the inside of the skins and made sure all the parts were ready for primer. I hope to prime tomorrow and then let it sit over the weekend while we do some family/CAP business.

Categories: Horizontal Stabilizer

DRDT-2…Great Tool

May 18th, 2011 No comments
The Amazing DRDT-2

One of the needed tools to complete an aluminum airplane that uses flush rivets is a “C-Frame” dimpler. There are several types. Once uses a mallet to smack the dimple dies together and then there is the DRDT-2. Instead of using a mallet, it uses a lever and a fulcrum to produce the pressure between the dies.

Since I have smashed enough fingers in my time with a hammer, I was VERY leery in taking a mallet to hit anything around my new airplane parts. Particularly around the skins that are typically dimpled in a “C-Frame.” There are plenty of guys that have good success, but I did not want to take the chance. Another problem with the mallet type is that if you slip while getting your swing ready, and move the  skins when you hit the plunger head, you can create the proverbial “Figure 8” hole in your skin. Basically, the force is great enough that you drill another hole with the dies right next to the hole you are actually trying to dimple. The DRDT-2 helps eliminate this as you can precisely place the pilot of the male dimple die in the hole and then just pull the lever down to actuate the plunger.

Before I got into any real heavy dimpling, I needed to mount it to something. When I bought the tool many months ago in preparation to build, I constructed a platform/table per the instructions provided by the tool manufacturer. However, the tool itself was never mounted to a bench. Some builders do, some don’t. Having three young children around, I don’t take chances with expensive and heavy tools that can be anchored. It is better to protect the kids and the tools.

When I constructed my benches, I modified the EAA1000 tables to essentially make a single 4’X6′ table. This left a 2’x4′ piece of ply left over. I figured I would simply make a smaller bench to hold my band saw and drill press. That idea lasted a short time when I wanted to place my bench vise and 12″ disk sander on the same bench. Needless to say, real estate was dwindling fast. So I built another 4’X4′ bench to make a 4 tool bench and mount all those tools to it. That left me with this 2’x4′ bench again. In shuffling around stuff when the Tail and Wing crates arrived, I set the DRDT-2 on this extra bench, and it became clear, the DRDT-2 has a home.

So I bolted it down today to the bench with some 5/16″ x 1.5″ bolts and then used some left over carpet from the house that was in storage and covered the support platform. Took me about 20 minutes and shortly after I got busy dimpling the Horizontal Stabilizer skins. The little bench that wasn’t enough earlier was perfect now. Worked like a charm.

So if you are trying to decide between a standard “C-Frame” mallet type dimple frame and a DRDT-2, I cannot comment beyond what I have read on the standard, but I can tell you, the DRDT-2 is great and works as designed. I hope to get my lovely wife on it for the Vertical Stabilizer skins. I am not sure I would say the same if she was using a mallet. 😉

Categories: RV Factory/Shop