E-714 Right Trimming
One of the items on the plans I was wondering about, and was coming up in building sequence of the right elevator, was the E-714 counterweight trimming. As designed, Vans incorporated a counter balanced tail surfaces to give the plane a very neutral feel on the stick and to eliminate/reduce surface flutter. This is accomplished by placing a weight on an arm located in front of the hinge line. There is a counterweight in both elevators and the rudder.
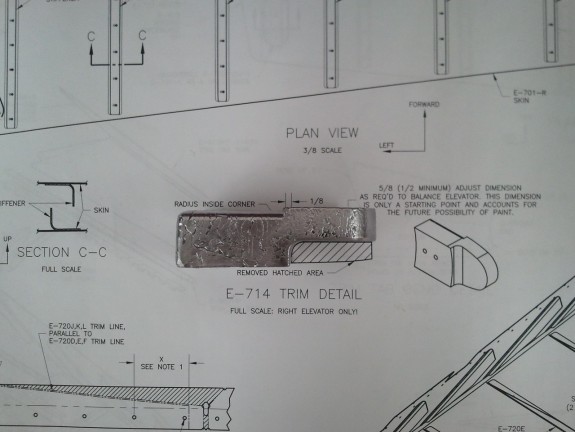
There is a catch however. The right and left elevators do not weigh the same. One has a trim servo and trim tab in it while the other does not. Vans ships 2 cast lead weights for the elevators that are the same shape, weight, and size. This means that on the lighter elevator (right side) the counterweight must be reduced in mass compared to the left. The plans have a nice full scale drawing of what the weight should look like when trimmed. Here you can see my finished product overlaid on the drawing.
The trim poses a few problems. It needs the radius and is thick and dense (though soft) and I was not sure how I was going to do it. A hacksaw and a file perhaps? That is a recipe for disaster. Then it dawned on me…I know a machinist who does very accurate work with a part and a drawing. He will know what to do. So my buddy (son-in-law to the machinist) called him up and asked if we could run over to his shop after the Cub Scout pack meeting for our boys. He agreed. Within 10 minutes of arriving, he knew exactly how he would achieve the trim.
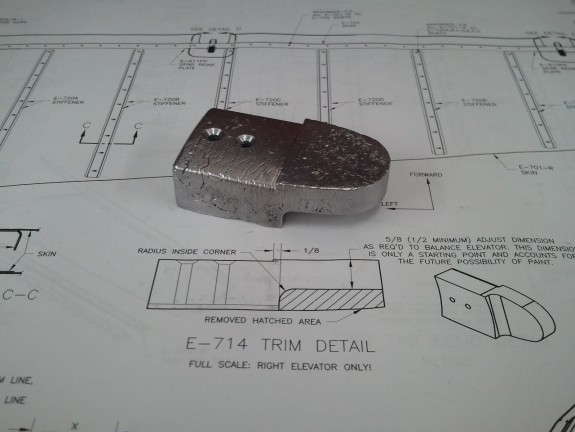
Basically, he made a knife for a fly cutter that incorporated the radius of the cut. He chucked it into his milling machine, clamped the counterweight in, referenced the distances, and started up the mill. He took 3-4 passes at the weight taking a slice off the back each time. As the depth increased, the radius appeared. He checked the size a couple of times with his calipers, and then set up the last cut. Once done, I had a perfectly flat, trimmed back, with a perfect radius exactly 1/8″ from the shoulder of the front…exactly per the plans. Total time, 20 minutes and we watched the mill do most of the work. I love this guy! Having done machining for 40 years…he knows his stuff. Thanks Len!
Here is the counterweight ready to install. One less thing to worry about and out of the way. Remember though…do not modify the other side the same way. I have heard some builders have. The part is not expensive to replace, but is expensive to ship! 🙂


